This is intended to be a quick setup guide to testing the ARM OMAP4 images on a pandaboard.
Requirements:
- SD Card (at least 8 gb), with at least a 4 gb partition for installing ubuntu OR SD Card (at least 1 gb) and USB Flash Drive or USB hard drive
- HDMI or mini-DVI cable and compatible display (dual-dvi not supported, max resolution is 1080p)
- If using a usb drive; ideally a usb hub is recommended to allow you to plug in a mouse and a keyboard in addition to the usb drive (pandaboard has only 2 usb plugs)
Steps
- Download installer image:
http://cdimage.ubuntu.com/daily-live/current/
For pandaboards, it’s http://cdimage.ubuntu.com/daily-live/current/quantal-desktop-armhf+omap4.img
- Note that after 12.04 pre-installed images are no longer created for OMAP.
Place the downloaded image file onto an sd card. As of quantal, the images are no longer preinstalled or gunzipped. Issue the following unmount the disk, and use the dd command to copy the image to your sd card, where /dev/sdx is your sd card's location. If you are unsure of which disk is your sdcard, use 'sudo fdisk -l' to list all attached drives.
sudo umount /dev/sdxy
sudo dd bs=4M if=quantal-desktop-armhf+omap4.img of=/dev/sdx ; sudo sync
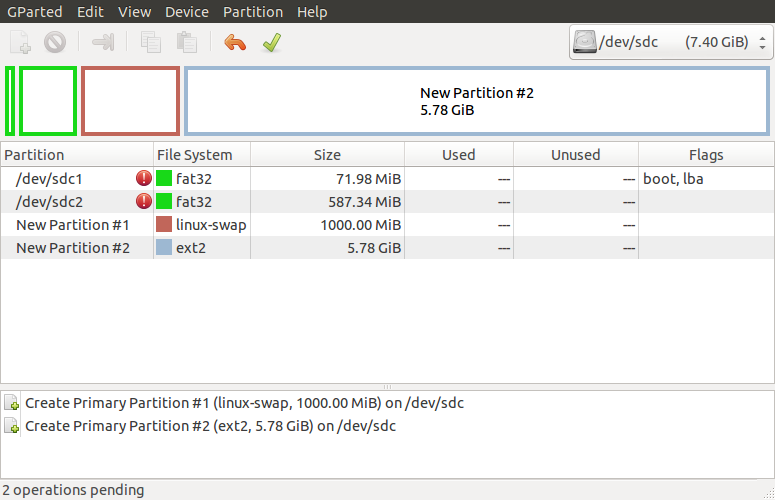
(Skip if not using the SD card as installation target) Partition the extra space on the SD card with a swap partition and installation partition.
- Use Gparted or fdisk (command line)
Suggest formatting installation partition as ext2 for speed purposes
Suggest swap partition size at least 256mb-512mb+
- Boot-up image on pandaboard:
- Insert SD card into pandaboard
- Connect HDMI (or dvi) cable to pandboard and display
- Connect USB Flash Drive or USB Hard Drive
- skip if you don’t have and are installing to SD card
- Connect mouse and/or keyboard
Ideally both but if your handy you can complete the installation with only one or the other

- Connect power cable
- After the power cable is connected the pandaboard should boot
The system should boot to the ubuntu installer (ubiquity). You should now be able to complete the install entire disk and manual install tests as normal using the isotracker. Link to quantal daily testcases.
Notes and Known Bugs
For installation medium, utilize the USB Drive you connected or the partition on your SD card with at least 4gb of free space. You CANNOT partition the sd card once booted.
If your using an SD card, you may encounter this bug: https://bugs.launchpad.net/ubuntu/+source/ubiquity/+bug/1036988. To workaround the bug, right before selecting 'Install Now' on the partitioning screen (Install, Installation Type), you need to switch to a virtual terminal (ctrl+alt+f1) and execute the following command sudo umount -l /cdrom. Then switch back to the installer (ctrl+alt+f7) and finish installation.
- Daily images after alpha3 for quantal won't be able to boot into the desktop, due to the dropping of unity2d from the images. Proper 3d driver support work is on-going to correct this.
- After shutdown, the device must be unplugged to power off completely.
Default CPU governor may cause crashes, switch to governor 'performance' using cpufrequtils: sudo cpufreq-set -r -g performance. See: https://bugs.launchpad.net/ubuntu/+source/linux-ti-omap4/+bug/971091
