DKMS
|
Size: 1672
Comment:
|
Size: 2737
Comment:
|
| Deletions are marked like this. | Additions are marked like this. |
| Line 1: | Line 1: |
| = DKMS will not work after 3.19.0-65 or above Kernel =; DKMS will not work after 3.19.0-65 or above Kernel if secure boot is enabled. To make DKMS works, you could do one of following method: |
= DKMS modules need to be configured to work with UEFI Secure Boot = |
| Line 4: | Line 3: |
| == Method 1 - Disable Secure Boot from BIOS == | Ubuntu is now checking module signing by default, on kernels 4.4.0-18.34, 4.4.0-21.37, 4.2.0-42.49, 3.19.0-65.73 and 3.13.0-92.139 onwards. You can read more details in this [[https://bugs.launchpad.net/ubuntu/+source/linux/+bug/1566221|bug in Launchpad]]. Because of those changes, DKMS modules will not work on systems with Secure Boot enabled unless correctly configured. In order to make DKMS work, Secure Boot signing keys for the system must be imported in the system firmware, otherwise Secure Boot needs to be disabled. There are several methods to configure your system to properly load DKMS modules with Secure Boot enabled. == Method 1 - Install the DKMS package you need == Simply install the package you need. Packages that make use of DKMS should prompt you to create a new Machine-Owner key (it will be done for you), and will guide you through the steps to enroll that key in your system's firmware. == Method 2 - Disable Secure Boot in shim-signed == 1. Open a terminal ('''Ctrl + Alt + T'''), and execute '''sudo mokutil --disable-validation'''. 1.#2 Enter a temporary password between 8 to 16 digits. (For example, 12345678, we will use this password later {{attachment:Enter_a_temporary_password.png|align="left"}} 1.#3 Enter the same password again to confirm. {{attachment:confirm_password.png|align="left"}} 1.#4 Reboot the system and press any key when you see the blue screen (MOK management {{attachment:press_any_key.png|align="left"}} 1.#5 Select '''Change Secure Boot state''' {{attachment:change_secureboot_state.png|align="left"}} 1.#6 Enter the password you had selected in '''Step 2''' and press Enter. {{attachment:enter_password.png|align="left"}} 1.#7 Select '''Yes''' to disable Secure Boot in shim-signed. {{attachment:select_yes.png|align="left"}} 1.#8 Press '''Enter''' key to finish the whole procedure. {{attachment:press_enter_key.png|align="left"}} To re-enable Secure Boot validation in shim, simply run '''sudo mokutil --enable-validation'''. == Method 3 - Disable Secure Boot from BIOS == |
| Line 6: | Line 34: |
| 2. Disable secure boot 3. Save configuration 4. Reboot the system |
1. Disable secure boot 1. Save configuration 1. Reboot the system |
| Line 10: | Line 38: |
| == Method 2 - Purge 3.19.0-65 kernel before long term solution fix from Kernel is released == 1. sudo apt-get purge linux-image-3.19.0-65-generic 2. Reboot the system |
|
| Line 14: | Line 39: |
| == Method 3 - Select 3.19.0-64.72 kernel to boot up system from GRUB before long term solution fix from Kernel is released == 1. Press Esc after Dell logo show off to enter GRUB. 2. Select 3.19.0-64.72 kernel to boot up system |
== Manual method == |
| Line 18: | Line 41: |
| == Method 4 - Disable Secure Boot in shim-signed == 1. Open a terminal by Ctrl + Alt + T, execute `sudo update-secureboot-policy` and then select ‘Yes’. 2. Enter a temporary password between 8 to 16 digits. (For example, 12345678, we will use this password later.) 3. Enter the same password again to confirm. 4. Reboot the system and press any key when you see the blue screen (MOK management). 5. Select “Change Secure Boot state”. 6. Press the corresponding password character and press Enter. Repeat this step several times to confirm previous temporary password like ‘12345678’ in step 2&3. For exmaple, '2' for this screen. 7. Select ‘Yes’ to disable Secure Boot in shim-signed. 8. Press Enter key to finish the whole procedure. 9. We can still enable Secure Boot in shim-signed again. Just execute `sudo update-secureboot-policy --enable` and then follow the similar steps above. |
You may also opt to sign modules yourself. To make this simple, you can use the command: '''sudo update-secureboot-policy --new-key''' To create a new MOK key to use for signing, then run the appropriate '''kmodsign''' command to sign your kernel module. After the module is signed, run '''sudo update-secureboot-policy --enroll-key''' to step through the enrollment wizard, or do the enrollment yourself by running '''sudo mokutil --import <your key>'''. |
DKMS modules need to be configured to work with UEFI Secure Boot
Ubuntu is now checking module signing by default, on kernels 4.4.0-18.34, 4.4.0-21.37, 4.2.0-42.49, 3.19.0-65.73 and 3.13.0-92.139 onwards. You can read more details in this bug in Launchpad.
Because of those changes, DKMS modules will not work on systems with Secure Boot enabled unless correctly configured.
In order to make DKMS work, Secure Boot signing keys for the system must be imported in the system firmware, otherwise Secure Boot needs to be disabled. There are several methods to configure your system to properly load DKMS modules with Secure Boot enabled.
Method 1 - Install the DKMS package you need
Simply install the package you need. Packages that make use of DKMS should prompt you to create a new Machine-Owner key (it will be done for you), and will guide you through the steps to enroll that key in your system's firmware.
Method 2 - Disable Secure Boot in shim-signed
Open a terminal (Ctrl + Alt + T), and execute sudo mokutil --disable-validation.
- Enter a temporary password between 8 to 16 digits. (For example, 12345678, we will use this password later
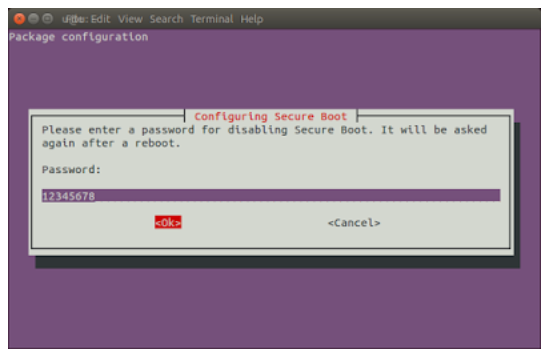
- Enter the same password again to confirm.
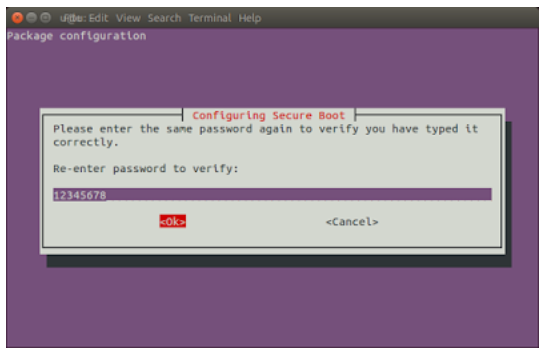
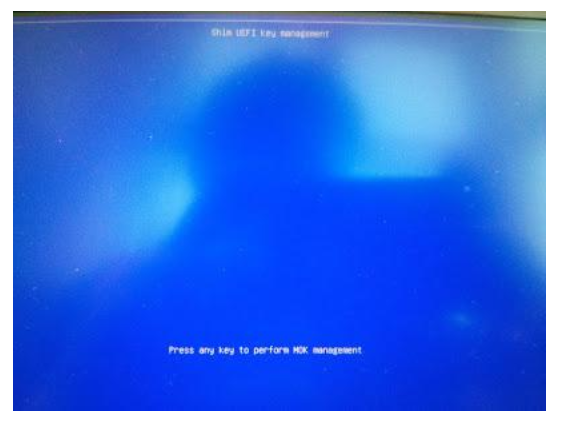
- Reboot the system and press any key when you see the blue screen (MOK management
Select Change Secure Boot state
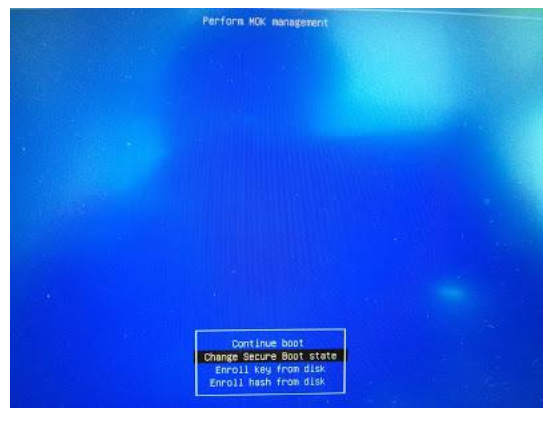
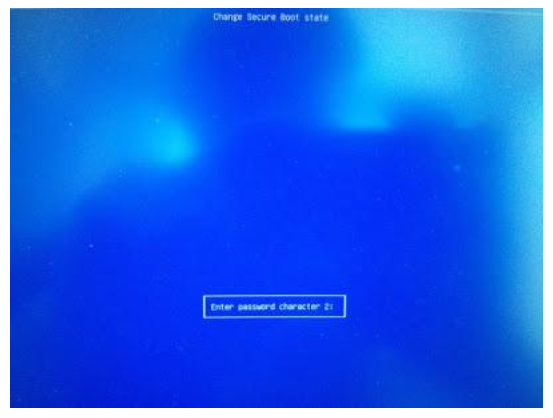
Enter the password you had selected in Step 2 and press Enter.
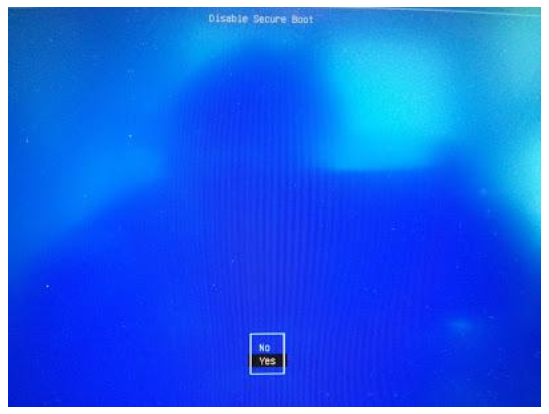
Select Yes to disable Secure Boot in shim-signed.
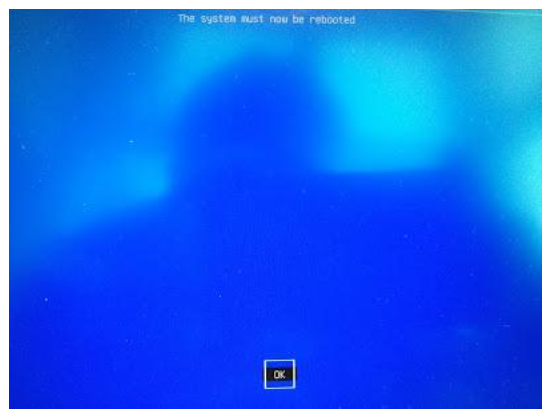
Press Enter key to finish the whole procedure.
To re-enable Secure Boot validation in shim, simply run sudo mokutil --enable-validation.
Method 3 - Disable Secure Boot from BIOS
- Enter BIOS setup
- Disable secure boot
- Save configuration
- Reboot the system
Manual method
You may also opt to sign modules yourself. To make this simple, you can use the command:
sudo update-secureboot-policy --new-key
To create a new MOK key to use for signing, then run the appropriate kmodsign command to sign your kernel module. After the module is signed, run sudo update-secureboot-policy --enroll-key to step through the enrollment wizard, or do the enrollment yourself by running sudo mokutil --import <your key>.
UEFI/SecureBoot/DKMS (last edited 2018-06-26 19:53:49 by cyphermox)