AutoInstallation
|
Size: 463
Comment:
|
Size: 2052
Comment: Added text descriptions after each screenshot
|
| Deletions are marked like this. | Additions are marked like this. |
| Line 9: | Line 9: |
| * Pick your preferred language. | |
| Line 13: | Line 13: |
| * Select a way to boot. | |
| Line 17: | Line 17: |
| * This is what the GNOME shell looks like. You will see it either in '''Try Ubuntu GNOME without Installing''', or after you have installed Ubuntu GNOME. * If you select '''Install Ubuntu GNOME''' from the upper left of this screen, you can begin the installation process. |
|
| Line 21: | Line 22: |
| * Select your language of choice for your new install. | |
| Line 25: | Line 26: |
| * It is typically a good idea to check both '''Download updates while installing.''' and '''Install this third-party software''' so that your new installation is as complete as possible. If you don't require these, however, it is certainly not necessary to check either. | |
| Line 29: | Line 30: |
| * Select how you would like to install Ubuntu GNOME. * '''Erase disk and install Ubuntu GNOME''' will replace your current operating system with Ubuntu GNOME. * There will be another option not pictured that will say something like '''Install Ubuntu GNOME and *your OS* side by side''' Select this if you wish to pick from Ubuntu GNOME and your current OS at startup each time you turn your computer on. |
|
| Line 33: | Line 36: |
| * Pick your time-zone. | |
| Line 37: | Line 40: |
| * Select the correct keyboard layout for your needs. * Not to be confused with your language. When in doubt, click '''Detect Keyboard Layout'''. |
|
| Line 41: | Line 45: |
| * Fill in whatever information you want, but fill in every text field. * Don't worry about '''Encrypt my home folder''' if you don't know what that is. It's very optional. |
|
| Line 45: | Line 50: |
| * Wait for Ubuntu GNOME to install. | |
| Line 48: | Line 53: |
* Restart your computer to start enjoying your new installation of Ubuntu GNOME! Thank you for choosing and using Ubuntu GNOME. |
Go back to Installation Page
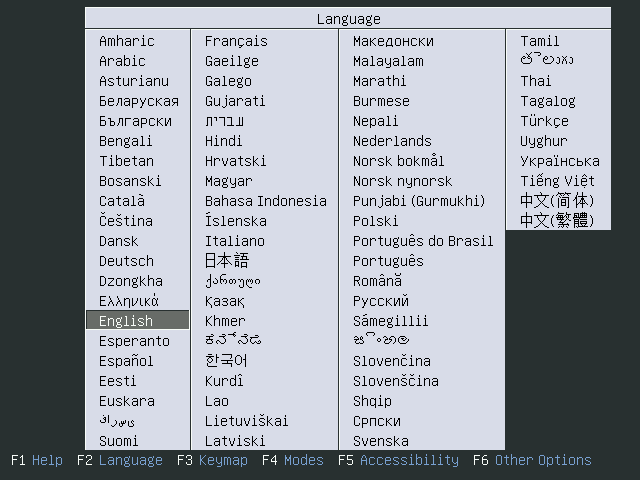
- Pick your preferred language.
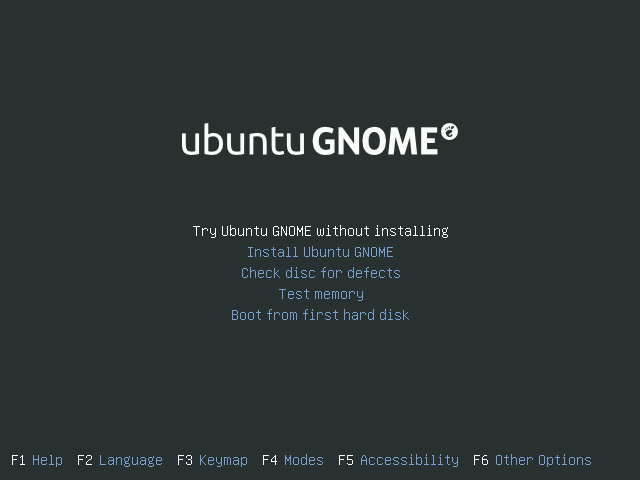
- Select a way to boot.
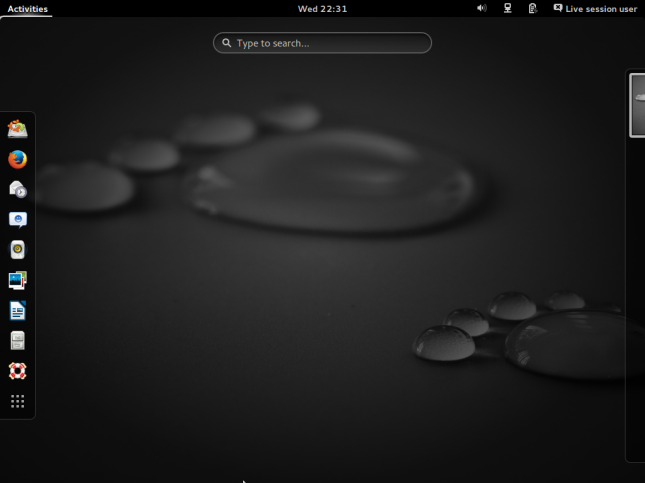
This is what the GNOME shell looks like. You will see it either in Try Ubuntu GNOME without Installing, or after you have installed Ubuntu GNOME.
If you select Install Ubuntu GNOME from the upper left of this screen, you can begin the installation process.
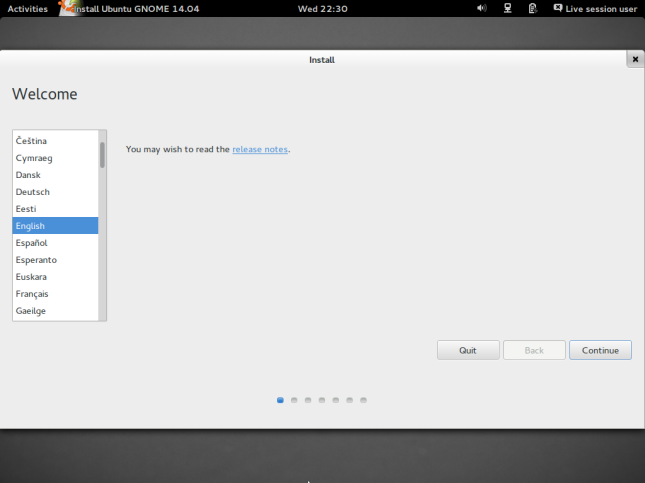
- Select your language of choice for your new install.
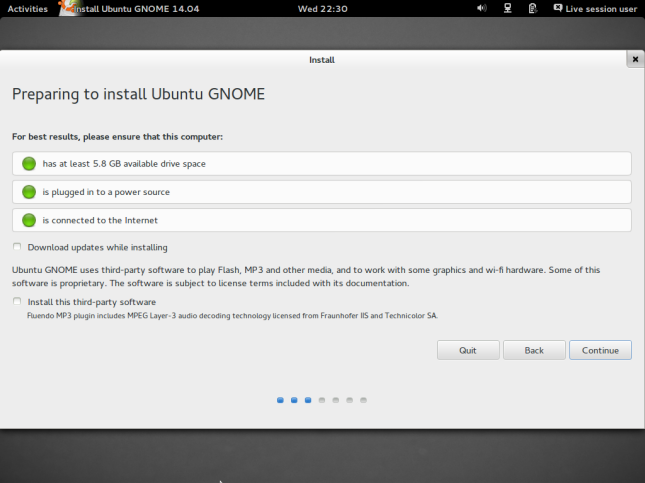
It is typically a good idea to check both Download updates while installing. and Install this third-party software so that your new installation is as complete as possible. If you don't require these, however, it is certainly not necessary to check either.
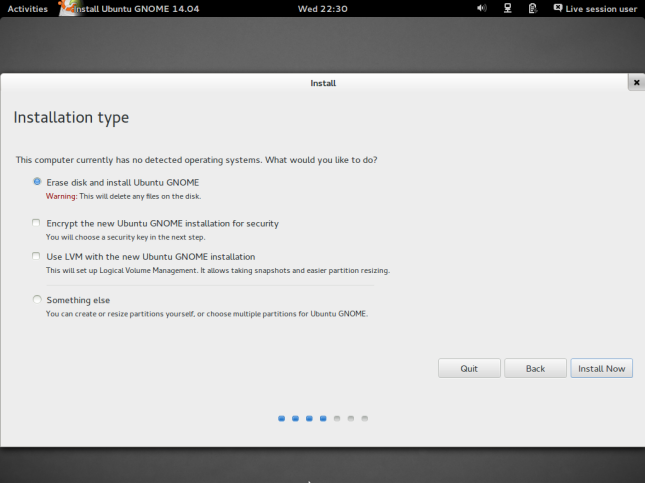
- Select how you would like to install Ubuntu GNOME.
Erase disk and install Ubuntu GNOME will replace your current operating system with Ubuntu GNOME.
There will be another option not pictured that will say something like Install Ubuntu GNOME and *your OS* side by side Select this if you wish to pick from Ubuntu GNOME and your current OS at startup each time you turn your computer on.
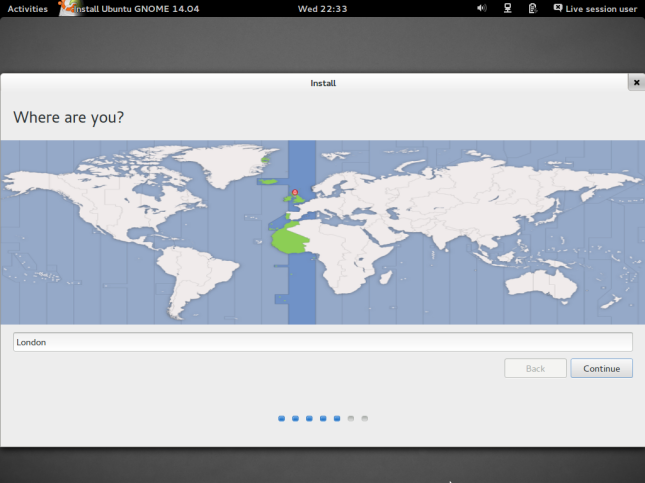
- Pick your time-zone.
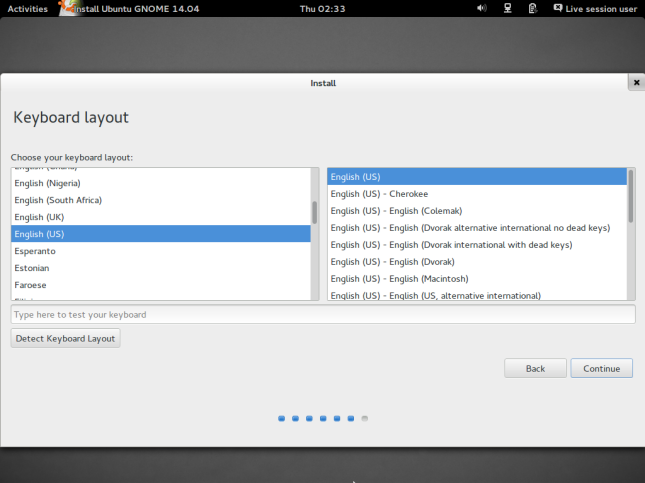
- Select the correct keyboard layout for your needs.
Not to be confused with your language. When in doubt, click Detect Keyboard Layout.
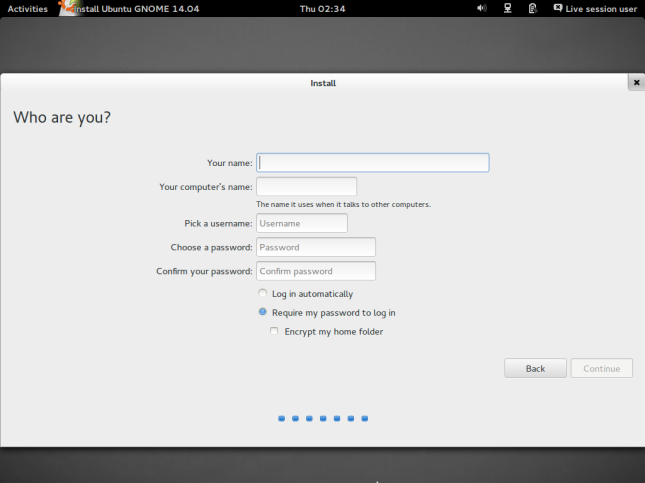
- Fill in whatever information you want, but fill in every text field.
Don't worry about Encrypt my home folder if you don't know what that is. It's very optional.
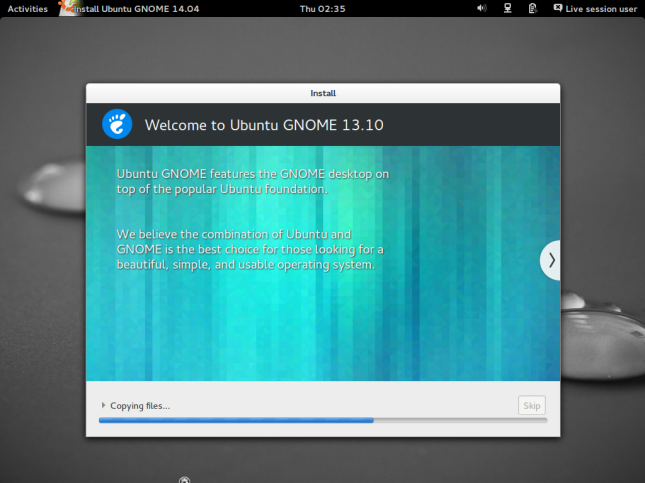
- Wait for Ubuntu GNOME to install.
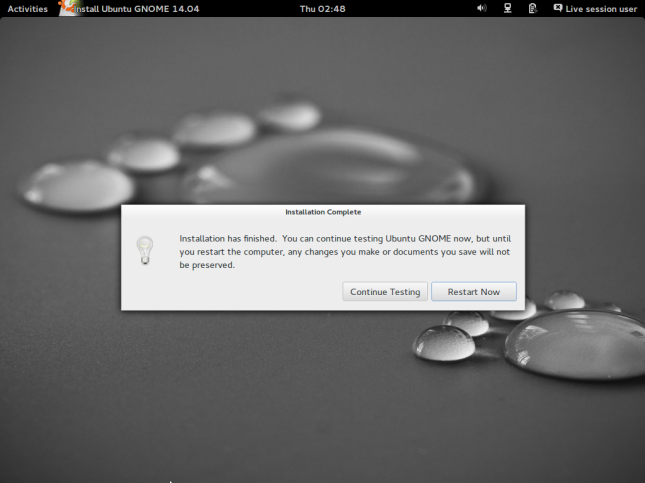
- Restart your computer to start enjoying your new installation of Ubuntu GNOME!
Thank you for choosing and using Ubuntu GNOME.
UbuntuGNOME/Installation/AutoInstallation (last edited 2015-09-13 11:26:58 by 121)

