Ubuntu_Feisty_On_Intel_Mac_Mini_Quick-Start_Guide
Feisty on Intel Mac Mini

Introduction
This is a very short Quick-Start Guide and review for installing Ubuntu Feisty Fawn on an Intel Mac Mini. Feisty is the first Ubuntu distro to integrate some bleeding edge proprietary drivers and a very useful Restricted Drivers Manager, so, the installation is straight away if you follow this guide. You don't need any computer ability to achieve a perfect result. Hope you enjoy it.
Hardware Specs
First of all, hardware specs of the Intel Mac Mini I own and used for this installation:
- Intel Mac Mini
- 1.66Ghz Intel Core Duo
- 512MB memory
- 60GB hard drive
If you have the powerfuller version of this machine, don't worry. It'll work OK, the basic specs are the same.
Prerequisites
To install Feisty Fawn on this machine or in the superior one, you need only the following software:
Ubuntu Feisty Fawn (Intel X86) http://www.ubuntu.com/getubuntu/download
Starts the real work
And now let’s start working, just follow these steps in the right order:
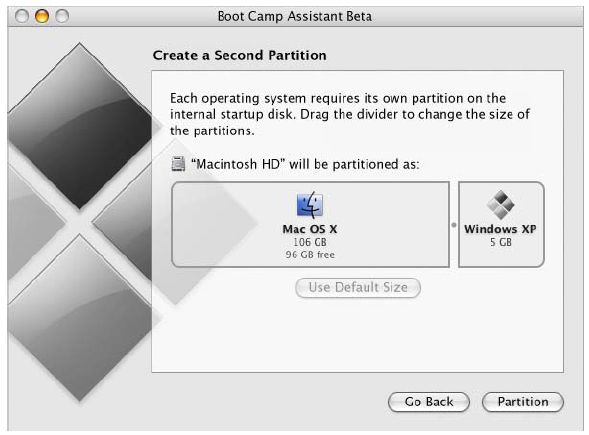
1) Install BootCamp, run it and split your HD in 2 parts. The partition intended for Windows will be the one we’ll use to install Feisty

Let's see some illustrated steps to partition your disc:
a) The BootCamp Icon
b) Here's the BootCamp screen in wich you can set the size of each partition. You choose how big each partition should be but remember that Linux can install software ONLY in its own partition, so, make it big and continue! Now leave BootCamp where it is and jump to the next step.
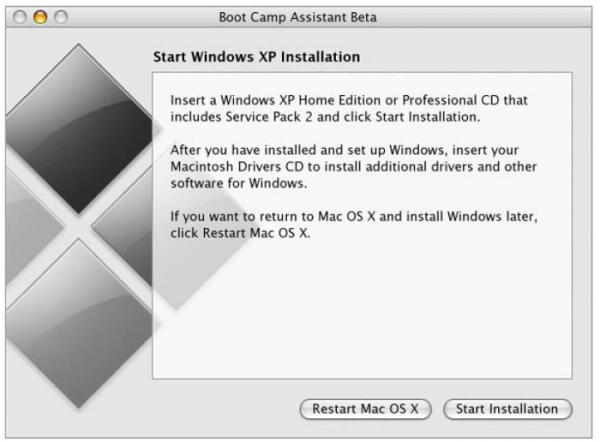
2) Burn Ubuntu Feisty’s iso image (Using the “disk utility” already present in OSX, Applications –> Utilities), insert it into the disc drive. After having burnt the ISO, return to BootCamp. Ignore the Start Installation Button. Of course, we don't have to install Windows, so, insert the Ubuntu Feisty CD into the drive and Click on the Restart Mac OSX Button
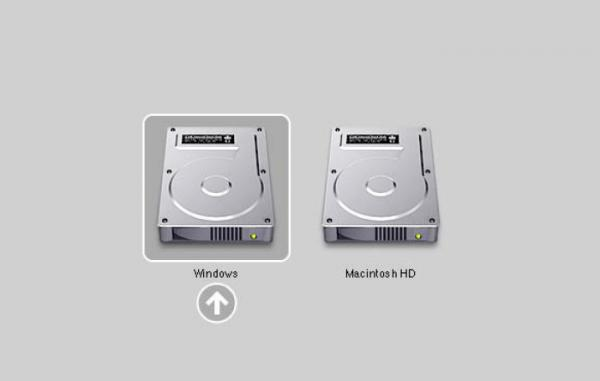
- 3) Keep the alt key pressed the moment you listen the classic Mac booting sound. A booting menù will appear, choose CD-rom. The Feisty Live CD Menù appears. You’ll probably be unable to use the keyboard in this menù, don’t worry, just wait. After some seconds, Ubuntu Live CD will start loading and you’ll be taken into the Ubuntu Feisty desktop.
- 4) Wow! Wireless card works with the new restricted pre-installed drivers! The restricted drivers manager warns you about the fact that these drivers are not opensource: do you really care? Personally, I’d love OS drivers to exist for any hardware but it is not like that, so, I prefer productivity over renouncing on the use of restricted drivers. The Intel 3D graphic card, obviously, works out the box with the built in Open Source video driver. Everything is perfect then! Let’s install Ubuntu.
- 5) Double click on the Install Icon on the desktop and install Ubuntu as normal. Choose to edit the partitions manually. This part is much simpler now than in any precedent Ubuntu version, I’m very glad of that. Locate the fat32 partition, delete it, it will be converted in free space. Now create a new partition from the empty space but remember to leave at least 600 MB of free space that will be used to create the Swap partition. This new partition will be the one used as root, your main Linux partition. Assign to it this symbol “/” and format it as ext3. Now create a new partition from the remaining free space and choose to use it as “swap”. We’re all set. Start Installation and configure it as you wish.
- 6) Reboot and remember: every time you want to run Ubuntu Linux, you’ll have to keep the alt key pressed during boot and choose “Windows” (Yes, really) from the boot menù that opens.
The games are completed, the mini little guide is almost over and you’ve got Ubuntu installed on your Mac Mini! ![]() The hardest thing is… that after some days you’ll want to dedicate the entire Mac's disk to Linux!!
The hardest thing is… that after some days you’ll want to dedicate the entire Mac's disk to Linux!!
Final Tuning
In your Intel Mac Mini you've got one of the best 3D cards around for the Linux world. An Intel Video Card. It is not surely as bleeding edge and powerful as an Nvidia or an ATI, but, hey... the drier is Opensource, you'll never have problems with it and it is super fast with Linux. So, if you like fireworks, let's burn some. If you like Compiz (Very basic effects), you can simply activate it using the new Feisty Desktop Effects:
System --> Preferences --> Desktop Effects

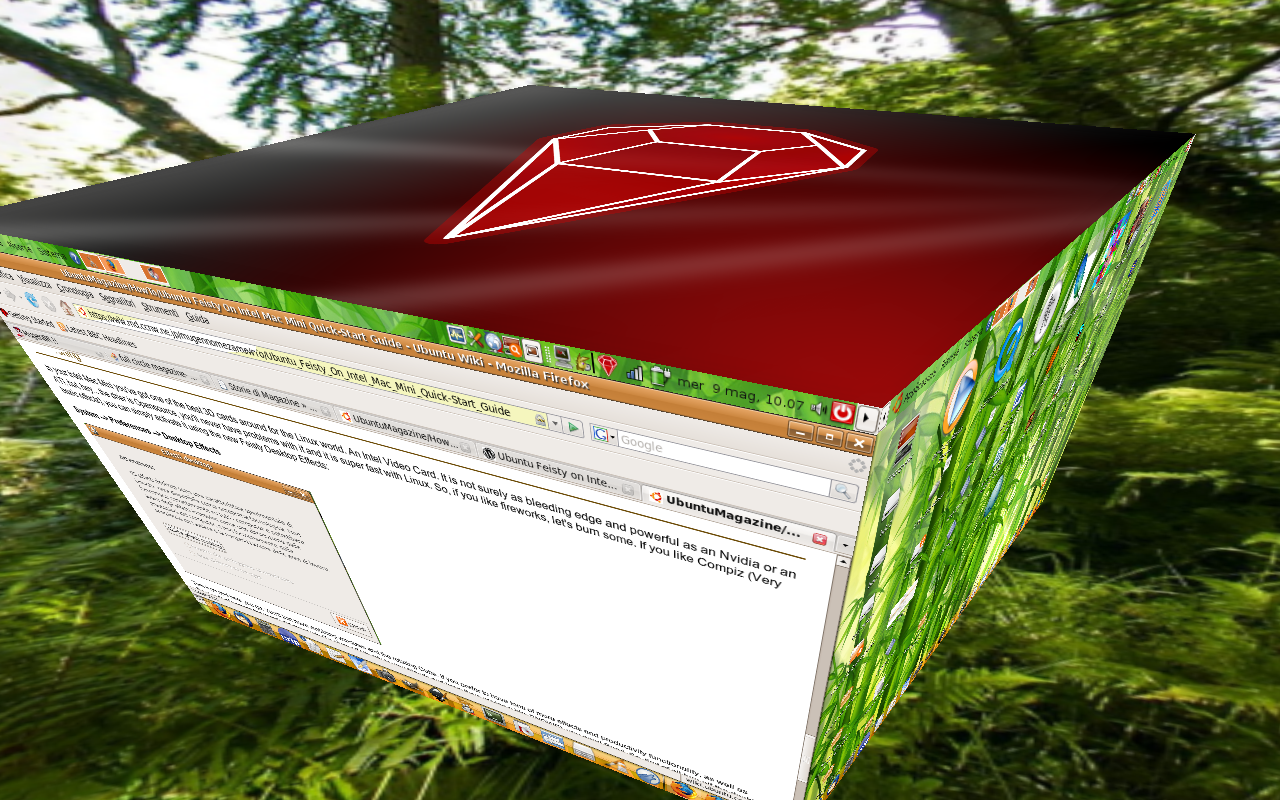
Turn it on and here you go. You'll just have wobbling windows and the rotating Cube. If you prefer to have tons of more effects and productivity functionality, as well as thousands of useless but wonderful eyecandy (To show off Ubuntu to your friends and have them saying a big: "WOW!"), you need Beryl. So, first of all turn off the desktop effects and then:
1) Well, Beryl is in the official repos now, so… let’s get it!!! Run Synaptic, search for Beryl and install all that you wish! I recommend every extra plugin package you find

2) System –> Preferences –> Sessions. Click on new: write down Beryl in name and “beryl-manager” (Without quotes) in Command. that’s it.
- 3) Without restarting, Alt+F2. Enter beryl-manager and press Return. There you go! The Beryl tray Icon appears and Beryl’s allready running! WOW! Aiglx without installing anything new except Beryl? Yes, really. Once restarting the system, Beryl will be automatically loaded
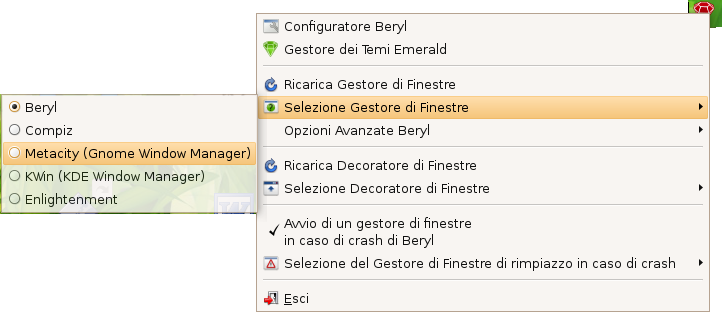
4) Remember that, if you prefer, you can run compiz instead of Beryl. INSTEAD, Man. Don’t try to run Compiz while Beryl’s running. To run Compiz, as we said, System –> Preferences –> Desktop Effects. Enable wobble and enable cube. Never do it while Beryl is running. To switch back to Compiz, just purge beryl-manager away from the Session Manager, right click on the Beryl-manager icon Select Windows Decorator --> Metacity, then right click on the beryl-manager icon again and exit. Now you can activate Desktop Effects again.
- 5) Enjoy your super fast 3D desktop on a Mac Mini without any significant effort!
UbuntuMagazine/HowTo/Ubuntu_Feisty_On_Intel_Mac_Mini_Quick-Start_Guide (last edited 2008-08-06 16:21:17 by localhost)