Wiki_Scripts
|
Size: 2714
Comment: Technical stuff doesn't fit that well under Guidelines, but guidelines can be in Documentation
|
Size: 2424
Comment:
|
| Deletions are marked like this. | Additions are marked like this. |
| Line 1: | Line 1: |
| ## page was renamed from Artwork/Guidelines/Software/Wiki_Scripts ## page was renamed from Artwork/Documentation/Tools/Wiki_Scripts ## page was renamed from Artwork/Documentation/Wiki Scripts = Wiki Scripts = There are two scripts here to help you manage the images on your wiki pages. One, is a montage script, basically for an orderly collage. The other is a thumbnailer. They both '''require imagemagick, the ui requires zenity''' ({{{sudo apt-get install imagemagick zenity}}} or use synaptic). The sizes for both scripts are the ones recommended for the wiki. |
<<Include(Artwork/PageTemplate/Header)>> ||<tablestyle="float:right; font-size: 0.9em; width:30%; background:#F1F1ED;"><<TableOfContents>>|| [[../|Back to Software]] Two scripts to help you to manage the images on your wiki pages. They both require imagemagick, the ui requires zenity. {{{sudo apt-get install imagemagick zenity}}} |
| Line 8: | Line 12: |
| Line 13: | Line 18: |
| === Montage Maker === | |
| Line 15: | Line 19: |
| '''[[attachment:Artwork/Documentation/Tools/Wiki_Scripts/media/SEA_DISC/Ubuntu|Splash Directory/ubuntu.logo.DV710.png]]''' | == Montage Maker == [[attachment:montagemaker|Download Montage Maker]] |
| Line 24: | Line 31: |
| Line 26: | Line 34: |
| '''[[attachment:thumbnail|Download here.]]''' | [[attachment:thumbnail|Download Thumbnailer]] |
| Line 31: | Line 39: |
| * ''This will overwrite any prerendered version of the same name.'' | * ''This will overwrite any prerendered version of the same name.'' |
| Line 36: | Line 44: |
Two scripts to help you to manage the images on your wiki pages.
They both require imagemagick, the ui requires zenity. sudo apt-get install imagemagick zenity
How to use the scripts
Download the attached script, anywhere you like. If you want to you can place it into your $PATH. Otherwise, just keep it in a handy location. Once you've saved it: right click on the file, and select properties. Navigate to the file permissions tab, and allow executing the file as a program.
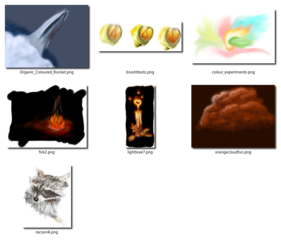
Example thumbnail of montage. |
|
Montage Maker
To use this script, point it at a directory with the images you wish to collate into one image. After this, choose a filename and location to save your montage.
- If you have problems with your svg thumbnailing in the montage, prerender a raster (pixel-based) version to place in the directory instead.
The script will try to thumbnail everything in the directory, so prepare it properly first.
- The CLI mode requires first a directory and then the output filename.
If you've saved it to the default location with Firefox, you could also run chmod +x ~/Desktop/montagemaker to make it executable
Thumbnailer
This script will thumbnail all the files you select, appending _thumb to them. There is a configuration section where you can change height, width, appended name, etc, as well as instructions for commenting and uncommenting some features.
- Be aware that the script by default will render a raster version of the svg with the same name.
This will overwrite any prerendered version of the same name.
It supports raster and svg images, svg support requires Inkscape
- To select multiple files, hold the control button while you select them.
- By default it automatically appends _thumb to the filename.
If you've saved it to the default location with Firefox, you could also run chmod +x ~/Desktop/thumbnail to make it executable
Artwork/Documentation/Software/Wiki_Scripts (last edited 2009-04-12 12:39:49 by p50894D21)
