GettingStarted
Add your language here |
This is still in beta phase and only available on edge.launchpad.net (beta testing). If you run into bugs, talk to the people in #launchpad on irc.freenode.net. (Known limitations)
Overview
Here's the quick run-down of what you need to do, to set up your daily builds.
- Have source code in launchpad (either use code.launchpad.net or have source import)
- Select branch used for daily build
- Write recipe
- Test build locally
- trigger builds via launchpadlib
Prerequisites
Code in Launchpad
Launchpad's Daily Builds only works on code that exists in Launchpad. Either you make use of Launchpad Code yourself (easier), or you set up Launchpad to import code from somewhere else.
Packaging
Somebody needs to have packaged your software before. If your software for example is in Ubuntu or Debian, you are sorted out. If there's another branch in Launchpad, that contains packaging for your software, you are sorted out. With the "recipe" (more on the topic below), you can sort-of-merge the packaging into your daily branch.
If nobody ever attemped to package your software for Debian or Ubuntu, you might want to have a look at PackagingGuide/PackagingOverview to get your initial packaging set up.
Make sure that the build process in your packaging can deal with what's in your branch. For example, if you work on a C project with autotools, you might have to run autoreconf -i at some stage during the build to make sure that all the auto-generated files (which are not in version control) are present.
Recipe
"recipes" are descriptions of the steps needed to construct a package from the various bzr branches. It relies on a certain format that specifies
- where to use the code from (trunk branch, beta branch, etc.), where to get the packaging from (separate branch? ubuntu branch?)
- the correct package version (so users will still be able to upgrade to the stable version of the distro once it gets released)
- what to modify to make the source build properly
In this first step, just write it in a text editor. Later on, you'll test it locally, then enable it in Launchpad.
Writing a basic recipe
With daily build recipes you have a number of options to get the source in place so it can be built.
build from trunk as is, if you need to have the debian/ directory with the packaging in trunk
use trunk and merge another branch, if you don't have the packaging in trunk but in another branch that can be merged in
use trunk and nest another branch, if you want to use a separate branch and put it into trunk in a specific location
The third alternative is one that is going to work in the most cases, which is why we'll highlight it here.
If you need anything more sophisticated or extensive documentation on all your options, please review our recipe documentation.
Simple Example
In this example we will use trunk which does not contain any packaging and nest a separate branch that contains JUST the packaging (./debian/ directory).
# bzr-builder format 0.2 deb-version 1.0+{time}
lp:foo
nest foopackaging lp:~hacker/+junk/packaging debian
Testing locally
Testing the recipe
It's very important to test your recipe locally, else your build might fail in Launchpad over and over again without you noticing. Also might the package versioning be broken. Make sure you test locally first!
Save your recipe file to <project>.recipe.
If you run Windows or Mac, check out how to run Ubuntu in a virtual machine for the test.
If you want to test on a specific version, check out this documentation for how to do that in a safe and sane manner.
Once you're happy with the specific Ubuntu version you want to test this in, please install
bzr-builder from the archive if available or
from https://launchpad.net/~dailydebs-team/+archive/bzr-builder
In order to build the recipe you need to use the bzr dailydeb command.
$ bzr dailydeb package.recipe working-dir
This will perform the steps specified in <project>.recipe. It will create working-dir and put the resulting source tree and the source package there.
Testing the build
Now we have a source package. Now let's test the build process.
First we set up pbuilder, a tool that sets up a clean, minimal environment for the build, so we can be sure it builds everywhere.
sudo apt-get install pbuilder
edit ~/.pbuilderrc and add
COMPONENTS="main universe multiverse restricted"
- sudo pbuilder create
To kick off the test-build, run
sudo pbuilder build <working-dir>/<project>_<version>.dsc
If the build succeeds, you can test-install the resulting package from /var/cache/pbuilder/result/.
Setting up the recipe in Launchpad
Now that you confirmed the recipe to work, the rest is very simple.

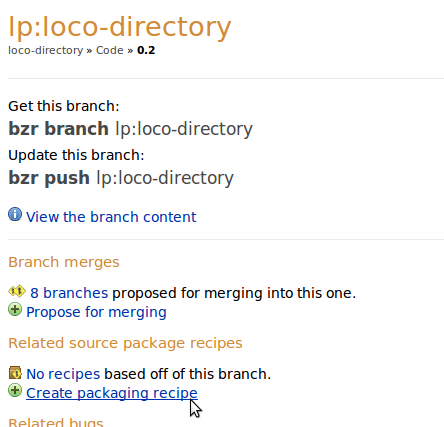
Browse to the branch you want to build in Launchpad. Click on "(+) Create packaging recipe".
Now fill in all the necessary details:
Name: simple name of the recipe. Remember: you might want more than one.
Description: please make it clear what users of this build sign up for.
Owner: select who drives these builds.
Default Distribution Series: select all the Ubuntu releases you want to build the package for. Make sure all these builds work before you sign up for them!
Recipe text: paste your recipe in here.
Building
Via Launchpad API
To trigger builds regularly, you can use this simple launchpadlib snippet:
   1 person = launchpad.people["person-who-owns-the-recipe"]
   2 recipe = person.getRecipe(name="name-of-the-recipe")
   3 ubuntu = launchpad.distributions["ubuntu"]
   4 ppa    = person.getPPAByName("name-of-ppa")
   5 for series in ubuntu.current_series:
   6     recipe.requestBuild(archive=ppa, distroseries=series, pocket="Release")
Via Web UI
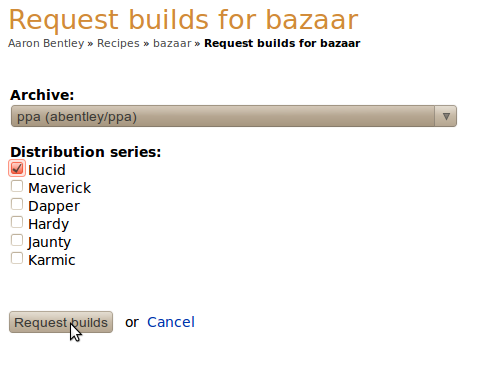
Also, you can use Launchpad's Web UI.
