MacBookPro
|
Size: 25535
Comment:
|
Size: 47923
Comment: added Screenlets support to Desktop Tweaks section
|
| Deletions are marked like this. | Additions are marked like this. |
| Line 1: | Line 1: |
| = Ubuntu on MacBookPro = [[BR]] == Preface == [[BR]]Many of Ubuntu forum members have been contributing to a thread I started some time ago in the forum. [[BR]]http://ubuntuforums.org/showthread.php?t=198453 [[BR]]It would be great to put all those Ubuntu on MacBookPro contributions here together ! [[BR]] [[BR]] There are some installation notes about Ubuntu on MacBookPro .. [[BR]] rather a compilation of what I found on the internet [[BR]] + configuration of french / belgian-fr keyboard [[BR]] + a nice desktop theme ;-) [[BR]] [[BR]] Thanks to Ubuntu forum members for their [[BR]] feedback and contribution and all the people providing [[BR]] drivers and/or useful information about Linux on Macbook [[BR]] especially Nicolas Boichat and Ronald S. Bultje [[BR]] == For more information : == [[BR]] [[BR]]http://www.mactel-linux.org/wiki/Main_Page [[BR]]http://modular.math.washington.edu/macbook/ [[BR]]http://modular.math.washington.edu/macbook/triboot/ [[BR]]http://bin-false.org/?p=17 [[BR]]http://desrt.mcmaster.ca/macbook.xhtml [[BR]][http://wiki.onmac.net/index.php/Triple_Boot_via_BootCamp http://wiki.onmac.net/index.php/Trip...t_via_BootCamp] [[BR]]http://www.jasonparekh.com/?page_id=9 [[BR]]http://www.ethicalhack.org/howto/triple_boot_howto.html [[BR]][http://wiki.cchtml.com/index.php/Ubuntu_Dapper_Installation_Guide http://wiki.cchtml.com/index.php/Ubu...allation_Guide] [[BR]]http://wiki.cchtml.com/index.php/Xgl-Compiz-Dapper [[BR]]http://blogs.gnome.org/portal/rbultje [[BR]]http://www.boichat.ch/nicolas/macbook-tools/ [[BR]][http://blogs.vislab.usyd.edu.au/index.php/JohnStavrakakis/2006/07/28/triple_boot_on_macbook_pro_15 http://blogs.vislab.usyd.edu.au/inde...macbook_pro_15] [[BR]]http://www.ubuntuforums.org/showthread.php?t=225621 == Note == [[BR]]'''For triple boot Mac OS X - Linux - Windows, follow specific instructions.''' [[BR]] (WARNING ! In the forum thread they are in blue but I did not find a way to put some color here ? [[BR]] so I put [Begin Triple Boot] [End Triple boot] tags instead) == MacOsX Installation == 1. Install MacOsX pro with a minimum of features. It may be useful for firmware update or hardware check .. 1. Boot on MacOsX CD holding Alt key 1. Follow installation instruction. == Boot Menu installation == [[BR]] [[BR]] 1.Boot on MacOsX [[BR]] 2.Install bootcamp [[BR]] [[BR]] [Begin Triple Boot] For triple boot: Burn MacBook Windows CD driver[End Triple boot] [[BR]] [[BR]] 3.Install rEFIt (http://refit.sf.net) * install mac image * copy efi to root directory (drag efi folder to MacOs disk) * open a mac os terminal (in utilities) * cd /efi/refit * ./enable-always.sh == Partionning == [[BR]] [[BR]] In a MacosX terminal, partition the disc : [[BR]] {{{ sudo diskutil resizeVolume disk0s2 10G }}} That sets 10G for MacOsX and the rest for Linux [[BR]] [[BR]] [[BR]] [[BR]] For triple boot: [[BR]] [Begin Triple Boot] {{{ sudo diskutil resizeVolume disk0s2 10G Linux Linux 52G "MS-DOS FAT32" Windows 30G }}} [End Triple Boot] == Install Windows XP SP2 == [Begin Triple Boot] [[BR]] Boot, in refit, choose the Windows CDRom. [[BR]] Launch install, at reboot choose the Windows HardDisk. [[BR]] Install drivers from BootCamp CD drivers. [[BR]] Follow my howto to customize Mac keyboard on Windows : [[BR]][http://discussions.apple.com/thread.jspa?threadID=608584&tstart=0 http://discussions.apple.com/thread....08584&tstart=0] [[BR]] [End Triple Boot] [[BR]] == Install Linux Ubuntu == [[BR]] * Boot on Ubuntu drapper live cd [[BR]] [[BR]] [Begin Triple Boot] [[BR]] For triple boot, make a swap file because of partion number limit explained [[BR]] on [http://wiki.onmac.net/index.php/Triple_Boot_via_BootCamp http://wiki.onmac.net/index.php/Trip...t_via_BootCamp] [[BR]] Open a terminal. (Application>Accessories>Terminal) [[BR]] {{{ sudo su [[BR]] mkdir /mnt/linux [[BR]] mount -t ext3 /dev/sda3 /mnt/linux [[BR]] sudo dd if=/dev/zero of=/mnt/linux/swap bs=1024 count=2097152 [[BR]] mkswap /mnt/linux/swap [[BR]] swapon /mnt/linux/swap }}} [End Triple Boot] [[BR]] * Click install on disk in Ubuntu * Choose a manual partition : (2Gb of swap and the rest for filesystem) [[BR]] do not erase efi 200M partition [[BR]] * define mount : * if possible, do not mount /mount/EFI (select white item in list) * /dev/sda3 => swap * /dev/sda4 => / [[BR]] [Begin Triple Boot] [[BR]] For triple boot * define mount : * /dev/sda3 => /Triple boot uses a swap file [End Triple Boot] [[BR]] [[BR]] * Grub installation fails at the end, just ignore it (you are going [[BR]] to install lilo anyway). [[BR]] * Open a terminal : Terminal 1 (Application>Accessories>Terminal) [[BR]] (the following comes from http://bin-false.org/?p=17 ) [[BR]] {{{ sudo su mkdir /mnt/ubuntu mount /dev/sda4 /mnt/ubuntu/ mount -t proc none /mnt/ubuntu/proc mount -o bind /dev /mnt/ubuntu/dev chroot /mnt/ubuntu /bin/bash apt-get install lilo lilo-doc }}} (Remark :Some users report problem to find lilo because no network is not [[BR]] available in the chroot terminal. It is strange it works for most for us. [[BR]] [[BR]] If you have that problem, the solution is to reactivate the network in the chroot terminal. [[BR]] Either manually (ifup eth0), with dhclient [[BR]] or using the graphical config (gksu network-admin).) [[BR]] [[BR]] * create /etc/lilo.conf [[BR]] Add this content: [[BR]] (with "vi" or Application>Accessories>Text Editor) [[BR]] {{{ boot=/dev/sda4 default=Linux map=/boot/map delay=20 image=/vmlinuz initrd=/initrd.img root=/dev/sda4 label=Linux read-only }}} [Begin Triple Boot] [[BR]] For triple boot use /dev/sda3 instead [[BR]] {{{ boot=/dev/sda3 default=Linux map=/boot/map delay=20 image=/vmlinuz initrd=/initrd.img root=/dev/sda3 label=Linux read-only }}} [End Triple Boot] [[BR]] * Open a second terminal : Terminal 2 [[BR]] {{{ sudo parted set 4 boot on quit }}} [Begin Triple Boot] [[BR]] For triple boot use /dev/sda3 instead [[BR]] {{{ sudo parted set 3 boot on quit }}} [End Triple Boot] [[BR]] * Go back to Terminal 1 [[BR]] {{{ lilo -b /dev/sda exit umount /mnt/ubuntu/proc umount /mnt/ubuntu/dev [[BR]] umount /mnt/ubuntu }}} [[BR]] [Begin Triple Boot] [[BR]] For triple boot [[BR]] {{{ lilo -P ignore -b /dev/sda3 exit umount /mnt/ubuntu/proc umount /mnt/ubuntu/dev umount /mnt/ubuntu }}} [End Triple Boot] [[BR]] * Reboot * '''Go in the rEFIt partition editor and synchronize MBR''' * Choose linux in rEFIt menu == Ubuntu configuration == [[BR]] === Update === [[BR]] [[BR]] Update your system and install restritected drivers [[BR]] {{{ sudo apt-get install linux-restricted-modules-2.6.15-26-686 linux-kernel-headers sudo apt-get dist-upgrade }}} Relaunch lilo if kernel has changed [[BR]] [[BR]] For triple boot [[BR]] {{{ lilo -P ignore -b /dev/sda3 }}} [[BR]] For dual boot [[BR]] {{{ sudo lilo -b /dev/sda }}} Reboot [[BR]] === Video === [[BR]] [[BR]]__Install ATI drivers :__ [[BR]] The following was suggested by Gendo and comes from : [[BR]][http://wiki.cchtml.com/index.php/Ubuntu_Dapper_Installation_Guide http://wiki.cchtml.com/index.php/Ubu...allation_Guide] [[BR]] disable fglrx module : sudo vi /etc/default/linux-restricted-modules-common [[BR]] {{{ DISABLED_MODULES="fglrx" }}} Uncomment the universe and multiverse repositories in /etc/apt/sources.list [[BR]] [[BR]] download drivers from ATI web site and follow this install : [[BR]] {{{ wget https://a248.e.akamai.net/f/674/9206/0/www2.ati.com/drivers/linux/ati-driver-installer-8.27.10-x86.run |
= Installing Ubuntu on a MacBook Pro = ##TABLE OF CONTENTS ON RIGHT SIDE ||<tablestyle="float:right; font-size: 0.9em; width:40%; margin: 0 0 1em 1em;" style="padding:0.5em; background:#F1F1ED;">'''Contents'''[[BR]][[TableOfContents(2)]]|| attachment:macbookpro.png == About == This page describes installing Ubuntu 7.10 (Gutsy Gibbon) on the '''1st and 2nd Generation Mac``Book Pro''' (Core Duo & Core 2 Duo). For the '''3rd Generation Mac``Book Pro (Santa Rosa)''' you will need to read the '''[https://wiki.ubuntu.com/MacBookPro/SantaRosa Santa Rosa MacBook Pro wiki]''' for additional information and instructions. For the '''Mac``Book''' you will need to read the '''[https://wiki.ubuntu.com/MacBook MacBook wiki]'''. === Special Thanks === Thanks to Ubuntu forum members for their feedback and the people providing Apple hardware drivers for Linux, especially Nicolas Boichat, Ronald S. Bultje, Jan Bernhardt, Ludovic Rousseau, João Pedro Serrano (Fuz2y) ... and special thanks to the people that have been continually editing this wiki :) == Links == Following is a list of other wikis providing details on running Linux on the MacBook or Mac``Book Pro: * The [https://help.ubuntu.com/community/MacBook Ubuntu MacBook wiki] also deals with the proper configuration of Apple hardware and installation. * The [http://wiki.debian.org/MacBook Debian MacBook wiki] - Debian Installation guide. * The [http://gentoo-wiki.com/HARDWARE_Apple_MacBook Gentoo MacBook wiki] - Partitioning, access to ext2/3 and UID sync'ing are covered quite well there (and somewhat sparse in this document) * The [http://wiki.onmac.net/index.php/Triple_Boot_via_BootCamp OnMac wiki] has triple-boot instructions, and also some details on restoring things to their initial state (removing bootcamp, linux, etc.). == Installing with Dual Boot (OS X, Linux) == attachment:OSX.png attachment:Linux.png Note: This is for a Mac``Book Pro with OS X allready installed To ajust Fans speed in OS X install: http://homepage.mac.com/holtmann/eidac/software/smcfancontrol2/index.html To access Linux partition in OS X install: http://sourceforge.net/project/showfiles.php?group_id=64713&package_id=101149&release_id=468470 1. Install the rEFIt Boot Menu from (http://refit.sf.net). 2. Use Boot``Camp to partition the drive (if using Tiger, don't bother burning a Windows boot CD; if using Leopard, it won't ask you). 3. Restart the computer with Ubuntu 7.10 Desktop CD inserted (64-bit or 32-bit version). rEFIT should recognize the CD and give you option to "boot Linux from CD". Scroll to this option using the down arrow or click on it with your mouse. 4. Click on 'Install' icon on the desktop. Select the appropriate language, select 'Keyboard Layout' as 'Macintosh', select 'Manual' partitioning, then 'Forward'. 5. Boot``Camp will have created '/dev/sda3' which should be roughly the size of the partition you created. Select 'dev/sda3' and delete it by clicking 'Delete Partition'. This should now be 'free space'. 6. Select the 'free space' and click 'New Partition'. Set the size to approximately 1 GB less than the total amount of free space. Format it as an 'ext3' type partition and set the 'Mount Point' to '/'. Set the formatting to occur at the beginning. Click OK. 7. This should leave approximately 1 GB of free space. Select this free space and click 'New Partition'. Format it as a 'swap' type partition. Set the formatting to occur at the beginning. Click OK. 8. Now click 'Forward'. This will give some scary warnings about FAT 32 not being partitioned correctly. Click 'Ignore' and proceed with the install. After being prompted for a user and computer name, check to make sure that the formatting is occurring at partitions #3 and #4 and click 'Install'. 9. Follow Ubuntu installation instructions from here. == Installing with Triple Boot (OS X, Vista & Linux) == attachment:OSX.png attachment:Windows.png attachment:Linux.png === Mac OS X Installation === attachment:OSX.png Note: If you have Mac OS X allready installed proceed to the next section. 1. Insert the Mac OS X 10.5 (Leopard) Install DVD into the drive, and start the computer while holding the 'c' key. 2. In the OS X installer menu, select 'Utilities' > 'Disk Utility...' 3. Select the main hard disk icon, go to 'Partition' tab, set the 'Volume scheme' to '1 Partition'. Name it "Macintosh", and format it as 'Mac OS Extended". 4. Exit 'Disk Utility' and continue the installation, select 'Macintosh' as the destination and continue. To save space, click 'Customize' and filter the 'Printer drivers', selecting only the ones you need, and deselect 'Language translations'. Click 'Done', and 'Install'. To ajust Fans speed in OS X install: http://homepage.mac.com/holtmann/eidac/software/smcfancontrol2/index.html To access Linux partition in OS X install: http://sourceforge.net/project/showfiles.php?group_id=64713&package_id=101149&release_id=468470 === Windows Vista Installation === attachment:Windows.png 1. Boot into your newly installed OS X and perform a software update (System Preferences > Software Update) on the system (a restart will be required). 2. Then go to 'Utilities' > 'Boot Camp Assistant', click 'Continue' and resize 'Macintosh' to 1/3 of total disk space, leaving the rest for Windows. Click 'Partition'. 3. Insert Windows Vista DVD (32-bit) and hit 'Start Installation". The computer will then restart and boot into the Windows Vista Installation DVD). 4. Select 'Disk 0 Partition 3 BOOTCAMP', hit 'Drive Options (Advanced)' and format it, then it 'Next' to start installation. 5. After Restart, insert 'Mac OS X 10.5 (Leopard) Install DVD' and install the Boot Camp Drivers necessary for Vista and Restart 6. After Restart, install 'Input Remapper': http://www.olofsson.info/index.html?inputremapper.html (Enables auto-fan-speed & some keyboard features) 7. Reboot the computer. Note: If your planning to play Games and take full advantage of your graphic card in Vista, I recommend to install the graphics driver with this tool(ATI only!): http://www.driverheaven.net/modtool/ Also to access Linux partition in vista install 'Ext2 IFS': http://www.fs-driver.org/download.html And to access OS X partition in vista install 'Mac Drive' : http://www.mediafour.com/products/macdrive/ ==== Vista Desktop Tweaks ==== ||<:> [https://wiki.ubuntu.com/MacBookPro?action=AttachFile&do=get&target=vista_desktop.jpg https://wiki.ubuntu.com/MacBookPro?action=AttachFile&do=get&target=vista_desktop1.jpg] [[BR]]~-Click image for larger view-~ |||| attachment:cubedesktop.jpg || 1. For custom Themes, install 'Vista Glazz': http://www.codegazer.com/vistaglazz/ (I'm using the theme 'Panorama': http://www.myvistathemes.com/skins-and-themes/panorama-theme-free-download/ ) 2. For the Desktop applications Bar, install 'Object``Dock': http://www.stardock.com/products/objectdock/ (I'm using the theme 'Leopard 3D Light': http://www.wincustomize.com/skins.aspx?skinid=13731&libid=29 ) 3. For the Linux hard-disk icon, install 'Icon``Packager': http://www.stardock.com/products/iconpackager/ (start 'Icon``Packager' > 'Icons and Cursors' > 'Drives' > right click on the linux hard-disk and hit 'Change Icon...' and browse for attachment:linux_hdd_vista.ico 4. For Destop Cube & other effects, install 'Cube Desktop': http://www.cubedesktop.com/ === Boot Menu installation === attachment:refit_logo.png 1. Boot into Mac OS X. 2. Install the rEFIt Boot Menu from (http://refit.sf.net). 3. Open a Mac OS X terminal window (in Applications > Utilities) and type: {{{ cd /efi/refit ./enable-always.sh }}} 4. Reboot the computer. === Ubuntu Installation === attachment:Linux.png 1. Start the computer with the Ubuntu 7.10 Desktop CD inserted (32-bit or 64-bit), and boot into the Live CD. 2. Click on 'Install' icon in the desktop, select 'Keyboard layout' as 'Macintosh', and click 'Forward'. Select 'manual' partitioning and click 'Forward'. 3. Select the Windows partition (/dev/sda3) and click 'Edit partition'. Change the value of 'New partition size' to 1/2 that of the existing partition. Also set the 'Mount point' to '/media/Windows', and click 'OK'. Select the new 'free space' and click on 'New partition'. Change the value of 'New partition size' to approximately 1GB less that of the total free space, and confirm that the new partition type is 'ext3'. Set the 'Mount point' to '/' and click 'OK'. Select the remaining ~1GB of free space, and click on 'New partition'. Change the partition type to 'swap' and click 'OK'. Now click 'Partition' to continue. 4. Set your user settings and click 'Forward'. Before installing, click on 'Advanced' and change '(hd0)' to '(hd0,3)' . Click 'OK', and 'Install'. 5. When installation is complete, reboot into Ubuntu Linux OS. Go to 'System' > 'Administration' > 'Software Sources'. In the 'Third-Party Software' tab, check the 1st software source. In the 'Updates' tab, check 'Pre-releases Updates' and 'Unsupported Updates'. Click 'Close' and 'Reload'. 6. Go to 'System' > 'Administration' > 'Update Manager' hit 'Check', 'Install Updates' and restart. 7. Read the following Video section for choosing which video driver to use. == Video == attachment:video_card.png The following only applies to the '''1st and 2nd Generation Mac``Book Pro''' models. If you are using a 3rd Generation Mac``Book Pro (Santa Rosa), see [https://wiki.ubuntu.com/MacBookPro/SantaRosa MacBookPro SantaRosa Guide]. You have 2 choices for the video driver: '''1.''' The open source '''radeonhd''' driver. An old experimental version (0.0.1) of this driver is included in Ubuntu 7.10 in universe repository; you should not use this version. An updated version (1.1.0) is available in an external repository (see below). Current version does not support 3D acceleration. This is the best driver choice if you don't need 3D acceleration. '''2.''' The closed source '''fglrx''' driver. This is the proprietary driver from ATI. It supports 3D accelerations. === radeonhd === Note: You are currently not able to use the "radeon" driver for the following cards and derivatives: {{{ X1300 / R515 based cards. X1600 / R530 based cards. X1800 / R520 based cards. X1900 / R580 based cards. }}} The backported version for 7.10 can be found at: https://launchpad.net/~tormodvolden/+archive More info about this driver: https://help.ubuntu.com/community/RadeonDriver Installation is simple: '''1.''' Make sure you have not installed the fglrx (ATI proprietary) driver (check under System -> Administration -> Restricted Drivers). '''2.''' Open System -> Administration -> Software sources. Go to "Third Party Software" tab click Add and add this line: {{{ deb http://ppa.launchpad.net/tormodvolden/ubuntu gutsy main }}} Click Add another time and also add this: {{{ deb-src http://ppa.launchpad.net/tormodvolden/ubuntu gutsy main }}} and enable both. . '''3.''' Open a terminal and install the radeonhd driver: {{{ sudo apt-get install xserver-xorg-video-radeonhd-dbg }}} Make sure you are installing version 1.1.0 or later and not the 0.0.1 version found in the official repository. Else redo step 2. '''4.''' You can now disable the repositories enabled in step 2 if you don't want any more updates from that repositories. '''5.''' The driver is not automatically selected by the xorg server (see [https://bugs.launchpad.net/ubuntu/+source/xserver-xorg-video-radeonhd/+bug/174309 radeonhd driver is not selected by the server bug] for update). Then, edit /etc/X11/xorg.conf and change the line {{{ Driver "vesa" }}} with {{{ Driver "radeonhd" }}} '''6.''' Reboot or restart your X server. You are now using the open source radeonhd driver. === fglrx === '''1.''' If running 64-bit Ubuntu, install the 32-bit libs before installing the Video driver with this command: {{{ sudo apt-get install ia32-libs }}} '''2.''' To install latest ATI driver (8.1) with 3D acceleration support do this: {{{ cd ~/Desktop mkdir ATI cd ATI |
| Line 253: | Line 235: |
| sudo apt-get install module-assistant build-essential sudo apt-get install fakeroot dh-make debconf libstdc++5 gcc-3.3-base chmod +x ati-driver-installer-8.27.10-x86.run ./ati-driver-installer-8.27.10-x86.run --buildpkg Ubuntu/dapper sudo dpkg -i xorg-driver-fglrx_8.27.10-1_i386.deb sudo dpkg -i fglrx-kernel-source_8.27.10-1_i386.deb sudo dpkg -i fglrx-control_8.27.10-1_i386.deb |
sudo apt-get install build-essential fakeroot dh-make debhelper debconf libstdc++5 dkms wget -c --no-check-certificate https://a248.e.akamai.net/f/674/9206/0/www2.ati.com/drivers/linux/64bit/ati-driver-installer-8-01-x86.x86_64.run sh ati-driver-installer-8-01-x86.x86_64.run --buildpkg Ubuntu/gutsy gksu gedit /etc/default/linux-restricted-modules-common }}} '''3.''' Add "fglrx" to the line "DISABLED_MODULES" File: '''''/etc/default/linux-restricted-modules-common''''' {{{ DISABLED_MODULES="fglrx" }}} '''4.''' Remove any old fglrx kernel and install the new fglrx debs {{{ |
| Line 261: | Line 253: |
| sudo module-assistant prepare,update sudo module-assistant build,install fglrx sudo depmod -a |
sudo dpkg -i xorg-driver-fglrx_8.452.1-1*.deb fglrx-kernel-source_8.452.1-1*.deb fglrx-amdcccle_8.452.1-1*.deb '''''(Type Y if promped to overwright any files)''''' sudo apt-get install -f }}} '''5.''' 3D desktop effects {{{ sudo gedit /usr/bin/compiz }}} '''''# Driver whitelist WHITELIST="fglrx nvidia intel ati radeon i810" # blacklist based on the pci ids # BLACKLIST_PCIIDS="$T" BLACKLIST_PCIIDS=""''''' '''6.''' Reboot! {{{ sudo shutdown -hr now }}} '''7.''' After Reboot: {{{ |
| Line 267: | Line 285: |
| reboot and check with : [[BR]] |
'''8.''' Reboot again! {{{ sudo shutdown -hr now }}} '''9.''' Verifying |
| Line 272: | Line 295: |
| you should have : [[BR]] {{{ display: :0.0 screen: 0 |
'''''display: :0.0 screen: 0 |
| Line 277: | Line 298: |
| OpenGL renderer string: ATI Mobility Radeon X1600 Generic OpenGL version string: 2.0.5879 (8.26.18) }}} [[BR]]__XGL/compiz installation__ [[BR]] [[BR]] If you want to go further and install compiz and XGL [[BR]] go to that other link : [[BR]]http://wiki.cchtml.com/index.php/Xgl-Compiz-Dapper [[BR]] (thanks to Gendo for that suggestion) [[BR]] [[BR]] After XGL compiz installation : [[BR]] [[BR]] - add the startcompiz script to the session start program (System>Preferences>Sessions | Startup Programs) [[BR]] [[BR]] - install gset-compiz, gcomizthemer ant themes and discover compiz ... [[BR]] {{{ sudo apt-get install gset-compiz gcompizthemer gcompizthemer-themes [[BR]] gset-compiz }}} Configure effects, key shortcuts with gset-compiz [[BR]] and customize your theme with gcompizthemer [[BR]] [[BR]] - I also had to add this line to the startcompiz script [[BR]] {{{ killall gnome-panel }}} === DVI Output === [[BR]] [[BR]] - Install ATI drivers as above [[BR]] - Install fglrx package with synaptic [[BR]] - run ATI config (either from ATI menu or sudo aticonfig) [[BR]] - configure a clone or large desktop [[BR]] for example : [[BR]] {{{ sudo aticonfig -f --initial=dual-head --screen-layout=right }}} - restart X (ctrl-alt-backspace) [[BR]] === Audio === [[BR]] Install latest Ubuntu kernel 2.6.15-26 [[BR]] relaunch lilo and reboot [[BR]] {{{ sudo lilo -b /dev/sda }}} You should hear Ubuntu login sound [[BR]] (It seems to work only on MBP17" not on MBP15"... [[BR]] for MBP15" follow the trick given by Gendo here : [[BR]][http://www.ubuntuforums.org/showpost.php?p=1269085&postcount=39 http://www.ubuntuforums.org/showpost...5&postcount=39] [[BR]] ) [[BR]] [[BR]] Microphone does not work with "sound recorder" application but [[BR]] It works with skype 1.3 beta for Linux (but not with skype 1.2) [[BR]] [[BR]] (I also installed latest alsa drivers (1.0.12rc1) following their [[BR]] INSTALL file) [[BR]] [[BR]] With old drivers and kernel when headset is plugged in jack, you might [[BR]] hear the sound in both headset AND speakers ?! [[BR]] [[BR]] With new alsa drivers (1.0.12rc1) and kernel ( 2.6.15-26-686 ), [[BR]] I do not have this problem any more. [[BR]] [[BR]] Finally ... sound is working perfectly on MBP17" [[BR]] [[BR]] If you have some issues left, you can have a look to this link, [[BR]] it contains many useful informations that are not here : [[BR]]http://www.jasonparekh.com/?page_id=9 [[BR]] === Wireless === [[BR]] (the following comes from http://bin-false.org/?p=17 ) * sudo modprobe new_wlan_scan_sta * sudo apt-get install network-manager network-manager-gnome It works out of the box on my MacBook with my hotspot. Some people seems to have problems with some wifi routers however. [[BR]] === Screen brightness === [[BR]] [[BR]] Nicolas Boichat wrote drivers for screen and keyboard backlight. [[BR]]http://www.boichat.ch/nicolas/macbook-tools/ [[BR]] [[BR]] Here is how to install : [[BR]] [[BR]] {{{ sudo apt-get install pciutils-dev wget http://www.boichat.ch/nicolas/macbook-tools/macbook-tools-0.1.1.tar.bz2 tar xvfj macbook-tools-0.1.1.tar.bz2 cd macbook-tools-0.1.1 sudo rm /usr/local/bin/backlight sudo make install }}} Use : [[BR]] backlight +10 [[BR]] backlight -10 [[BR]] [[BR]] To control backlight with key pressed, you can use a program [[BR]] developed by alexinfurs available here : [[BR]]http://ubuntuforums.org/showthread.php?t=215801 [[BR]] [[BR]] {{{ sudo apt-get install libvte-dev sudo ln -s /usr/local/bin/backlight /usr/bin/macbook-backlight tar xvfz macbook-backlight-control-0.2.tar.gz (get it from the link above) cd macbook-backlight-control/src make ./macbook-backlight-control }}} Try : [[BR]] Ctrl+F1 [[BR]] Ctrl+F2 [[BR]] [[BR]] Add macbook-bakclight-control to your session start scripts [[BR]] System>Preference>Session [[BR]] [[BR]] To get automatic backlight adjustement from sensors, apply [[BR]] kernel patch developped by Nicolas Boichat [[BR]] [[BR]] Thank you to msprunck for his feedback [[BR]] === Keyboard Backlight === [[BR]] [[BR]] Nicolas Boichat wrote drivers for screen and keyboard backlight. [[BR]] See : [[BR]]http://www.boichat.ch/nicolas/macbook-tools/ [[BR]] [[BR]] Follow "Screen brightness" installation [[BR]] [[BR]] ./applesmc 255 [[BR]] to turn light on [[BR]] sudo ./applesmc 0 [[BR]] to turn light off [[BR]] ./applesmc [[BR]] to see sensors values [[BR]] [[BR]] works on MBP 17 [[BR]] === Keyboard === [[BR]] ==== __Method 1 : using Xmodmap__: ==== [[BR]] With this method you need to start xmodmap script when the session start [[BR]] but it is easier to modify special keys. [[BR]] [[BR]] copy the xmodmap to a custom one : [[BR]] {{{ sudo cp /usr/share/xmodmap/xmodmap.be /usr/share/xmodmap/xmodmap.mbp.be }}} edit that file and change special keys definition [[BR]] Especially to have an "AltGr" key and a "Delete" key .. [[BR]] I redefined many other keys to have a full feature keyboard. [[BR]] [[BR]] You can change it yourself : [[BR]] - to find a keycode : launch xev and hit the key [[BR]] - to get the command keyword : look at this website : http://wiki.linuxquestions.org/wiki/List_of_keysyms [[BR]] (After a keycode, you can put 4 keyword : "normal key keyword" "shift key keyword" "altgr key keyword" "shift algr key keyword" [[BR]] for example : a A à @) [[BR]] [[BR]] Then start xmodmap by : [[BR]] {{{ xmodmap /usr/share/xmodmap/xmodmap.mbp.be }}} Put it somewhere so that it is loaded automatically [[BR]] [[BR]] Here is my french - belgian/fr xmodmap file : [[BR]] [[BR]] {{{ clear Mod1 clear Mod2 ! keycode 8 = keycode 9 = Escape keycode 10 = ampersand 1 bar brokenbar keycode 11 = eacute 2 twosuperior onehalf keycode 12 = quotedbl 3 threesuperior threequarters keycode 13 = apostrophe 4 braceleft onequarter keycode 14 = parenleft 5 braceleft keycode 15 = section 6 asciicircum keycode 16 = egrave 7 keycode 17 = exclam 8 keycode 18 = ccedilla 9 braceleft keycode 19 = agrave 0 braceright keycode 20 = parenright degree braceright keycode 21 = minus underscore keycode 22 = BackSpace Delete Delete keycode 23 = Tab keycode 24 = a keycode 25 = z keycode 26 = e E EuroSign keycode 27 = r R registered keycode 28 = t keycode 29 = y keycode 30 = u keycode 31 = i keycode 32 = o O at keycode 33 = p keycode 34 = dead_circumflex dead_diaeresis bracketleft keycode 35 = dollar asterisk bracketright EuroSign keycode 36 = Return keycode 37 = Control_L keycode 38 = q keycode 39 = s keycode 40 = d keycode 41 = f keycode 42 = g keycode 43 = h keycode 44 = j keycode 45 = k keycode 46 = l keycode 47 = m keycode 48 = ugrave percent dead_acute keycode 49 = less greater backslash !twosuperior threesuperior keycode 50 = Shift_L keycode 51 = backslash sterling dead_grave mu keycode 52 = w keycode 53 = x keycode 54 = c C copyright keycode 55 = v keycode 56 = b keycode 57 = n N asciitilde keycode 58 = comma question dead_cedilla keycode 59 = semicolon period keycode 60 = colon slash Multi_key keycode 61 = equal plus plusminus keycode 62 = Shift_R keycode 63 = KP_Multiply keycode 64 = Alt_L keycode 65 = space keycode 66 = Caps_Lock keycode 67 = F1 F11 keycode 68 = F2 F12 keycode 69 = F3 F13 keycode 70 = F4 F14 keycode 71 = F5 F15 keycode 72 = F6 F16 keycode 73 = F7 F17 keycode 74 = F8 F18 keycode 75 = F9 F19 keycode 76 = F10 F20 keycode 77 = Num_Lock keycode 78 = Scroll_Lock keycode 79 = KP_7 keycode 80 = KP_8 keycode 81 = KP_9 keycode 82 = KP_Subtract keycode 83 = KP_4 keycode 84 = KP_5 keycode 85 = KP_6 keycode 86 = KP_Add keycode 87 = KP_1 keycode 88 = KP_2 keycode 89 = KP_3 keycode 90 = KP_0 keycode 91 = KP_Decimal keycode 92 = 0x1007ff00 keycode 93 = keycode 94 = at numbersign ! less greater backslash keycode 95 = F11 keycode 96 = F12 keycode 97 = Home keycode 98 = Up Up Prior keycode 99 = Prior keycode 100 = Left Left Home keycode 101 = Begin keycode 102 = Right Right End keycode 103 = End keycode 104 = Down Down Next keycode 105 = Next keycode 106 = Insert keycode 107 = Delete keycode 108 = Delete keycode 109 = Control_R keycode 110 = Pause keycode 111 = Print keycode 112 = KP_Divide keycode 113 = Mode_switch keycode 114 = Break keycode 115 = Mode_switch keycode 116 = Mode_switch keycode 117 = Multi_key add Mod1 = Alt_L add Mod2 = Mode_switch }}} ==== Method 2 : changing symbol map : ==== [[BR]] [[BR]] [[BR]] This is for International keyboard (french - belgian/fr ) but [[BR]] you could adapt it easily to your keyboard [[BR]] [[BR]] Define your keyboard in xorg.conf [[BR]] and configure right apple key to alt-gr [[BR]] [[BR]] {{{ Section "InputDevice" Identifier "Generic Keyboard" Driver "kbd" Option "CoreKeyboard" Option "XkbRules" "xorg" Option "XkbLayout" "be" Option "XkbModel" "pc104" Option "XkbOptions" "lv3:rwin_switch" EndSection }}} I had to reconfigure some keys that were not properly defined even with macintosh layout (@#,<>..). [[BR]] [[BR]] I also made some custom changes to access development keys easily : * Alt-Gr < gives { * Shift AltGr > gives } * AltGr ( gives [ * Shift AltGr ) gives ] * mu key gives \ [[BR]] Here is the hacked part of my /etc/X11/xkb/symbols/be : [[BR]] {{{ partial default alphanumeric_keys xkb_symbols "basic" { include "latin" name[Group1]="Belgium"; key <AE01> { [ ampersand, 1, bar, exclamdown ] }; key <AE02> { [ eacute, 2, at, oneeighth ] }; key <AE03> { [ quotedbl, 3, numbersign, sterling ] }; key <AE04> { [apostrophe, 4, onequarter, onehalf ] }; key <AE05> { [ parenleft, 5, bracketleft, threeeighths ] }; key <AE06> { [ section, 6, asciicircum, fiveeighths ] }; key <AE07> { [ egrave, 7, braceleft, seveneighths ] }; key <AE08> { [ exclam, 8, bracketleft, trademark ] }; key <AE09> { [ ccedilla, 9, braceleft, plusminus ] }; key <AE10> { [ agrave, 0, braceright, degree ] }; key <AE11> { [parenright, degree, bracketright, questiondown ] }; key <AE12> { [ minus, underscore, dead_cedilla, dead_ogonek ] }; key <AD01> { [ a, A, at, Greek_OMEGA ] }; key <AD02> { [ z, Z, lstroke, Lstroke ] }; key <AD03> { [ e, E, EuroSign, cent ] }; key <AD11> { [dead_circumflex, dead_diaeresis, bracketleft, dead_abovering ] }; key <AD12> { [ dollar, asterisk, EuroSign, dead_macron ] }; key <AC01> { [ q, Q, ae, AE ] }; key <AC10> { [ m, M, dead_acute, dead_doubleacute ] }; key <AC11> { [ ugrave, percent, dead_acute, dead_caron ] }; key <LSGT> { [ at, numbersign, twosuperior, threesuperior ] }; key <BKSL> { [ backslash, sterling, dead_grave, dead_breve ] }; key <AB01> { [ w, W, guillemotleft, less ] }; key <AB07> { [ comma, question, dead_cedilla, masculine ] }; key <AB08> { [ semicolon, period, horizconnector, multiply ] }; key <AB09> { [ colon, slash, periodcentered, division ] }; key <AB10> { [ equal, plus, dead_tilde, dead_abovedot] }; key <TLDE> { [ less, greater, braceleft, braceright ] }; }}} ==== Configure special keys ==== [[BR]] [[BR]] Todo : fn keys are not catchable event ... [[BR]] * Install keylaunch with synaptic and put in in xinitrc script * go to your home directory and create a file .keylaunchrc * add this to the file : [[BR]] {{{ key=.*.F2:backlight +10 key=.*.F1:backlight -10 }}} Atlernatively, for backlight control, you can use a programm [[BR]] developped by alexinfurs availabel here : [[BR]]http://ubuntuforums.org/showthread.php?t=215801 [[BR]] === Temperatures === [[BR]] [[BR]] Hard Disk Temperature: [[BR]] {{{ sudo apt-get install hddtemp hddtemp /dev/sda }}} That prints the temperature of your harddisk [[BR]] [[BR]] CPUs Temperature : [[BR]] (This code was written by Jan Bernhardt and Ludovi Roussearu under GPL) [[BR]] {{{ sudo apt-get install subversion svn co https://svn.sourceforge.net/svnroot/mactel-linux mactel-linux cd mactel-linux/trunk/tools/temperature/ make sudo modprobe msr sudo ./coretemp }}} That prints temperatures of both CPUs [[BR]] [[BR]] [[BR]] [[BR]] === Bluetooth === [[BR]] [[BR]] I was able to send/receive files via bluetooth with a SE P910 phone. [[BR]] [[BR]] Install bluetooth packages : gnome or kde depending of what you like [[BR]] (gnome-bluetooth, kdebluetooth, bluesutil..) they are both working. [[BR]] Also obex libraries (qobex, libopenobex) [[BR]] [[BR]]''__For gnome users :__'' [[BR]] Launch System>Preference>Bluetooth manager [[BR]] Meneu Device>Scan ... you should see your phone [[BR]] [[BR]] On the phone search devices, you should see you computer [[BR]] [[BR]] Launch Applicarions>Accessoires>Bluetooth File Sharing [[BR]] [[BR]] Phone to computer : [[BR]] Send a file from the phone to the computer. A confirmation popup [[BR]] is launched and the file is in your home directory ! [[BR]] [[BR]] Computer to phone: [[BR]] Right click a file, send to, select your device.. that works [[BR]] === Touchpad === [[BR]] [[BR]] I could configure touchpad right click with mouseemu but after each right click it freezes .. [[BR]] If anybody find out how to get it working please give us feedback. [[BR]] [[BR]] Install mouseemu (with synaptic or apt-get --install mouseemu) [[BR]] Edit config file: [[BR]] {{{ sudo vi /etc/default/mouseemu }}} Add that content : [[BR]] [[BR]] {{{ MID_CLICK="-middle 56 272" # Alt + mouse click = middle click [[BR]] RIGHT_CLICK="-right 464 272" # Fn + mouse click = right click [[BR]] SCROLL="-scroll 87" # F11 + mouse movement [[BR]] TYPING_BLOCK="-typing-block 300" # block mouse for 300ms after a keypress }}} Restart mouseemu : [[BR]] [[BR]] {{{ sudo /etc/init.d/mouseemu restart }}} Requested by JDR. Any idea ? [[BR]] === External Mouse === [[BR]] [[BR]] A little bit out of scope but I manage to get my Logitech MX510 [[BR]] side button working with this in the xorg.conf : [[BR]] {{{ Section "InputDevice" Identifier "Configured Mouse" Driver "mouse" Option "CorePointer" Option "Device" "/dev/input/mice" Option "Protocol" "ExplorerPS/2" Option "Emulate3Buttons" "false" Option "Buttons" "5" Option "ZAxisMapping" "4 5" Option "ButtonMapping" "1 2 3 6 7" Option "Resolution" "800" EndSection }}} (source http://www.ubuntuforums.org/showthread.php?t=150116 )\ [[BR]] [[BR]] [[BR]] === WebCam === [[BR]] [[BR]] [[BR]] Ronald S. Bultje is writing a driver look at his blog : [[BR]]http://blogs.gnome.org/portal/rbultje [[BR]] [[BR]] Rapido get it working. His notes are here : [[BR]]http://www.ubuntuforums.org/showthread.php?t=225621 [[BR]] [[BR]] {{{ sudo apt-get install libusb-0.1-4 libusb-dev wget http://people.freedesktop.org/~rbultje/linux-uvc-0.1.0-b.tar.gz tar xvfz linux-uvc-0.1.0-b.tar.gz cd linux-uvc-0.1.0-b/ |
OpenGL renderer string: ATI Mobility Radeon X1600 OpenGL version string: 2.1.7276 Release''''' {{{ glxinfo | grep direct }}} '''''direct rendering: Yes''''' '''10.''' Here's my /etc/X11/attachment:xorg.conf file. '''11.''' CTRL+ALT+BACKSPACE freeze fix: {{{ sudo update-rc.d -f atieventsd remove (for CTRL+ALT+BACKSPACE to work you have to reboot!) }}} If you get errors concerning "LibGL.so.1", or if OpenGL games fail to start, then the application is searching for libGL in the wrong place. You can create a symbolic link to libGL by running this command: {{{ sudo ln -sf /usr/lib/libGL.so.1.2 /usr/lib/libGL.so.1 sudo ln -sf /usr/lib32/libGL.so.1.2 /usr/lib32/libGL.so.1 }}} Note: See http://wiki.cchtml.com/index.php/Ubuntu_Gutsy_Installation_Guide for more info if needed! Note: Use ATI Catalyst Control Center > Applications > Accessories > to change any of this mods(such as clone, single, big desktop) or to change screen resolution or to disable/enable monitors. Also see this guide that concerns video playback issues with Compiz Fusion : http://wiki.compiz-fusion.org/VideoPlayback == Screen Colors == attachment:screen_colors.jpg Mac``Book Pros can use a program called xcalib to emulate the screen coloring calibration of OS X. This isn't available in the Ubuntu repositories, so you'll have to download it and compile it. {{{ sudo apt-get install libxxf86vm-dev libxext-dev wget -c http://www.etg.e-technik.uni-erlangen.de/web/doe/xcalib/xcalib-source-0.8.tar.gz tar -zxvf xcalib-source-0.8.tar.gz cd xcalib-0.8/ make xcalib sudo mv xcalib /usr/local/bin/ sudo chmod 755 /usr/local/bin/xcalib sudo mount -t hfsplus /dev/sda2 /mnt #(this mounts the mac partition [/dev/sda2] on /mnt) sudo cp /mnt/Library/ColorSync/Profiles/Displays/* /usr/local/etc }}} Then, do an "ls /usr/local/etc" and note the name of the profile (for the next step). Finally, add the following line to the end of either /etc/gdm/Init/Default (for standard Ubuntu/Gnome) or /etc/kde3/kdm/Xsetup (for Kubuntu/KDE), before the final "exit" statement: {{{ /usr/local/bin/xcalib "/usr/local/etc/<insert name of profile here>" }}} Restart X (Ctrl-Alt-Backspace) and your Mac OS X color profile will load as X starts. == Sound / Audio & Microphone == attachment:speakers.jpg attachment:microphone.jpg 1. Double click on the Volume icon (it opens Volume Control), Select Edit > Preferences > enable Master, PCM, Front, Surround, Capture, Capture 1, Input Source, Mux, and Mux 1. 2. In Playback TAB -> Increase the volume to 100% and unmute (Master, PCM , Front, Surround). 3. In Recording TAB -> Unmute all and set 'Capture' and 'Capture 1' Volume to 95% and 'Mux' and 'Mux 1' to 50% of volume(higher results on static) 4. In Options TAB -> Set Input Source as: 'Mic' 5. Right-click on the volume applet and choose Preferences. Select "PCM" as the device to control. 6. Open the Sound preferences (System-Preferences-Sound in GNOME). Select "PCM" as the device to control. To install the latest sound driver, also applys for the ones who's '''Sound is not working by default'', try this method: {{{ rsync -avz --delete rsync://alsa.alsa-project.org/hg/alsa-driver alsa rsync -avz --delete rsync://alsa.alsa-project.org/hg/alsa-kernel alsa cd alsa cd alsa-driver ./hgcompile |
| Line 753: | Line 388: |
| sudo mkdir /mnt/mac sudo mount -t hfsplus /dev/sda2 /mnt/mac/ sudo ./extract /mnt/mac/System/Library/Extensions/IOUSBFamily.kext/Contents/PlugIns/AppleUSBVideoSupport.kext/Contents/MacOS/AppleUSBVideoSupport |
sudo /etc/init.d/alsasound stop sudo lsmod [verify all snd modules are unloaded] sudo rm /lib/modules/2.6.22-14-generic/ubuntu/media/snd-hda-intel/snd-hda-intel.ko sudo depmod -a sudo modprobe snd-hda-intel }}} From here you'll need to run alsamixer to unmute the Master, PCM, Line Out, and apply the settings described before. Note that you'll probably need to recompile after every kernel upgrade. == Wireless == attachment:wireless.jpg The Mac``Book Pro uses an Atheros wireless chipset that is not compatible with the current stable Mad``Wifi driver. However, the prerelease version of the driver is compatible, but is unstable in some cases. With proper installation and some modifications, it is adequate for everyday use. However, the Atheros HAL is binary and is not considered open-source software. To install the prerelease Mad``Wifi drivers, you can chooose to use daily snapshots or Subversion. Using daily snapshots: {{{ sudo apt-get install build-essential wget http://snapshots.madwifi.org/madwifi-trunk-current.tar.gz tar -zxvf madwifi<tab> cd madwifi<tab> make sudo make install sudo sed -i~ 's/^exit 0/modprobe ath_pci\nexit 0/' /etc/rc.local sudo sed -i~ 's/^exit 0/modprobe wlan_scan_sta\nexit 0/' /etc/rc.local sudo sed -i~ 's/^exit 0/iwpriv ath0 bgscan 0\nexit 0/' /etc/rc.local }}} Alternatively, using Subversion (be patient with the checkout, it may take a while): {{{ sudo apt-get install build-essential subversion svn co http://svn.madwifi.org/madwifi/trunk madwifi cd madwifi make sudo make install sudo sed -i~ 's/^exit 0/modprobe ath_pci\nexit 0/' /etc/rc.local sudo sed -i~ 's/^exit 0/modprobe wlan_scan_sta\nexit 0/' /etc/rc.local sudo sed -i~ 's/^exit 0/iwpriv ath0 bgscan 0\nexit 0/' /etc/rc.local }}} At this point the driver is installed and should work and the internal wifi will be enabled after reboot. Alternatively, you can skip the reboot and use these commands to insert the driver into the running kernel: {{{ sudo modprobe ath_pci sudo modprobe wlan_scan_sta sudo iwpriv ath0 bgscan 0 }}} Finally, the Mad``Wifi driver will prevent you from resuming after suspend-to-ram. To fix this, edit {{{/etc/default/acpi-support}}} and add the {{{ath_pci}}} driver to the {{{MODULES}}} variable, like so: {{{ # ... MODULES="ath_pci" # ... }}} == Temperatures & Fan Speed == attachment:temperatures.jpg === Hard Disk Temperature === attachment:hddlinux.jpg {{{ sudo apt-get install hddtemp }}} Select 'Yes', then 'OK', and 'OK' again. === CPUs Temperature === attachment:cpu.jpg add this to /etc/rc.local : {{{ modprobe coretemp sensors -s }}} To install lm-sensors and sensors-applet type in terminal : {{{ sudo apt-get install lm-sensors sensors-applet }}} Right Click in the main panel menu and 'Add to Panel...' the 'Hardware Sensors Monitor', then right click on Hardware Sensors Monitor applet and go to 'Preferences' > 'Sensors' and Enable > 'hddtemp' > '/dev/sda', and also Disable > 'libsensors' > temp2 to temp11 . === Manual Fan Speed Control === attachment:fan_speed1.jpg attachment:fan_speed2.jpg attachment:fan_speed3.jpg It is not recommended to set the fan speed manually, because the Linux kernel automatically adjusts the fan speed proportionally to the CPU temperature. If you really need to set it manually, this is the method to use. This method does not carry over through a reboot, so rebooting the computer reverts the fans to automatic speed. This assumes you have already installed applesmc. {{{ sudo modprobe applesmc echo applesmc | sudo tee -a /etc/modules }}} Copy the files to your home dir: attachment:fan_speed1 , attachment:fan_speed2 , attachment:fan_speed3 And to execute: sudo bash ~/fan_speed1 (...2 or 3) To see the fan speed, Enable 'Left Side' and 'Right Side' in the Sensors Applet Preferences. This way, you have three different configurations of fan speeds to use for different activities. It is recommended to set the fans to a minimum of 3500RPM (fan_speed1). When you are doing CPU-intensive activities, set the fans to 4000RPM (fan_speed2) or even 5000RPM (fan_speed3). == Reducing Power Consumption == attachment:powertop.png PowerTOP is a program that monitors a Linux system and gives suggestions on reducing power consumption. To install PowerTOP, enter this command in a terminal: {{{ sudo apt-get install build-essential libncurses5-dev libncursesw5-dev wget -c http://www.lesswatts.org/projects/powertop/download/powertop-1.9.tar.gz tar -xvf powertop-1.9.tar.gz cd powertop-1.9 make sudo make install sudo cp powertop /usr/sbin/powertop }}} PowerTOP must always be run as root, so use the following command to run it: {{{ sudo powertop }}} == Keyboard Fixes == attachment:altgr.jpg The Mac``Book Pro Keyboard doesn't have a Alt GR / Right Alt key, so there is no way to type Third Level Keys, such as "@" and "[" (these vary from country to country). Here is a solution: Go to System > Preferences > Keyboard. On the Layout Options tab, select "Third Level Choosers" and check "Press Enter key on keypad to choose 3rd level". Now you can use the Left Enter key (on the Mac``Book Pro keyboard) as a Alt Gr Key to access these Third Level Keys. == Right / Middle Clicking == attachment:rightclick.jpg First go to > System > Preferences > Keyboard, and click on 'Accessibility' button. check 'Enable keyboard accessibility features' and then go to 'Mouse keys' tab and check 'Enable Mouse Keys' and hit 'Close' button. Then create a text file as ~/.xmodmap containing the following text (Note: This sets Right Apple key as Right mouse click and Left Enter Key as Alt Gr key) {{{ keycode 116 = Pointer_Button3 keycode 108 = ISO_Level3_Shift }}} Add a call to xmodmap to your startup applications (System > Preferences > Sessions) [example]: {{{ xmodmap /home/fuz2y/.xmodmap }}} Restart X (Ctrl+Alt+Backspace) for the changes to take effect. == Function Keys == attachment:fuctionkeys.jpg Pommed is a daemon to support extra keys on apple computers. These include the brightness, eject, volume and others. Releases of Pommed 1.8 or up fully support the MacBook and Mac``Book Pro keyboards. It can be installed with this command: {{{ sudo apt-get install pommed }}} You can check your pommed version number with this command: {{{ pommed -v }}} The default behavior on Apple keyboards is to have the top row keys primarily function as media keys (brightness, volume, etc), and have the expected function keys (F1, F2, etc) accessible with using the fn keys. To reverse this behavior, edit the pommed configuration file with this command: {{{ sudo gedit /etc/pommed.conf }}} Change the value of fnmode to "2", and save. At any time, you can change this value back to "1" to return to the default behavior. To install the SVN Pommed version do this (not easy!): {{{ svn co svn://svn.debian.org/pommed sudo apt-get build-dep pommed cd pommed cd trunk make (follow instruction in INSTALL (file) to install it) }}} == Touchpad Fixes == attachment:touchpad.jpg Edit /etc/X11/xorg.conf and replace : Sections "InputDevice" Identifiers "Synaptics Touchpad" ... ... EndSection With : {{{ Section "InputDevice" Identifier "Synaptics Touchpad" Driver "synaptics" Option "SendCoreEvents" "true" Option "Device" "/dev/psaux" Option "Protocol" "auto-dev" Option "SHMConfig" "true" Option "LeftEdge" "10" Option "RightEdge" "1200" Option "TopEdge" "10" Option "BottomEdge" "370" Option "FingerLow" "10" Option "FingerHigh" "20" Option "MaxTapTime" "180" Option "MaxTapMove" "220" Option "SingleTapTimeout" "100" Option "MaxDoubleTapTime" "180" Option "LockedDrags" "off" Option "MinSpeed" "1.10" Option "MaxSpeed" "1.30" Option "AccelFactor" "0.08" Option "TapButton1" "1" Option "TapButton2" "3" Option "TapButton3" "2" Option "RTCornerButton" "0" Option "RBCornerButton" "0" Option "LTCornerButton" "0" Option "LBCornerButton" "0" Option "VertScrollDelta" "20" Option "HorizScrollDelta" "50" Option "HorizEdgeScroll" "0" Option "VertEdgeScroll" "0" Option "VertTwoFingerScroll" "1" Option "HorizTwoFingerScroll" "1" EndSection }}} == WebCam ( iSight ) & Ekiga / aMSN == attachment:webcam.jpg Quick and easy iSight setup: {{{ sudo modprobe -r uvcvideo sudo mv /lib/modules/2.6.22-14-generic/ubuntu/media/usbvideo/uvcvideo.ko /lib/modules/2.6.22-14-generic/ubuntu/media/usbvideo/uvcvideo.ko.original sudo apt-get install libusb-0.1-4 libusb-dev }}} Download the new all-in-one bundle, with firmware autoloader as provided by Ivan N. Zlatev by clicking here: http://files.i-nz.net/projects/linux-kernel/isight/uvcvideo-isight.tar.gz Change directories to where the tar file is. Then untar it: {{{ tar -xvf uvcvideo-isight.tar.gz }}} Now build and Install the uvcvideo module and load it: {{{ cd against-revision-140 make sudo make install |
| Line 758: | Line 681: |
| Then try a soft like Ekiga with V4L2 support. It works ! [[BR]] See rapido post for more details. http://www.ubuntuforums.org/showthread.php?t=225621 [[BR]] === Access MacOsX partition === [[BR]] [[BR]] You can still access (in read only mode) your MacOsX partition as this : [[BR]] [[BR]] {{{ sudo mkdir /mnt/mac [[BR]] mount -t hfsplus /dev/sda2 /mnt/mac [[BR]] cd /mnt/mac }}} === Troubleshooting === [[BR]] [[BR]] Heat ... under Linux MBP is even hotter than on MacOSx .. [[BR]] Especially the harddrive .. [[BR]] [[BR]] "kernel panic - not syncing: IO-APIC + timer doesn't work!" [[BR]] occurs often when the usb mouse is plugged at boot. So either [[BR]] apply patches or boot with mouse unplugged ... [[BR]] (I also had rarely this error with unplugged mouse ..) [[BR]] === Desktop === [[BR]] Finally .. find a suitable desktop for such a great OS on a great Machine ! [[BR]] [[BR]] I built mine on the theme : " Tux the pingouin crunched the apple " http://ubuntuforums.org/images/smilies/icon_wink.gif [[BR]] [[BR]] It is based on [http://www.gnome-look.org/content/show.php?content=40670 HumanBlue], [http://www.gnome-look.org/content/show.php?content=37099 HumanAzul], [http://www.gnome-look.org/content/show.php?content=15994 Tux-Mania] GDM and a [http://www.gnome-look.org/content/show.php?content=26229 Tux screenshot] comming from [[BR]]http://www.gnome-look.org [[BR]] [[BR]] To get rid of brown background while starting, change background color in /etc/gdm.conf [[BR]] ( BackgroundColor=#5B5B5B instead of BackgroundColor=#2b0600 ) [[BR]] [[BR]] |
Add this line to /etc/rc.local: {{{ modprobe uvcvideo }}} Reboot and test it: {{{ gst-launch-0.10 v4l2src ! video/x-raw-yuv,format=\(fourcc\)UYVY,width=640,height=480 ! ffmpegcolorspace ! ximagesink }}} Or try one of: {{{ gst-launch-0.10 v4l2src ! ffmpegcolorspace ! ximagesink - or - gst-launch-0.10 v4l2src ! ffmpegcolorspace ! video/x-raw-yuv,format=\(fourcc\)UYVY,width=640,height=480 ! ffmpegcolorspace ! ximagesink }}} On Ekiga > 'Preferences' > 'Video Plugin' select V4L2 , and press 'Detect devices' button. See Below in Applications Section how to install aMSN with tk/tcl-8.5 from sources, then go to 'aMSN' > 'Preferences' > 'Other' > 'Edit audio and video settings' to set up webcam. Please note that the webcam will not work in Flash applications. This is due to Flash Plugin 8 & 9 using the video driver V4L rather than V4L2, which is the version in use in Ubuntu 7.10 and most Linux distribution. As soon as the Flash Plugin starts to use V4L2 or anything else than V4L, this problem should be fixed. You can file a feature request for this on [http://www.adobe.com/cfusion/mmform/index.cfm?name=wishform Adobe's website] and you can find a discussion about this in the comments of [http://blogs.adobe.com/penguin.swf/2006/06/penguin_eyes_1.html a post on the Linux Flash Plugin developer's blog] == Access OS X, Windows Partition & Network Shares == attachment:hddosx.jpg attachment:hddwin.jpg attachment:shares.jpg To do so edit /etc/fstab , here's what you need to change : {{{ ## EFI ################################################################### #/dev/sda1 /media/EFI vfat defaults,utf8,umask=007,gid=46 0 1 ## Macintosh ############################################################# /dev/sda2 /media/Macintosh hfsplus defaults,uid=1000 0 2 ## Windows ############################################################### /dev/sda3 /media/Windows ntfs defaults,uid=1000 0 0 ## Network ############################################################### # Server //Server/public /Shares/Server-public cifs credentials=/home/fuz2y/.smbcredentials,uid=1000 0 0 }}} Then do the following in terminal: {{{ sudo gedit /etc/nsswitch.conf (change the line "hosts: file dns ..." to "file dns wins ...") sudo aptitude install winbind sudo mkdir /media/Macintosh sudo chmod 777 /media/Macintosh sudo mkdir /media/Windows sudo chmod 777 /media/Windows sudo mkdir /Shares/Server-public ('''Mount point for Network Share!''') sudo chmod 777 /Shares/Server-public }}} Also read this to create the file '~/.smbcredentials' : https://help.ubuntu.com/community/MountWindowsSharesPermanently#head-35cfd84dee9a392fa28c8795f37b6660a8786c35 And to apply: {{{ sudo umount -a sudo mount -a }}} == Mounting OS X partition with Read-Write permissions == attachment:hddosx.jpg Step 1 (if mounting read-write) - turn off journaling under Mac OS X: If you want to mount the Mac OS X-filesystem in read-write mode (not read-only) then you have to turn off journaling. 1. Boot into '''Mac OS X DVD''' 2. Start Utilities and a terminal 3. As root (e.g. with sudo) use diskutil to turn off journaling (Disabling journaling via diskutil): {{{ sudo /usr/sbin/diskutil disableJournal / }}} 4. Reboot into Linux. Use my "fstab" settings for Mac OS X partition. '''(cannot write on HFS+ filesystem anymore)''' : If you cannot write on the HFS+ filesystem anymore, boot into Mac OS X and perform a filesystem check. == Apple Remote Control == attachment:remotecontrol.jpg Apple's Remote Control is working by default in Ubuntu 7.10, but only allows you to control the Volume. So here's the tweaks to get it working on with other applications: {{{ sudo apt-get install inputlirc lirc lirc-x }}} And edit /etc/rc.local and add: {{{ /etc/init.d/inputlirc start /etc/init.d/inputlirc restart }}} Then go to > System > Preferences > Sessions , and add the following to the Startup list by this order: {{{ gksu irexec & /home/YOURACCOUNT/.lircrc gksu irxevent & /home/YOURACCOUNT/.lircrc }}} Note: YOURACCOUNT = your user name To make it work on the startup you have to edit sudoers and set the main user as no password requirement for the use of sudo command, here's how to: {{{ sudo /bin/bash nano /etc/sudoers }}} Here's what to change in /etc/sudoers : {{{ # User privilege specification root ALL=(ALL) ALL YOURACCOUNT ALL=(ALL) NOPASSWD: ALL # Members of the admin group may gain root privileges #%admin ALL=(ALL) ALL }}} Note: YOURACCOUNT = your user name. Then to create the .lircrc file in your home dir do this: {{{ exit gedit ~/.lircrc }}} Here's my attachment:.lircrc file. Note: If it doesnt work at the first time, execute the commands mannualy using Alt+F2: {{{ gksu irexec & /home/YOURACCOUNT/.lircrc gksu irxevent & /home/YOURACCOUNT/.lircrc gksu /etc/rc.local }}} == Apple Wireless Keyboard == attachment:apple_wireless_keyboard.png Note: If you've allready paired the keyboard on Mac OS X, boot into OS X and unpair it first! Install the package bluez-gnome {{{ sudo apt-get install bluetooth bluez-gnome }}} Find out the Bluetooth Hardware Device Address of the Apple Keyboard {{{ hcitool scan }}} Copy the resulting address: {{{ Scanning ... XX:XX:XX:XX:XX:XX Apple Wireless Keyboard }}} Edit the file /etc/bluetooth/hcid.conf {{{ sudo gedit /etc/bluetooth/hcid.conf }}} Enter the following stanza at the end of the file: {{{ device XX:XX:XX:XX:XX:XX { name "Apple Wireless Keyboard"; auth enable; encrypt enable; } }}} Save the file and close gedit. Enable HID-support at start-up: {{{ sudo gedit /etc/default/bluetooth }}} Change "HIDD_ENABLED=1" Save the file, close gedit Restart the Bluetooth subsystem: {{{ sudo /etc/init.d/bluetooth restart }}} * Restarting Bluetooth services... [ ok ] Complete the device pairing: Restart the keyboard again using the switch on the side to make it discoverable. Do not hit any keys on your Apple Keyboard unless this tutorial says so. It might cause all sorts of strange trouble during the pairing procedure. Right after restarting the keyboard, run the following command: {{{ sudo hidd --connect XX:XX:XX:XX:XX:XX }}} Ubuntu will now try to connect to the keyboard without showing any progress bar or other output. Enter the PIN 0000 and hit the enter key (both on your Apple Keyboard). Right after hitting enter, a notification window should pop up on your desktop asking you for the PIN you just entered. Enter it. "hidd" should finish without further outputs. You should now be set up. == Desktop Tweaks == attachment:desktoptweaks.jpg === Ubuntu Fusion Theme === ||<:> [https://wiki.ubuntu.com/MacBookPro?action=AttachFile&do=get&target=desktop1.jpg https://wiki.ubuntu.com/MacBookPro?action=AttachFile&do=get&target=desktop.jpg] [[BR]]~-Click image for larger view-~ |||| [https://wiki.ubuntu.com/MacBookPro?action=AttachFile&do=get&target=cube.jpg https://wiki.ubuntu.com/MacBookPro?action=AttachFile&do=get&target=cube1.jpg] [[BR]]~-Click image for larger view-~ |||| attachment:login1.jpg || Here's my latest Desktop theme (Instructions inside!): http://pwp.netcabo.pt/fuz2y/fuz2y_desktop_theme_v1.2.tar.gz contact email: fuz2y.pt@gmail.com Enjoy a futuristic Ubuntu Look! :) Also note this to enable changing splash screen background color: It seems like commenting the following lines out in "/etc/gdm/PreSession/Default" seems to solve the problem and the color then the color should be left at whatever color is set as the login screen background until the desktop loads. {{{ # Default value #if [ "x$BACKCOLOR" = "x" ]; then # BACKCOLOR="#dab082" #fi #"$XSETROOT" -cursor_name left_ptr -solid "$BACKCOLOR" }}} === Fonts like Mac OS X === attachment:fonts.jpg By default, Ubuntu uses a style of font rendering different than that used on Mac OS X. You may prefer fonts similar to those on Mac OS X, and you can have these on Ubuntu by doing the following: 1. Open the Appearance preference panel (System-Preferences-Appearance) 2. Click Fonts, and select the "Subpixel smoothing" option. 3. Click Details, and select "Slight" hinting, Enjoy! === Ubuntu Animated Mouse Cursor === attachment:cursor.jpg {{{ sudo apt-get install gcursor wget -c http://www.gnome-look.org/CONTENT/content-files/66327-UbuntuCrystalcursors.tar.gz tar -zxvf 66327-UbuntuCrystalcursors.tar.gz cd Crystalcursors make sudo make install sudo apt-get install kdelibs-data kdelibs4c2a libarts1c2a libartsc0 libaudio2 libavahi-qt3-1 liblua50 liblualib50 libopenexr2c2a libqt3-mt kdebase-bin sudo ./choose.sh (select 'white' and wait for the next screen prompt and press 'OK') gcursor (select 'crystalwhite' and press 'Install Theme' button) }}} Then Reboot and enjoy your new animated cursor :) === Compiz Fusion Icon, Compiz Settings Manager and Emerald + Themes === attachment:compiz.jpg attachment:emerald.jpg To install do this: {{{ sudo apt-get install git git-core compiz-dev compizconfig-settings-manager emerald git-clone git://anongit.opencompositing.org/users/crdlb/fusion-icon cd fusion-icon make sudo make install }}} Go to System > Preferences > Sessions and add "fusion-icon" to the Startup To enable Emerald, start fusion-icon and right click on it and select window decorator: emerald. To install Emerald Themes do this: {{{ sudo apt-get install subversion git clone git://anongit.compiz-fusion.org/fusion/decorators/emerald-themes cd emerald-themes/themes svn cp https://svn.generation.no/emerald-themes . mv emerald-themes/* . rm -rf emerald-themes cd themes ./import.sh cd .. mv themes ~/.emerald/ }}} === Avant Window Navigator === attachment:awn.jpg To install AWN with nice Skins and Curves Effect follow this guide: http://ubuntuforums.org/showthread.php?t=572019 === Screenlets === attachment:screenlets.jpg Download the latest deb package from here: https://sourceforge.net/project/showfiles.php?group_id=216036&package_id=260818 == Applications == attachment:apps.jpg === Automatix2 & Video Codecs === attachment:automatix.jpg To install get it from here: http://www.getautomatix.com/wiki/index.php?title=Installation#Ubuntu_7.10_.28Gutsy_AMD64.29 Go to > System Tools > automatix2 In 'Codecs and Plugins' select: 'Ubuntu Restricted Extras and Multimedia Codecs' and also 'W64-DVD Codecs' and Install === Ubuntu Tweak === attachment:ubuntutweak.jpg Download and run the deb from here: http://www.getdeb.net/app.php?name=Ubuntu+Tweak === AVG Anti-Virus Free Edition 7.5 === attachment:avg.jpg Useful to remove virus from Windows partitions ;) To install do this in the terminal: {{{ wget -c http://free3.grisoft.cz/filedir/inst/avg75fld-r51-a1243.i386.deb sudo dpkg -i --force-architecture avg75fld-r51-a1243.i386.deb }}} Right click on the 'Panel Menu Launcher' > 'Edit Menus' > 'Applications' > 'Accessories' > 'AVG for Linux Workstation' Right click it and select 'Properties' and change 'Command' line to: gksu avggui To launch AVG go to > Accessories > AVG for Linux Workstation. === SMPlayer SVN + Themes === attachment:smplayer.jpg Nice video player based on mplayer, to install: Download it at: http://downloads.sourceforge.net/smplayer/smplayer-0.5.62.tar.bz2 Read the file Install.txt included in the package to know how compile it. Get themes here, i'm using default with icon set 'blackPanther-VistaLike': http://downloads.sourceforge.net/smplayer/smplayer-themes_0.1.14_all.deb Also see this guide that concerns video playback issues with Compiz Fusion : http://wiki.compiz-fusion.org/VideoPlayback === VLC Media Player === attachment:vlc.png An alternative to the SMPlayer is VLC. It plays just about everything once you install the video codecs using Automatix. Also, it doesn't use the massive QT4 libraries like the SMPlayer, so it's easy to install. Make sure you have a universal mirror and type: {{{ sudo apt-get update sudo apt-get install vlc vlc-plugin-esd mozilla-plugin-vlc }}} Also see this guide that concerns video playback issues with Compiz Fusion : http://wiki.compiz-fusion.org/VideoPlayback === aMSN SVN (Multi-OS MSN messenger with Tcl & TK 8.5) === attachment:amsn.jpg Here's how to compile and install aMSN latest version with plugins and anti-alising support : {{{ sudo apt-get install build-essential libx11-dev libc6-dev imagemagick libjpeg-dev libpng12-dev libxft-dev tcl8.4 tk8.4 tcltls msttcorefonts checkinstall debhelper subversion libsnack2 mkdir ~/amsn_svn cd ~/amsn_svn wget -c http://kent.dl.sourceforge.net/sourceforge/tcl/tcl8.5b3-src.tar.gz wget -c http://kent.dl.sourceforge.net/sourceforge/tcl/tk8.5b3-src.tar.gz tar -zxvf tcl8.5b3-src.tar.gz tar -zxvf tk8.5b3-src.tar.gz }}} *64 bit OS only: {{{ cd ~/amsn_svn/tcl8.5b3/unix ./configure --prefix=/usr --enable-64bit make sudo checkinstall -y --pkgversion 8.5b3 --pkgname amsn_tcl8.5b3 cd ~/amsn_svn/tk8.5b3/unix ./configure --prefix=/usr --enable-xft --enable-64bit make sudo checkinstall -y --pkgversion 8.5b3 --pkgname amsn_tk8.5b3 }}} *END *32 bit OS only: {{{ cd ~/amsn_svn/tcl8.5b3/unix ./configure --prefix=/usr make sudo checkinstall -y --pkgversion 8.5b3 --pkgname amsn_tcl8.5b3 cd ~/amsn_svn/tk8.5b3/unix ./configure --prefix=/usr --enable-xft make sudo checkinstall -y --pkgversion 8.5b3 --pkgname amsn_tk8.5b3 }}} *END {{{ sudo apt-cache search amsn cd /usr/bin sudo rm wish sudo rm tclsh sudo ln -sf wish8.5 wish sudo ln -sf tclsh8.5 tclsh cd /usr/lib sudo ln -sf tcl8.5 tcl sudo ln -sf tk8.5 tk sudo ln -sf libtk8.5.so libtk.so sudo ln -sf libtcl8.5.so libtcl.so sudo ln -sf libtclstub8.5.a libtclstub.a sudo ln -sf libtkstub8.5.a libtkstub.a sudo ldconfig sudo cp ~/amsn_svn/tcl8.5b3/library/msgcat/msgcat.tcl /usr/lib/tcl8.5 sudo cp ~/amsn_svn/tcl8.5b3/library/msgcat/pkgIndex.tcl /usr/lib/tcl8.5 cd ~/amsn_svn sudo rm -rf amsn sudo rm -rf amsn-extras svn co https://amsn.svn.sourceforge.net/svnroot/amsn/trunk/amsn amsn svn co https://amsn.svn.sourceforge.net/svnroot/amsn/trunk/amsn-extras amsn-extras cd amsn ./configure --prefix=/usr make sudo make deb cd distrib/DEB sudo dpkg -i amsn*.deb }}} Run aMSN (Panel Menu > Internet > aMSN), or type in terminal: {{{ amsn }}} Copy / Install extra Plugins and Skins to aMSN: For Plugins: {{{ mv ~/amsn_svn/amsn-extras/plugins ~/.amsn/ }}} For Skins: {{{ mv ~/amsn_svn/amsn-extras/skins ~/.amsn/ }}} And here's my skin (Cannabis 3.4): http://www.amsn-project.net/getURL.php?id=158 Enjoy :) === Man DVD (Video DVD Creation) === attachment:mandvd.jpg Download and run it from here: http://www.getdeb.net/app.php?name=ManDVD === Wine (Run Windows Applications on Linux) === attachment:wine.jpg {{{ wget -q http://wine.budgetdedicated.com/apt/387EE263.gpg -O- | sudo apt-key add - sudo wget http://wine.budgetdedicated.com/apt/sources.list.d/gutsy.list -O /etc/apt/sources.list.d/winehq.list sudo apt-get update sudo apt-get install wine }}} === VMware Server & Bootcamp partitions === attachment:vmware.jpg Installing VMWare Server on Ubuntu 7.10 1. Download VMware Server source from the VMware website: http://vmware.com/download/server/ 2. Download this installer patch: http://knihovny.cvut.cz/ftp/pub/vmware/vmware-any-any-update113.tar.gz ( source reference: http://igordevlog.blogspot.com/2007/07/vmware-in-ubuntu-gutsy-kernel-2622.html ) 3. Extract all the archives to some location on your system (tar -zxvf VMware-server* ; tar -zxvf vmware*) 4. Ensure that you have build-essential installed in order to compile these sources (sudo aptitude install build-essential) 5. Install the xinetd server (sudo aptitude install xinetd) 6. Run sudo ./vmware-install.pl located within the vmware-server-* unpacked archive. 7. Select all the default options *EXCEPT* do not compile the modules at this point. (Do you want this program to try to build the vmmon module for your system? NO) 8. Run sudo ./runme.pl located within the vmware-any* archive. This will launch step 8. 9. Select the default options and this time answer YES to compile the proper modules. 10. Run vmware-server using the command vmware or via your Applications Menu. Note: if you update your kernel you will need to re-run the scripts to regenerate and recompile VMware Server for your updated kernel. == Games == attachment:games.jpg === World Of Warcraft === attachment:wow.jpg See this page how get World Of Warcraft running: https://help.ubuntu.com/community/WorldofWarcraft === Enemy Territory Quake Wars === attachment:etqw.jpg Download the game client from: http://vlaai.snt.utwente.nl/pub/games/etqw/retail/client/linux/ETQW-client-1.2-full.r5.x86.run To install type in terminal: {{{ sudo apt-get install ia32-libs sudo chmod +x ETQW-client-12-full_r5_x86.run sudo ./ETQW-client-12-full_r5_x86.run }}} To Enable 3D Anti-alising and other tweaks do this: {{{ sudo gedit /usr/local/games/etqw/base/autoexec.cfg }}} Past this into the file and save it: {{{ g_skipIntro 1 com_allowconsole 1 com_showFPS 1 com_unlockfps 1 com_unlock_maxFPS 60 r_aspectratio 0 r_customwidth 1024 r_customheight 768 seta r_mode "5" seta r_multiSamples "4" }}} Also run ETQW as root (run with Compiz disabled): {{{ gksu /usr/local/games/etqw/etqw }}} To run ETQW with Compiz enabled do this: 1. First to allow you to run a new X display you need to edit the "/etc/X11/Xwrapper.config" file: {{{ sudo cp /etc/X11/Xwrapper.config /etc/X11/Xwrapper.config.custom sudo su md5sum /etc/X11/Xwrapper.config > /var/lib/x11/Xwrapper.config.md5sum exit sudo dpkg-reconfigure x11-common }}} Then make sure you change the first option to "Anybody" and hit enter twice. 2. Next we have to set your ~/.Xauthority file up. This may look tricky but it's very straight forward, all you need to do is add a line using a special key we find. So, in a terminal type: {{{ xauth (after xauth press Return and type:) list }}} And you should get an output something like this: {{{ spanky/unix:0 MIT-MAGIC-COOKIE-1 52f29a10d18753f7c26e0c2fe7fdc64f localhost.localdomain/unix:0 MIT-MAGIC-COOKIE-1 52f29a10d18753f7c26e0c2fe7fdc64f }}} Yours WILL be different, thats ok. Now we need to add a new line and then exit to save it. So we type in "add :1.0 MIT-MAGIC-COOKIE-1" followed by that long alpha numeric string. I've highlighted mine in bold above so you know what I'm talking about but remember to use yours. So for me I would type the following: {{{ add :1.0 MIT-MAGIC-COOKIE-1 52f29a10d18753f7c26e0c2fe7fdc64f exit }}} Remember YOU have to use YOUR OWN sting of numbers and letters copied form the output we got earlier, mine is just an example. Ok? I know it's a bit abstract but hopefully this is clear enough. 3. Create the script "x.etqw": {{{ sudo gedit /usr/local/bin/x.etqw }}} And paste the following: {{{ #!/bin/bash xinit /usr/local/games/etqw/etqw "$@" -- :1 }}} 4. Now we need to make it executable and move it to the right place: {{{ sudo chmod a+x /usr/local/bin/x.etqw }}} 5. Run "x.etqw" in a terminal, ETQW should run on a new X server. To access your desktop you need to press: {{{ CTRL + ALT + F7 }}} 6. To go back to ETQW press: {{{ CTRL + ALT + F9 }}} (or whichever screen your game appears on...mine was on F9). === PunkBuster === attachment:pb.jpg Here's how to run Punkbuster Updater: {{{ wget -c http://websec.evenbalance.com/downloads/linux/pbsetup.run sudo apt-get install upx-ucl upx -d pbsetup.run sudo chmod +x pbsetup.run sudo ./pbsetup.run }}} == Troubleshooting == attachment:questions.jpg No one is leaving their contact in case of any assistance, but here's mine :) fuz2y.pt@gmail.com === Bootsplash fix === I experienced a blank screen during booting and shutdown (with a C2Duo-15"-MBP). After searching the web and messing around with the vga=XXX kernel parameter without success, I found the following procedure to help: Edit file {{{ /etc/usplash.conf }}} and replace the resolution there with your display's actual resolution (for the 15" this is 1440 by 900) After editing, enter {{{ sudo update-initramfs -u -k `uname -r` }}} Happy Booting! |
Installing Ubuntu on a MacBook Pro
ContentsBRTableOfContents(2) |
attachment:macbookpro.png
About
This page describes installing Ubuntu 7.10 (Gutsy Gibbon) on the 1st and 2nd Generation MacBook Pro (Core Duo & Core 2 Duo).
For the 3rd Generation MacBook Pro (Santa Rosa) you will need to read the [https://wiki.ubuntu.com/MacBookPro/SantaRosa Santa Rosa MacBook Pro wiki] for additional information and instructions.
For the MacBook you will need to read the [https://wiki.ubuntu.com/MacBook MacBook wiki].
Special Thanks
Thanks to Ubuntu forum members for their feedback and the people providing Apple hardware drivers for Linux, especially Nicolas Boichat, Ronald S. Bultje, Jan Bernhardt, Ludovic Rousseau, João Pedro Serrano (Fuz2y) ... and special thanks to the people that have been continually editing this wiki ![]()
Links
Following is a list of other wikis providing details on running Linux on the MacBook or MacBook Pro:
The [https://help.ubuntu.com/community/MacBook Ubuntu MacBook wiki] also deals with the proper configuration of Apple hardware and installation.
The [http://wiki.debian.org/MacBook Debian MacBook wiki] - Debian Installation guide.
The [http://gentoo-wiki.com/HARDWARE_Apple_MacBook Gentoo MacBook wiki] - Partitioning, access to ext2/3 and UID sync'ing are covered quite well there (and somewhat sparse in this document)
The [http://wiki.onmac.net/index.php/Triple_Boot_via_BootCamp OnMac wiki] has triple-boot instructions, and also some details on restoring things to their initial state (removing bootcamp, linux, etc.).
Installing with Dual Boot (OS X, Linux)
attachment:OSX.png attachment:Linux.png
Note: This is for a MacBook Pro with OS X allready installed
To ajust Fans speed in OS X install: http://homepage.mac.com/holtmann/eidac/software/smcfancontrol2/index.html
To access Linux partition in OS X install: http://sourceforge.net/project/showfiles.php?group_id=64713&package_id=101149&release_id=468470
1. Install the rEFIt Boot Menu from (http://refit.sf.net).
2. Use BootCamp to partition the drive (if using Tiger, don't bother burning a Windows boot CD; if using Leopard, it won't ask you).
3. Restart the computer with Ubuntu 7.10 Desktop CD inserted (64-bit or 32-bit version). rEFIT should recognize the CD and give you option to "boot Linux from CD". Scroll to this option using the down arrow or click on it with your mouse.
4. Click on 'Install' icon on the desktop. Select the appropriate language, select 'Keyboard Layout' as 'Macintosh', select 'Manual' partitioning, then 'Forward'.
5. BootCamp will have created '/dev/sda3' which should be roughly the size of the partition you created. Select 'dev/sda3' and delete it by clicking 'Delete Partition'. This should now be 'free space'.
6. Select the 'free space' and click 'New Partition'. Set the size to approximately 1 GB less than the total amount of free space. Format it as an 'ext3' type partition and set the 'Mount Point' to '/'. Set the formatting to occur at the beginning. Click OK.
7. This should leave approximately 1 GB of free space. Select this free space and click 'New Partition'. Format it as a 'swap' type partition. Set the formatting to occur at the beginning. Click OK.
8. Now click 'Forward'. This will give some scary warnings about FAT 32 not being partitioned correctly. Click 'Ignore' and proceed with the install. After being prompted for a user and computer name, check to make sure that the formatting is occurring at partitions #3 and #4 and click 'Install'.
9. Follow Ubuntu installation instructions from here.
Installing with Triple Boot (OS X, Vista & Linux)
attachment:OSX.png attachment:Windows.png attachment:Linux.png
Mac OS X Installation
attachment:OSX.png
Note: If you have Mac OS X allready installed proceed to the next section.
1. Insert the Mac OS X 10.5 (Leopard) Install DVD into the drive, and start the computer while holding the 'c' key.
2. In the OS X installer menu, select 'Utilities' > 'Disk Utility...'
3. Select the main hard disk icon, go to 'Partition' tab, set the 'Volume scheme' to '1 Partition'. Name it "Macintosh", and format it as 'Mac OS Extended".
4. Exit 'Disk Utility' and continue the installation, select 'Macintosh' as the destination and continue. To save space, click 'Customize' and filter the 'Printer drivers', selecting only the ones you need, and deselect 'Language translations'. Click 'Done', and 'Install'.
To ajust Fans speed in OS X install: http://homepage.mac.com/holtmann/eidac/software/smcfancontrol2/index.html
To access Linux partition in OS X install: http://sourceforge.net/project/showfiles.php?group_id=64713&package_id=101149&release_id=468470
Windows Vista Installation
attachment:Windows.png
1. Boot into your newly installed OS X and perform a software update (System Preferences > Software Update) on the system (a restart will be required).
2. Then go to 'Utilities' > 'Boot Camp Assistant', click 'Continue' and resize 'Macintosh' to 1/3 of total disk space, leaving the rest for Windows. Click 'Partition'.
3. Insert Windows Vista DVD (32-bit) and hit 'Start Installation". The computer will then restart and boot into the Windows Vista Installation DVD).
4. Select 'Disk 0 Partition 3 BOOTCAMP', hit 'Drive Options (Advanced)' and format it, then it 'Next' to start installation.
5. After Restart, insert 'Mac OS X 10.5 (Leopard) Install DVD' and install the Boot Camp Drivers necessary for Vista and Restart
6. After Restart, install 'Input Remapper': http://www.olofsson.info/index.html?inputremapper.html
(Enables auto-fan-speed & some keyboard features)
7. Reboot the computer.
Note: If your planning to play Games and take full advantage of your graphic card in Vista, I recommend to install the graphics driver with this tool(ATI only!): http://www.driverheaven.net/modtool/
Also to access Linux partition in vista install 'Ext2 IFS': http://www.fs-driver.org/download.html
And to access OS X partition in vista install 'Mac Drive' : http://www.mediafour.com/products/macdrive/
Vista Desktop Tweaks
[https://wiki.ubuntu.com/MacBookPro?action=AttachFile&do=get&target=vista_desktop.jpg https://wiki.ubuntu.com/MacBookPro?action=AttachFile&do=get&target=vista_desktop1.jpg] BRClick image for larger view |
attachment:cubedesktop.jpg |
|
1. For custom Themes, install 'Vista Glazz': http://www.codegazer.com/vistaglazz/ (I'm using the theme 'Panorama': http://www.myvistathemes.com/skins-and-themes/panorama-theme-free-download/ )
2. For the Desktop applications Bar, install 'ObjectDock': http://www.stardock.com/products/objectdock/ (I'm using the theme 'Leopard 3D Light': http://www.wincustomize.com/skins.aspx?skinid=13731&libid=29 )
3. For the Linux hard-disk icon, install 'IconPackager': http://www.stardock.com/products/iconpackager/ (start 'IconPackager' > 'Icons and Cursors' > 'Drives' > right click on the linux hard-disk and hit 'Change Icon...' and browse for attachment:linux_hdd_vista.ico
4. For Destop Cube & other effects, install 'Cube Desktop': http://www.cubedesktop.com/
Boot Menu installation
attachment:refit_logo.png
1. Boot into Mac OS X.
2. Install the rEFIt Boot Menu from (http://refit.sf.net).
3. Open a Mac OS X terminal window (in Applications > Utilities) and type:
cd /efi/refit
./enable-always.sh
4. Reboot the computer.
Ubuntu Installation
attachment:Linux.png
1. Start the computer with the Ubuntu 7.10 Desktop CD inserted (32-bit or 64-bit), and boot into the Live CD.
2. Click on 'Install' icon in the desktop, select 'Keyboard layout' as 'Macintosh', and click 'Forward'. Select 'manual' partitioning and click 'Forward'.
3. Select the Windows partition (/dev/sda3) and click 'Edit partition'. Change the value of 'New partition size' to 1/2 that of the existing partition. Also set the 'Mount point' to '/media/Windows', and click 'OK'. Select the new 'free space' and click on 'New partition'. Change the value of 'New partition size' to approximately 1GB less that of the total free space, and confirm that the new partition type is 'ext3'. Set the 'Mount point' to '/' and click 'OK'. Select the remaining ~1GB of free space, and click on 'New partition'. Change the partition type to 'swap' and click 'OK'. Now click 'Partition' to continue.
4. Set your user settings and click 'Forward'. Before installing, click on 'Advanced' and change '(hd0)' to '(hd0,3)' . Click 'OK', and 'Install'.
5. When installation is complete, reboot into Ubuntu Linux OS. Go to 'System' > 'Administration' > 'Software Sources'. In the 'Third-Party Software' tab, check the 1st software source. In the 'Updates' tab, check 'Pre-releases Updates' and 'Unsupported Updates'. Click 'Close' and 'Reload'.
6. Go to 'System' > 'Administration' > 'Update Manager' hit 'Check', 'Install Updates' and restart.
7. Read the following Video section for choosing which video driver to use.
Video
attachment:video_card.png
The following only applies to the 1st and 2nd Generation MacBook Pro models. If you are using a 3rd Generation MacBook Pro (Santa Rosa), see [https://wiki.ubuntu.com/MacBookPro/SantaRosa MacBookPro SantaRosa Guide]. You have 2 choices for the video driver:
1. The open source radeonhd driver. An old experimental version (0.0.1) of this driver is included in Ubuntu 7.10 in universe repository; you should not use this version. An updated version (1.1.0) is available in an external repository (see below). Current version does not support 3D acceleration. This is the best driver choice if you don't need 3D acceleration.
2. The closed source fglrx driver. This is the proprietary driver from ATI. It supports 3D accelerations.
radeonhd
Note: You are currently not able to use the "radeon" driver for the following cards and derivatives:
X1300 / R515 based cards.
X1600 / R530 based cards.
X1800 / R520 based cards.
X1900 / R580 based cards.
The backported version for 7.10 can be found at: https://launchpad.net/~tormodvolden/+archive
More info about this driver: https://help.ubuntu.com/community/RadeonDriver
Installation is simple:
1. Make sure you have not installed the fglrx (ATI proprietary) driver (check under System -> Administration -> Restricted Drivers).
2. Open System -> Administration -> Software sources. Go to "Third Party Software" tab click Add and add this line:
deb http://ppa.launchpad.net/tormodvolden/ubuntu gutsy main
Click Add another time and also add this:
deb-src http://ppa.launchpad.net/tormodvolden/ubuntu gutsy main
and enable both. .
3. Open a terminal and install the radeonhd driver:
sudo apt-get install xserver-xorg-video-radeonhd-dbg
Make sure you are installing version 1.1.0 or later and not the 0.0.1 version found in the official repository. Else redo step 2.
4. You can now disable the repositories enabled in step 2 if you don't want any more updates from that repositories.
5. The driver is not automatically selected by the xorg server (see [https://bugs.launchpad.net/ubuntu/+source/xserver-xorg-video-radeonhd/+bug/174309 radeonhd driver is not selected by the server bug] for update). Then, edit /etc/X11/xorg.conf and change the line
Driver "vesa"
with
Driver "radeonhd"
6. Reboot or restart your X server. You are now using the open source radeonhd driver.
fglrx
1. If running 64-bit Ubuntu, install the 32-bit libs before installing the Video driver with this command:
sudo apt-get install ia32-libs
2. To install latest ATI driver (8.1) with 3D acceleration support do this:
cd ~/Desktop
mkdir ATI
cd ATI

sudo apt-get update
sudo apt-get install build-essential fakeroot dh-make debhelper debconf libstdc++5 dkms

wget -c --no-check-certificate https://a248.e.akamai.net/f/674/9206/0/www2.ati.com/drivers/linux/64bit/ati-driver-installer-8-01-x86.x86_64.run

sh ati-driver-installer-8-01-x86.x86_64.run --buildpkg Ubuntu/gutsy

gksu gedit /etc/default/linux-restricted-modules-common
3. Add "fglrx" to the line "DISABLED_MODULES" File: /etc/default/linux-restricted-modules-common
DISABLED_MODULES="fglrx"
4. Remove any old fglrx kernel and install the new fglrx debs
sudo rm /usr/src/fglrx-kernel*.deb

sudo dpkg -i xorg-driver-fglrx_8.452.1-1*.deb fglrx-kernel-source_8.452.1-1*.deb fglrx-amdcccle_8.452.1-1*.deb

'''''(Type Y if promped to overwright any files)'''''

sudo apt-get install -f
5. 3D desktop effects
sudo gedit /usr/bin/compiz
# Driver whitelist WHITELIST="fglrx nvidia intel ati radeon i810" # blacklist based on the pci ids # BLACKLIST_PCIIDS="$T" BLACKLIST_PCIIDS=""
6. Reboot!
sudo shutdown -hr now
7. After Reboot:
sudo aticonfig --initial
sudo aticonfig --overlay-type=Xv
8. Reboot again!
sudo shutdown -hr now
9. Verifying
fglrxinfo
display: :0.0 screen: 0 OpenGL vendor string: ATI Technologies Inc. OpenGL renderer string: ATI Mobility Radeon X1600 OpenGL version string: 2.1.7276 Release
glxinfo | grep direct
direct rendering: Yes
10. Here's my /etc/X11/attachment:xorg.conf file.
11. CTRL+ALT+BACKSPACE freeze fix:
sudo update-rc.d -f atieventsd remove

(for CTRL+ALT+BACKSPACE to work you have to reboot!)
If you get errors concerning "LibGL.so.1", or if OpenGL games fail to start, then the application is searching for libGL in the wrong place. You can create a symbolic link to libGL by running this command:
sudo ln -sf /usr/lib/libGL.so.1.2 /usr/lib/libGL.so.1
sudo ln -sf /usr/lib32/libGL.so.1.2 /usr/lib32/libGL.so.1
Note: See http://wiki.cchtml.com/index.php/Ubuntu_Gutsy_Installation_Guide for more info if needed!
Note: Use ATI Catalyst Control Center > Applications > Accessories > to change any of this mods(such as clone, single, big desktop) or to change screen resolution or to disable/enable monitors.
Also see this guide that concerns video playback issues with Compiz Fusion : http://wiki.compiz-fusion.org/VideoPlayback
Screen Colors
attachment:screen_colors.jpg
MacBook Pros can use a program called xcalib to emulate the screen coloring calibration of OS X. This isn't available in the Ubuntu repositories, so you'll have to download it and compile it.
sudo apt-get install libxxf86vm-dev libxext-dev
wget -c http://www.etg.e-technik.uni-erlangen.de/web/doe/xcalib/xcalib-source-0.8.tar.gz
tar -zxvf xcalib-source-0.8.tar.gz
cd xcalib-0.8/
make xcalib
sudo mv xcalib /usr/local/bin/
sudo chmod 755 /usr/local/bin/xcalib

sudo mount -t hfsplus /dev/sda2 /mnt
#(this mounts the mac partition [/dev/sda2] on /mnt)

sudo cp /mnt/Library/ColorSync/Profiles/Displays/* /usr/local/etc
Then, do an "ls /usr/local/etc" and note the name of the profile (for the next step).
Finally, add the following line to the end of either /etc/gdm/Init/Default (for standard Ubuntu/Gnome) or /etc/kde3/kdm/Xsetup (for Kubuntu/KDE), before the final "exit" statement:
/usr/local/bin/xcalib "/usr/local/etc/<insert name of profile here>"
Restart X (Ctrl-Alt-Backspace) and your Mac OS X color profile will load as X starts.
Sound / Audio & Microphone
attachment:speakers.jpg attachment:microphone.jpg
1. Double click on the Volume icon (it opens Volume Control), Select Edit > Preferences > enable Master, PCM, Front, Surround, Capture, Capture 1, Input Source, Mux, and Mux 1.
2. In Playback TAB -> Increase the volume to 100% and unmute (Master, PCM , Front, Surround).
3. In Recording TAB -> Unmute all and set 'Capture' and 'Capture 1' Volume to 95% and 'Mux' and 'Mux 1' to 50% of volume(higher results on static)
4. In Options TAB -> Set Input Source as: 'Mic'
5. Right-click on the volume applet and choose Preferences. Select "PCM" as the device to control.
6. Open the Sound preferences (System-Preferences-Sound in GNOME). Select "PCM" as the device to control.
To install the latest sound driver, also applys for the ones who's Sound is not working by default, try this method: From here you'll need to run alsamixer to unmute the Master, PCM, Line Out, and apply the settings described before. Note that you'll probably need to recompile after every kernel upgrade.
attachment:wireless.jpg The MacBook Pro uses an Atheros wireless chipset that is not compatible with the current stable MadWifi driver. However, the prerelease version of the driver is compatible, but is unstable in some cases. With proper installation and some modifications, it is adequate for everyday use. However, the Atheros HAL is binary and is not considered open-source software. To install the prerelease MadWifi drivers, you can chooose to use daily snapshots or Subversion. Using daily snapshots: Alternatively, using Subversion (be patient with the checkout, it may take a while): At this point the driver is installed and should work and the internal wifi will be enabled after reboot. Alternatively, you can skip the reboot and use these commands to insert the driver into the running kernel: Finally, the MadWifi driver will prevent you from resuming after suspend-to-ram. To fix this, edit /etc/default/acpi-support and add the ath_pci driver to the MODULES variable, like so:
attachment:temperatures.jpg
attachment:hddlinux.jpg Select 'Yes', then 'OK', and 'OK' again.
attachment:cpu.jpg add this to /etc/rc.local : To install lm-sensors and sensors-applet type in terminal : Right Click in the main panel menu and 'Add to Panel...' the 'Hardware Sensors Monitor', then right click on Hardware Sensors Monitor applet and go to 'Preferences' > 'Sensors' and Enable > 'hddtemp' > '/dev/sda', and also Disable > 'libsensors' > temp2 to temp11 .
attachment:fan_speed1.jpg attachment:fan_speed2.jpg attachment:fan_speed3.jpg It is not recommended to set the fan speed manually, because the Linux kernel automatically adjusts the fan speed proportionally to the CPU temperature. If you really need to set it manually, this is the method to use. This method does not carry over through a reboot, so rebooting the computer reverts the fans to automatic speed. This assumes you have already installed applesmc. Copy the files to your home dir: attachment:fan_speed1 , attachment:fan_speed2 , attachment:fan_speed3 And to execute: sudo bash ~/fan_speed1 (...2 or 3) To see the fan speed, Enable 'Left Side' and 'Right Side' in the Sensors Applet Preferences. This way, you have three different configurations of fan speeds to use for different activities. It is recommended to set the fans to a minimum of 3500RPM (fan_speed1). When you are doing CPU-intensive activities, set the fans to 4000RPM (fan_speed2) or even 5000RPM (fan_speed3).
attachment:powertop.png PowerTOP is a program that monitors a Linux system and gives suggestions on reducing power consumption. To install PowerTOP, enter this command in a terminal: PowerTOP must always be run as root, so use the following command to run it:
attachment:altgr.jpg The MacBook Pro Keyboard doesn't have a Alt GR / Right Alt key, so there is no way to type Third Level Keys, such as "@" and "[" (these vary from country to country). Here is a solution: Go to System > Preferences > Keyboard. On the Layout Options tab, select "Third Level Choosers" and check "Press Enter key on keypad to choose 3rd level". Now you can use the Left Enter key (on the MacBook Pro keyboard) as a Alt Gr Key to access these Third Level Keys.
attachment:rightclick.jpg First go to > System > Preferences > Keyboard, and click on 'Accessibility' button. check 'Enable keyboard accessibility features' and then go to 'Mouse keys' tab and check 'Enable Mouse Keys' and hit 'Close' button. Then create a text file as ~/.xmodmap containing the following text (Note: This sets Right Apple key as Right mouse click and Left Enter Key as Alt Gr key) Add a call to xmodmap to your startup applications (System > Preferences > Sessions) [example]: Restart X (Ctrl+Alt+Backspace) for the changes to take effect.
attachment:fuctionkeys.jpg Pommed is a daemon to support extra keys on apple computers. These include the brightness, eject, volume and others. Releases of Pommed 1.8 or up fully support the MacBook and MacBook Pro keyboards. It can be installed with this command: You can check your pommed version number with this command: The default behavior on Apple keyboards is to have the top row keys primarily function as media keys (brightness, volume, etc), and have the expected function keys (F1, F2, etc) accessible with using the fn keys. To reverse this behavior, edit the pommed configuration file with this command: Change the value of fnmode to "2", and save. At any time, you can change this value back to "1" to return to the default behavior. To install the SVN Pommed version do this (not easy!):
attachment:touchpad.jpg Edit /etc/X11/xorg.conf and replace : Sections "InputDevice" With :
attachment:webcam.jpg Quick and easy iSight setup: Download the new all-in-one bundle, with firmware autoloader as provided by Ivan N. Zlatev by clicking here: http://files.i-nz.net/projects/linux-kernel/isight/uvcvideo-isight.tar.gz Change directories to where the tar file is. Then untar it: Now build and Install the uvcvideo module and load it: Add this line to /etc/rc.local: Reboot and test it: Or try one of: On Ekiga > 'Preferences' > 'Video Plugin' select V4L2 , and press 'Detect devices' button. See Below in Applications Section how to install aMSN with tk/tcl-8.5 from sources, then go to 'aMSN' > 'Preferences' > 'Other' > 'Edit audio and video settings' to set up webcam. Please note that the webcam will not work in Flash applications. This is due to Flash Plugin 8 & 9 using the video driver V4L rather than V4L2, which is the version in use in Ubuntu 7.10 and most Linux distribution. As soon as the Flash Plugin starts to use V4L2 or anything else than V4L, this problem should be fixed. You can file a feature request for this on [http://www.adobe.com/cfusion/mmform/index.cfm?name=wishform Adobe's website] and you can find a discussion about this in the comments of [http://blogs.adobe.com/penguin.swf/2006/06/penguin_eyes_1.html a post on the Linux Flash Plugin developer's blog]
attachment:hddosx.jpg attachment:hddwin.jpg attachment:shares.jpg To do so edit /etc/fstab , here's what you need to change : Then do the following in terminal: Also read this to create the file '~/.smbcredentials' : https://help.ubuntu.com/community/MountWindowsSharesPermanently#head-35cfd84dee9a392fa28c8795f37b6660a8786c35 And to apply:
attachment:hddosx.jpg Step 1 (if mounting read-write) - turn off journaling under Mac OS X: If you want to mount the Mac OS X-filesystem in read-write mode (not read-only) then you have to turn off journaling. 1. Boot into 2. Start Utilities and a terminal 3. As root (e.g. with sudo) use diskutil to turn off journaling (Disabling journaling via diskutil): 4. Reboot into Linux. Use my "fstab" settings for Mac OS X partition.
attachment:remotecontrol.jpg Apple's Remote Control is working by default in Ubuntu 7.10, but only allows you to control the Volume. So here's the tweaks to get it working on with other applications: And edit /etc/rc.local and add: Then go to > System > Preferences > Sessions , and add the following to the Startup list by this order: Note: YOURACCOUNT = your user name To make it work on the startup you have to edit sudoers and set the main user as no password requirement for the use of sudo command, here's how to: Here's what to change in /etc/sudoers : Note: YOURACCOUNT = your user name. Then to create the .lircrc file in your home dir do this: Here's my attachment:.lircrc file. Note: If it doesnt work at the first time, execute the commands mannualy using Alt+F2:
attachment:apple_wireless_keyboard.png Note: If you've allready paired the keyboard on Mac OS X, boot into OS X and unpair it first! Install the package bluez-gnome Find out the Bluetooth Hardware Device Address of the Apple Keyboard Copy the resulting address: Edit the file /etc/bluetooth/hcid.conf Enter the following stanza at the end of the file: Save the file and close gedit. Enable HID-support at start-up: Change "HIDD_ENABLED=1" Save the file, close gedit Restart the Bluetooth subsystem: * Restarting Bluetooth services... [ ok ] Complete the device pairing: Restart the keyboard again using the switch on the side to make it discoverable. Do not hit any keys on your Apple Keyboard unless this tutorial says so. It might cause all sorts of strange trouble during the pairing procedure. Right after restarting the keyboard, run the following command: Ubuntu will now try to connect to the keyboard without showing any progress bar or other output. Enter the PIN 0000 and hit the enter key (both on your Apple Keyboard). Right after hitting enter, a notification window should pop up on your desktop asking you for the PIN you just entered. Enter it. "hidd" should finish without further outputs. You should now be set up.
attachment:desktoptweaks.jpg
[https://wiki.ubuntu.com/MacBookPro?action=AttachFile&do=get&target=desktop1.jpg https://wiki.ubuntu.com/MacBookPro?action=AttachFile&do=get&target=desktop.jpg] BRClick image for larger view [https://wiki.ubuntu.com/MacBookPro?action=AttachFile&do=get&target=cube.jpg https://wiki.ubuntu.com/MacBookPro?action=AttachFile&do=get&target=cube1.jpg] BRClick image for larger view attachment:login1.jpg Here's my latest Desktop theme (Instructions inside!): http://pwp.netcabo.pt/fuz2y/fuz2y_desktop_theme_v1.2.tar.gz contact email: fuz2y.pt@gmail.com Enjoy a futuristic Ubuntu Look! Also note this to enable changing splash screen background color: It seems like commenting the following lines out in "/etc/gdm/PreSession/Default" seems to solve the problem and the color then the color should be left at whatever color is set as the login screen background until the desktop loads.
attachment:fonts.jpg By default, Ubuntu uses a style of font rendering different than that used on Mac OS X. You may prefer fonts similar to those on Mac OS X, and you can have these on Ubuntu by doing the following: 1. Open the Appearance preference panel (System-Preferences-Appearance) 2. Click Fonts, and select the "Subpixel smoothing" option. 3. Click Details, and select "Slight" hinting, Enjoy!
attachment:cursor.jpg Then Reboot and enjoy your new animated cursor
attachment:compiz.jpg attachment:emerald.jpg To install do this: Go to System > Preferences > Sessions and add "fusion-icon" to the Startup To enable Emerald, start fusion-icon and right click on it and select window decorator: emerald. To install Emerald Themes do this:
attachment:awn.jpg To install AWN with nice Skins and Curves Effect follow this guide: http://ubuntuforums.org/showthread.php?t=572019
attachment:screenlets.jpg Download the latest deb package from here: https://sourceforge.net/project/showfiles.php?group_id=216036&package_id=260818
attachment:apps.jpg
attachment:automatix.jpg To install get it from here: http://www.getautomatix.com/wiki/index.php?title=Installation#Ubuntu_7.10_.28Gutsy_AMD64.29 Go to > System Tools > automatix2 In 'Codecs and Plugins' select: 'Ubuntu Restricted Extras and Multimedia Codecs' and also 'W64-DVD Codecs' and Install
attachment:ubuntutweak.jpg Download and run the deb from here: http://www.getdeb.net/app.php?name=Ubuntu+Tweak
attachment:avg.jpg Useful to remove virus from Windows partitions Right click on the 'Panel Menu Launcher' > 'Edit Menus' > 'Applications' > 'Accessories' > 'AVG for Linux Workstation' Right click it and select 'Properties' and change 'Command' line to: gksu avggui To launch AVG go to > Accessories > AVG for Linux Workstation.
attachment:smplayer.jpg Nice video player based on mplayer, to install: Download it at: http://downloads.sourceforge.net/smplayer/smplayer-0.5.62.tar.bz2 Read the file Install.txt included in the package to know how compile it. Get themes here, i'm using default with icon set 'blackPanther-VistaLike': http://downloads.sourceforge.net/smplayer/smplayer-themes_0.1.14_all.deb Also see this guide that concerns video playback issues with Compiz Fusion : http://wiki.compiz-fusion.org/VideoPlayback
attachment:vlc.png An alternative to the SMPlayer is VLC. It plays just about everything once you install the video codecs using Automatix. Also, it doesn't use the massive QT4 libraries like the SMPlayer, so it's easy to install. Make sure you have a universal mirror and type: Also see this guide that concerns video playback issues with Compiz Fusion : http://wiki.compiz-fusion.org/VideoPlayback
attachment:amsn.jpg Here's how to compile and install aMSN latest version with plugins and anti-alising support : *64 bit OS only: *END *32 bit OS only: *END Run aMSN (Panel Menu > Internet > aMSN), or type in terminal: Copy / Install extra Plugins and Skins to aMSN: For Plugins: For Skins: And here's my skin (Cannabis 3.4): http://www.amsn-project.net/getURL.php?id=158 Enjoy
attachment:mandvd.jpg Download and run it from here: http://www.getdeb.net/app.php?name=ManDVD
attachment:wine.jpg
attachment:vmware.jpg Installing VMWare Server on Ubuntu 7.10 1. Download VMware Server source from the VMware website: http://vmware.com/download/server/ 2. Download this installer patch: http://knihovny.cvut.cz/ftp/pub/vmware/vmware-any-any-update113.tar.gz ( source reference: http://igordevlog.blogspot.com/2007/07/vmware-in-ubuntu-gutsy-kernel-2622.html ) 3. Extract all the archives to some location on your system (tar -zxvf VMware-server* ; tar -zxvf vmware*) 4. Ensure that you have build-essential installed in order to compile these sources (sudo aptitude install build-essential) 5. Install the xinetd server (sudo aptitude install xinetd) 6. Run sudo ./vmware-install.pl located within the vmware-server-* unpacked archive. 7. Select all the default options *EXCEPT* do not compile the modules at this point. (Do you want this program to try to build the vmmon module for your system? NO) 8. Run sudo ./runme.pl located within the vmware-any* archive. This will launch step 8. 9. Select the default options and this time answer YES to compile the proper modules. 10. Run vmware-server using the command vmware or via your Applications Menu. Note: if you update your kernel you will need to re-run the scripts to regenerate and recompile VMware Server for your updated kernel.
attachment:games.jpg
attachment:wow.jpg See this page how get World Of Warcraft running: https://help.ubuntu.com/community/WorldofWarcraft
attachment:etqw.jpg Download the game client from: http://vlaai.snt.utwente.nl/pub/games/etqw/retail/client/linux/ETQW-client-1.2-full.r5.x86.run To install type in terminal: To Enable 3D Anti-alising and other tweaks do this: Past this into the file and save it: Also run ETQW as root (run with Compiz disabled): To run ETQW with Compiz enabled do this: 1. First to allow you to run a new X display you need to edit the "/etc/X11/Xwrapper.config" file: Then make sure you change the first option to "Anybody" and hit enter twice. 2. Next we have to set your ~/.Xauthority file up. This may look tricky but it's very straight forward, all you need to do is add a line using a special key we find. So, in a terminal type: And you should get an output something like this: Yours WILL be different, thats ok. Now we need to add a new line and then exit to save it. So we type in "add :1.0 MIT-MAGIC-COOKIE-1" followed by that long alpha numeric string. I've highlighted mine in bold above so you know what I'm talking about but remember to use yours. So for me I would type the following: Remember YOU have to use YOUR OWN sting of numbers and letters copied form the output we got earlier, mine is just an example. Ok? I know it's a bit abstract but hopefully this is clear enough. 3. Create the script "x.etqw": And paste the following: 4. Now we need to make it executable and move it to the right place: 5. Run "x.etqw" in a terminal, ETQW should run on a new X server. To access your desktop you need to press: 6. To go back to ETQW press: (or whichever screen your game appears on...mine was on F9).
attachment:pb.jpg Here's how to run Punkbuster Updater:
attachment:questions.jpg No one is leaving their contact in case of any assistance, but here's mine
I experienced a blank screen during booting and shutdown (with a C2Duo-15"-MBP). After searching the web and messing around with the vga=XXX kernel parameter without success, I found the following procedure to help: Edit file and replace the resolution there with your display's actual resolution (for the 15" this is 1440 by 900) After editing, enter Happy Booting! rsync -avz --delete rsync://alsa.alsa-project.org/hg/alsa-driver alsa
rsync -avz --delete rsync://alsa.alsa-project.org/hg/alsa-kernel alsa
cd alsa
cd alsa-driver
./hgcompile
make
sudo make install
sudo /etc/init.d/alsasound stop
sudo lsmod [verify all snd modules are unloaded]
sudo rm /lib/modules/2.6.22-14-generic/ubuntu/media/snd-hda-intel/snd-hda-intel.ko
sudo depmod -a
sudo modprobe snd-hda-intel
Wireless
sudo apt-get install build-essential
wget http://snapshots.madwifi.org/madwifi-trunk-current.tar.gz
tar -zxvf madwifi<tab>
cd madwifi<tab>
make
sudo make install
sudo sed -i~ 's/^exit 0/modprobe ath_pci\nexit 0/' /etc/rc.local
sudo sed -i~ 's/^exit 0/modprobe wlan_scan_sta\nexit 0/' /etc/rc.local
sudo sed -i~ 's/^exit 0/iwpriv ath0 bgscan 0\nexit 0/' /etc/rc.local
sudo apt-get install build-essential subversion
svn co http://svn.madwifi.org/madwifi/trunk madwifi
cd madwifi
make
sudo make install
sudo sed -i~ 's/^exit 0/modprobe ath_pci\nexit 0/' /etc/rc.local
sudo sed -i~ 's/^exit 0/modprobe wlan_scan_sta\nexit 0/' /etc/rc.local
sudo sed -i~ 's/^exit 0/iwpriv ath0 bgscan 0\nexit 0/' /etc/rc.local
sudo modprobe ath_pci
sudo modprobe wlan_scan_sta
sudo iwpriv ath0 bgscan 0
# ...
MODULES="ath_pci"

# ...
Temperatures & Fan Speed
Hard Disk Temperature
sudo apt-get install hddtemp
CPUs Temperature
modprobe coretemp
sensors -s
sudo apt-get install lm-sensors sensors-applet
Manual Fan Speed Control
sudo modprobe applesmc
echo applesmc | sudo tee -a /etc/modules
Reducing Power Consumption
sudo apt-get install build-essential libncurses5-dev libncursesw5-dev

wget -c http://www.lesswatts.org/projects/powertop/download/powertop-1.9.tar.gz

tar -xvf powertop-1.9.tar.gz

cd powertop-1.9

make

sudo make install

sudo cp powertop /usr/sbin/powertop
sudo powertop
Keyboard Fixes
Right / Middle Clicking
keycode 116 = Pointer_Button3
keycode 108 = ISO_Level3_Shift
xmodmap /home/fuz2y/.xmodmap
Function Keys
sudo apt-get install pommed
pommed -v
sudo gedit /etc/pommed.conf
svn co svn://svn.debian.org/pommed

sudo apt-get build-dep pommed
cd pommed
cd trunk
make
(follow instruction in INSTALL (file) to install it)
Touchpad Fixes
Section "InputDevice"
        Identifier      "Synaptics Touchpad"
        Driver          "synaptics"
        Option          "SendCoreEvents"        "true"
        Option          "Device"                "/dev/psaux"
        Option          "Protocol"              "auto-dev"
        Option          "SHMConfig"             "true"
        Option          "LeftEdge"              "10"
        Option          "RightEdge"             "1200"
        Option          "TopEdge"               "10"
        Option          "BottomEdge"            "370"
        Option          "FingerLow"             "10"
        Option          "FingerHigh"            "20"
        Option          "MaxTapTime"            "180"
        Option          "MaxTapMove"            "220"
        Option          "SingleTapTimeout"      "100"
        Option          "MaxDoubleTapTime"      "180"
        Option          "LockedDrags"           "off"
        Option          "MinSpeed"              "1.10"
        Option          "MaxSpeed"              "1.30"
        Option          "AccelFactor"           "0.08"
        Option          "TapButton1"            "1"
        Option          "TapButton2"            "3"
        Option          "TapButton3"            "2"
        Option          "RTCornerButton"        "0"
        Option          "RBCornerButton"        "0"
        Option          "LTCornerButton"        "0"
        Option          "LBCornerButton"        "0"
        Option          "VertScrollDelta"       "20"
        Option          "HorizScrollDelta"      "50"
        Option          "HorizEdgeScroll"       "0"
        Option          "VertEdgeScroll"        "0"
        Option          "VertTwoFingerScroll"   "1"
        Option          "HorizTwoFingerScroll"  "1"
EndSection
WebCam ( iSight ) & Ekiga / aMSN
sudo modprobe -r uvcvideo
sudo mv /lib/modules/2.6.22-14-generic/ubuntu/media/usbvideo/uvcvideo.ko /lib/modules/2.6.22-14-generic/ubuntu/media/usbvideo/uvcvideo.ko.original
sudo apt-get install libusb-0.1-4 libusb-dev
tar -xvf uvcvideo-isight.tar.gz
cd against-revision-140
make
sudo make install
sudo modprobe uvcvideo
modprobe uvcvideo
gst-launch-0.10 v4l2src ! video/x-raw-yuv,format=\(fourcc\)UYVY,width=640,height=480 ! ffmpegcolorspace ! ximagesink
gst-launch-0.10 v4l2src ! ffmpegcolorspace ! ximagesink
 - or -
gst-launch-0.10 v4l2src ! ffmpegcolorspace ! video/x-raw-yuv,format=\(fourcc\)UYVY,width=640,height=480 ! ffmpegcolorspace ! ximagesink
Access OS X, Windows Partition & Network Shares
## EFI ###################################################################

#/dev/sda1      /media/EFI     vfat  defaults,utf8,umask=007,gid=46  0 1

## Macintosh #############################################################

/dev/sda2       /media/Macintosh     hfsplus      defaults,uid=1000  0  2

## Windows ###############################################################

/dev/sda3       /media/Windows       ntfs         defaults,uid=1000  0  0

## Network ###############################################################

# Server

//Server/public /Shares/Server-public cifs credentials=/home/fuz2y/.smbcredentials,uid=1000 0 0
sudo gedit /etc/nsswitch.conf

(change the line "hosts: file dns ..." to "file dns wins ...")

sudo aptitude install winbind

sudo mkdir /media/Macintosh

sudo chmod 777 /media/Macintosh

sudo mkdir /media/Windows

sudo chmod 777 /media/Windows

sudo mkdir /Shares/Server-public ('''Mount point for Network Share!''')

sudo chmod 777 /Shares/Server-publicsudo umount -a
sudo mount -a
Mounting OS X partition with Read-Write permissions
sudo /usr/sbin/diskutil disableJournal /
Apple Remote Control
sudo apt-get install inputlirc lirc lirc-x
/etc/init.d/inputlirc start
/etc/init.d/inputlirc restart
gksu irexec & /home/YOURACCOUNT/.lircrc
gksu irxevent & /home/YOURACCOUNT/.lircrc
sudo /bin/bash

nano /etc/sudoers
# User privilege specification
root    ALL=(ALL) ALL
YOURACCOUNT   ALL=(ALL) NOPASSWD: ALL

# Members of the admin group may gain root privileges
#%admin ALL=(ALL) ALL
exit
gedit ~/.lircrc
gksu irexec & /home/YOURACCOUNT/.lircrc
gksu irxevent & /home/YOURACCOUNT/.lircrc
gksu /etc/rc.local
Apple Wireless Keyboard
sudo apt-get install bluetooth bluez-gnome
hcitool scan
Scanning ...

XX:XX:XX:XX:XX:XX Apple Wireless Keyboard
sudo gedit /etc/bluetooth/hcid.conf
device XX:XX:XX:XX:XX:XX {

name "Apple Wireless Keyboard";

auth enable;

encrypt enable;

}sudo gedit /etc/default/bluetooth
sudo /etc/init.d/bluetooth restart
sudo hidd --connect XX:XX:XX:XX:XX:XX
Desktop Tweaks
Ubuntu Fusion Theme
![]()
# Default value
#if [ "x$BACKCOLOR" = "x" ]; then
# BACKCOLOR="#dab082"
#fi

#"$XSETROOT" -cursor_name left_ptr -solid "$BACKCOLOR"
Fonts like Mac OS X
Ubuntu Animated Mouse Cursor
sudo apt-get install gcursor

wget -c http://www.gnome-look.org/CONTENT/content-files/66327-UbuntuCrystalcursors.tar.gz
tar -zxvf 66327-UbuntuCrystalcursors.tar.gz
cd Crystalcursors
make
sudo make install

sudo apt-get install kdelibs-data kdelibs4c2a libarts1c2a libartsc0 libaudio2 libavahi-qt3-1 liblua50 liblualib50 libopenexr2c2a libqt3-mt kdebase-bin

sudo ./choose.sh
(select 'white' and wait for the next screen prompt and press 'OK')

gcursor
(select 'crystalwhite' and press 'Install Theme' button)
![]()
Compiz Fusion Icon, Compiz Settings Manager and Emerald + Themes
sudo apt-get install git git-core compiz-dev compizconfig-settings-manager emerald
git-clone git://anongit.opencompositing.org/users/crdlb/fusion-icon
cd fusion-icon
make
sudo make install
sudo apt-get install subversion
git clone git://anongit.compiz-fusion.org/fusion/decorators/emerald-themes

cd emerald-themes/themes
svn cp https://svn.generation.no/emerald-themes .
mv emerald-themes/* .
rm -rf emerald-themes
cd themes
./import.sh
cd ..
mv themes ~/.emerald/
Avant Window Navigator
Screenlets
Applications
Automatix2 & Video Codecs
Ubuntu Tweak
AVG Anti-Virus Free Edition 7.5
![]() To install do this in the terminal:
To install do this in the terminal: wget -c http://free3.grisoft.cz/filedir/inst/avg75fld-r51-a1243.i386.deb
sudo dpkg -i --force-architecture avg75fld-r51-a1243.i386.deb
SMPlayer SVN + Themes
VLC Media Player
sudo apt-get update
sudo apt-get install vlc vlc-plugin-esd mozilla-plugin-vlc
aMSN SVN (Multi-OS MSN messenger with Tcl & TK 8.5)
sudo apt-get install build-essential libx11-dev libc6-dev imagemagick libjpeg-dev libpng12-dev libxft-dev tcl8.4 tk8.4 tcltls msttcorefonts checkinstall debhelper subversion libsnack2

mkdir ~/amsn_svn
cd ~/amsn_svn
wget -c http://kent.dl.sourceforge.net/sourceforge/tcl/tcl8.5b3-src.tar.gz
wget -c http://kent.dl.sourceforge.net/sourceforge/tcl/tk8.5b3-src.tar.gz
tar -zxvf tcl8.5b3-src.tar.gz
tar -zxvf tk8.5b3-src.tar.gz
cd ~/amsn_svn/tcl8.5b3/unix
./configure --prefix=/usr --enable-64bit
make
sudo checkinstall -y --pkgversion 8.5b3 --pkgname amsn_tcl8.5b3

cd ~/amsn_svn/tk8.5b3/unix
./configure --prefix=/usr --enable-xft --enable-64bit
make
sudo checkinstall -y --pkgversion 8.5b3 --pkgname amsn_tk8.5b3
cd ~/amsn_svn/tcl8.5b3/unix
./configure --prefix=/usr
make
sudo checkinstall -y --pkgversion 8.5b3 --pkgname amsn_tcl8.5b3

cd ~/amsn_svn/tk8.5b3/unix
./configure --prefix=/usr --enable-xft
make
sudo checkinstall -y --pkgversion 8.5b3 --pkgname amsn_tk8.5b3
sudo apt-cache search amsn

cd /usr/bin
sudo rm wish
sudo rm tclsh
sudo ln -sf wish8.5 wish
sudo ln -sf tclsh8.5 tclsh
cd /usr/lib
sudo ln -sf tcl8.5 tcl
sudo ln -sf tk8.5 tk
sudo ln -sf libtk8.5.so libtk.so
sudo ln -sf libtcl8.5.so libtcl.so
sudo ln -sf libtclstub8.5.a libtclstub.a
sudo ln -sf libtkstub8.5.a libtkstub.a
sudo ldconfig
sudo cp ~/amsn_svn/tcl8.5b3/library/msgcat/msgcat.tcl /usr/lib/tcl8.5
sudo cp ~/amsn_svn/tcl8.5b3/library/msgcat/pkgIndex.tcl /usr/lib/tcl8.5
cd ~/amsn_svn
sudo rm -rf amsn
sudo rm -rf amsn-extras

svn co https://amsn.svn.sourceforge.net/svnroot/amsn/trunk/amsn amsn

svn co https://amsn.svn.sourceforge.net/svnroot/amsn/trunk/amsn-extras amsn-extras

cd amsn
./configure --prefix=/usr
make
sudo make deb
cd distrib/DEB
sudo dpkg -i amsn*.deb
amsn
mv ~/amsn_svn/amsn-extras/plugins ~/.amsn/
mv ~/amsn_svn/amsn-extras/skins ~/.amsn/
![]()
Man DVD (Video DVD Creation)
Wine (Run Windows Applications on Linux)
wget -q http://wine.budgetdedicated.com/apt/387EE263.gpg -O- | sudo apt-key add -
sudo wget http://wine.budgetdedicated.com/apt/sources.list.d/gutsy.list -O /etc/apt/sources.list.d/winehq.list

sudo apt-get update
sudo apt-get install wine
VMware Server & Bootcamp partitions
Games
World Of Warcraft
Enemy Territory Quake Wars
sudo apt-get install ia32-libs

sudo chmod +x ETQW-client-12-full_r5_x86.run
sudo ./ETQW-client-12-full_r5_x86.run
sudo gedit /usr/local/games/etqw/base/autoexec.cfg
g_skipIntro 1
com_allowconsole 1
com_showFPS 1
com_unlockfps 1
com_unlock_maxFPS 60
r_aspectratio 0
r_customwidth 1024
r_customheight 768
seta r_mode "5"
seta r_multiSamples "4"
gksu /usr/local/games/etqw/etqw
sudo cp /etc/X11/Xwrapper.config /etc/X11/Xwrapper.config.custom
sudo su
md5sum /etc/X11/Xwrapper.config > /var/lib/x11/Xwrapper.config.md5sum
exit
sudo dpkg-reconfigure x11-common
xauth
(after xauth press Return and type:)
list
spanky/unix:0  MIT-MAGIC-COOKIE-1  52f29a10d18753f7c26e0c2fe7fdc64f
localhost.localdomain/unix:0  MIT-MAGIC-COOKIE-1  52f29a10d18753f7c26e0c2fe7fdc64f
add :1.0 MIT-MAGIC-COOKIE-1 52f29a10d18753f7c26e0c2fe7fdc64f
exit
sudo gedit /usr/local/bin/x.etqw
xinit /usr/local/games/etqw/etqw "$@" -- :1
sudo chmod a+x /usr/local/bin/x.etqw
CTRL + ALT + F7
CTRL + ALT + F9
PunkBuster
wget -c http://websec.evenbalance.com/downloads/linux/pbsetup.run
sudo apt-get install upx-ucl
upx -d pbsetup.run
sudo chmod +x pbsetup.run
sudo ./pbsetup.run
Troubleshooting
![]() fuz2y.pt@gmail.com
fuz2y.pt@gmail.com Bootsplash fix
/etc/usplash.conf
sudo update-initramfs -u -k `uname -r`
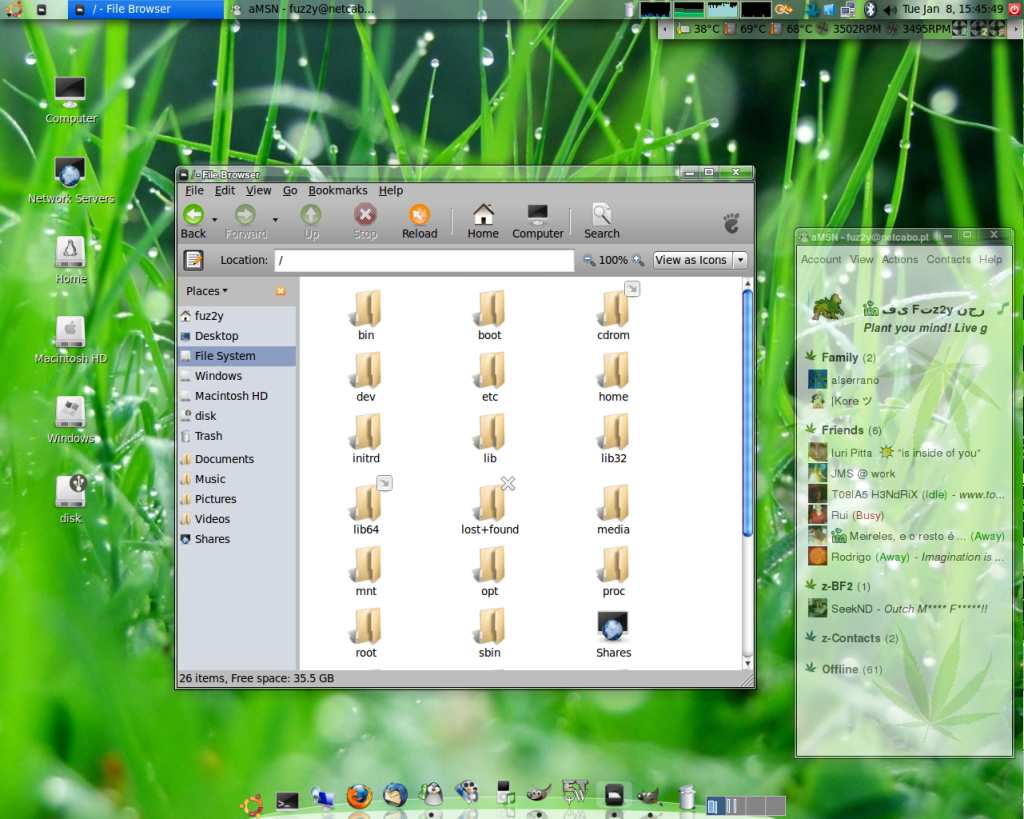
MacBookPro (last edited 2008-08-06 17:00:24 by localhost)