This HowTo describes the procedure to turn a fresh ubuntu-umpc install into an ubuntu netbook install with some easy steps.
The ubuntu-umpc image can be found here
The image runs an installable livesession, in case you want to modify the live session to have an installable netbook image see this page
Replacing the packages
The instructions below assume you have not made any changes to the default settings after a fresh install. First remove the apps specific for the touchscreen centric Ubuntu umpc image including it's desktop settings
sudo apt-get remove --purge devilspie xautomation midbrowser ubuntu-mobile-default-settings
Now install the apps that make up an Ubuntu netbook desktop (note that the netbook-launcher package is shipped with ubuntu-umpc, there is no need to install it)
sudo apt-get install firefox go-home-applet maximus window-picker-applet
Delete your users ~/.gconf directory that holds the desktop settings to make sure all umpc settings are gone.
Log out of the desktop
Automatically turn on the netbook apps
There will soon be a package in a personal package archive with which you can turn your desktop automatically into a netbook desktop. Currently you need to do this manually, see "The manual way" below.
The manual way
Go to Settings->Preferences->Apearance
- Switch off the Desktop Effects completely, else the netbook laucher app won't work properly
- Delete the bottom Panel
Go to System->Preferences-Sessions
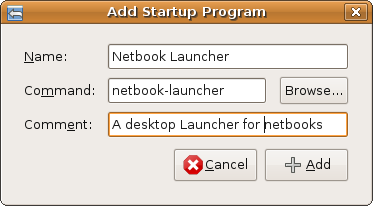
- Add a new launcher for the netbook-launcher app
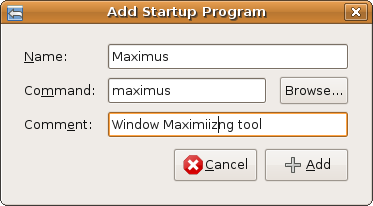
- Add a new launcher for the maximus window maximizer app
- Add a new launcher for the netbook-launcher app
Remove the menu from the panel (Right click -> remove from panel)
Remove the logout/switch-user applet from the panel (Right click -> remove from panel)
Remove the Separator between the notification area and logout/switch-user from the panel (Right click -> remove from panel)
Remove the Browser Launcher and Help item from the panel (Right click -> remove from panel)
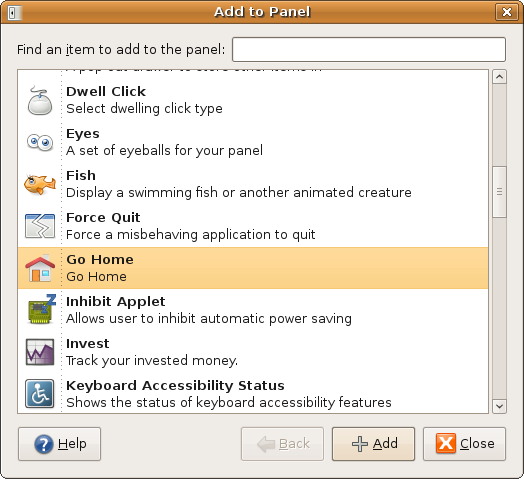
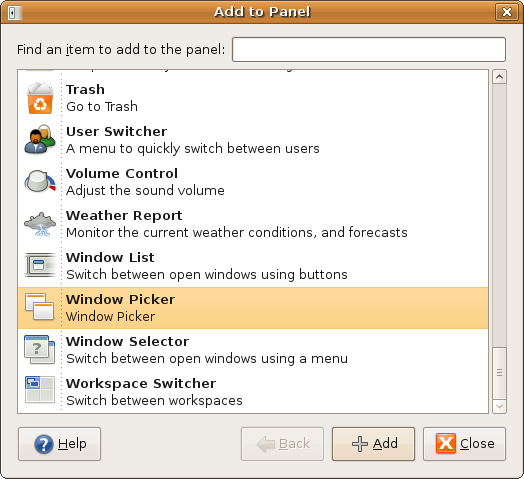
- Right click on the panel and select "Add to Panel" to open the add dialog.
- Scroll to "Go Home" and click on "Add", the applet will be added to the panel, move it to the very left, Ricght click on it and check "Lock to panel"
- Scroll to "Window Picker" move it next to the "Go Home" applet and lock it as well.
- Scroll to "Go Home" and click on "Add", the applet will be added to the panel, move it to the very left, Ricght click on it and check "Lock to panel"
The result
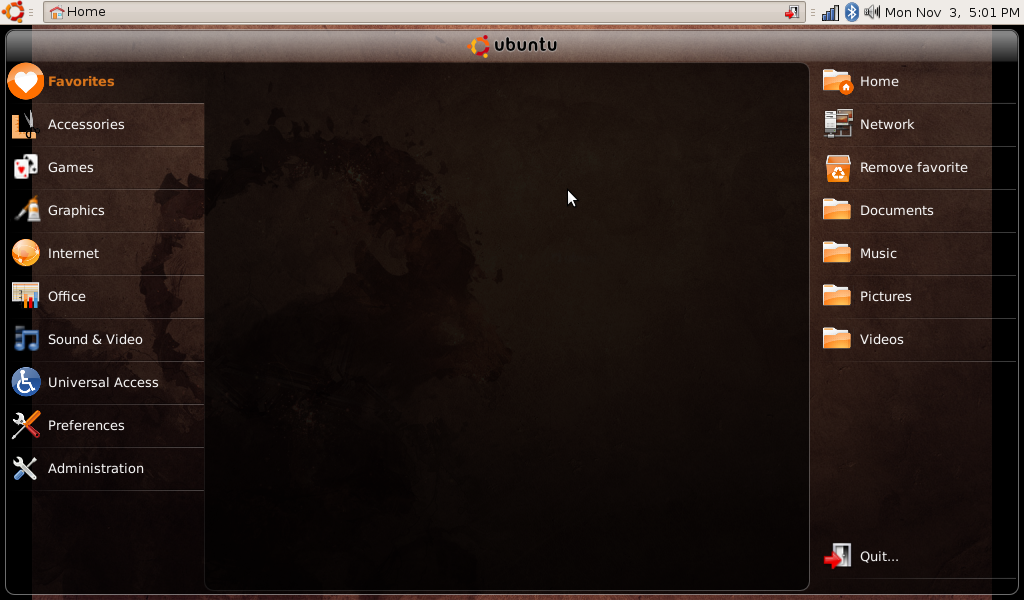
That's it, you successfully turned your umpc desktop into a netbook desktop using the Ubuntu netbook applications, your final Desktop should look like below:
Notes for Touchscreen users
There are some things you should note if using the netbook setup with a touchscreen (all these are known and will be fixed in jaunty jackalope (9.04):
- The netbook launcher will not adapt to panels bigger than 24 pixels (such a small panel size is hard to use with your fingers, the panel will overlap the launcher if you choose a bigger size)
- The netbook launcher will not easily cope with very big font sizes or translations into languages that turn english words into very long phrases (in such a case you will notice a lot of cut off menu items in the launcher menu)
- The scroll bar in the launcher is not easily finger usable (the scrollbar in the action area of the launcher is better used with a pen than a finger, it's width is fixed)
- The launcher works best on 1024x600 screens (if you use something smaller you might need to scroll a lot in the action area since the icon size is fixed)
- The icons of the applets wont scale to bigger panel sizes (if you prefer to use a panel size suitable for finger use note that the icons will stay at 16x16 pixels and might be hard to distinguish)
