Installation In zKVM
This document belongs to this parent document: https://wiki.ubuntu.com/S390X/InstallationGuide and contains step-by-step instructions on howto setup a virtual machine running Ubuntu Linux 16.04 on top of KVM for IBM z Systems.
1 For an initial installation, several installation files are required, like the Ubuntu Server 16.04 s390x ISO image, the kernel file and the initial ramdisk (initrd). Login to your existing KVM for IBM z Systems host and change to the folder: /var/lib/libvirt/images
The image itself is available from Ubuntu's image download portal:
wget http://cdimage.ubuntu.com/releases/16.04/release/ubuntu-16.04-server-s390x.iso
Now you have to open that image, change into the boot folder and copy the files kernel.ubuntu and initrd.ubuntu over to the /var/lib/libvirt/images folder. For example:
create a temporary mount point:
mkdir ./tmpmnt
perform a loop-back mount:
$ sudo mount -o loop ./ubuntu-16.04-server-s390x.iso ./tmpmnt
[sudo] password for user:
mount: block device /media/work/images/ubuntu-16.04-server-s390x.iso is write-protected, mounting read-only
copy the required install files from the boot folder:
cp ./tmpmnt/boot/kernel.ubuntu /var/lib/libvirt/images
cp ./tmpmnt/boot/initrd.ubuntu /var/lib/libvirt/images
cleanup the mount:
sudo umount tmpmnt
rm -r tmpmnt
2 Configuration KVM virtual machines can either be booted from a boot image file located on a disk or from a native block disk. The disk image file represents a local (maybe virtual) hard disk for the virtual machine that is mounted as block device on the KVM host. Physical disks, like DASD/ECKD or SCSI can be defined as a virtual disks of a virtual machine.
The following instructions show how to install Ubuntu 16.04 on a native block device.
The KVM virtual machine is defined in a domain XML file, please see this example:
<<domain type="kvm">
<name>u1604vm1</name>
<description>Ubuntu 16.04 LTS VM</description>
<memory>20480000</memory>
<vcpu>2</vcpu>
<os>
<type arch="s390x" machine="s390-ccw-virtio">hvm</type>
<!-- kernel and initrd lines need to be removed after installation -->
<kernel>/var/lib/libvirt/images/kernel.ubuntu</kernel>
<initrd>/var/lib/libvirt/images/initrd.ubuntu</initrd>
<cmdline>netcfg/disable_dhcp=true</cmdline>
<boot dev="hd"/>
</os>
<iothreads>1</iothreads>
<on_poweroff>destroy</on_poweroff>
<on_reboot>restart</on_reboot>
<on_crash>preserve</on_crash>
<devices>
<emulator>/usr/bin/qemu-system-s390x</emulator>
<!-- SCSI disk of the KVM guest -->
<disk type="block" device="disk">
<driver name="qemu" type="raw" cache="none" iothread="1" io="native"/>
<source dev="/dev/mapper/guest"/>
<target dev="vda" bus="virtio"/>
<address type='ccw' cssid='0xfe' ssid='0x0' devno='0x0001'/>
</disk>
<!-- macvtap LAN - direct connection from host to guest -->
<interface type='direct'>
<mac address='02:00:00:12:01:02'/>
<source dev='net0' mode='bridge'/>
<model type='virtio'/>
<address type='ccw' cssid='0xfe' ssid='0x0' devno='0x0002'/>
</interface>
<!-- administration LAN - virtual network -->
<interface type='bridge'>
<mac address='02:00:00:12:02:02'/>
<source bridge='adminlan'/>
<model type='virtio'/>
<address type='ccw' cssid='0xfe' ssid='0x0' devno='0x0003'/>
</interface>
<console type="pty">
<target type='sclp' port='0'/>
</console>
</devices>
</domain>`
Even if this defines a virtual machine make sure the data is correct and the mac addresses are unique! Save this file, for example with the same file like provided as machine name: u1604vm1.xml
Now create a persistent virtual machine definition using for example virsh: # virsh define u1604vm1.xml
Domain u1604vm1 defined from u1604vm1.xml
The definition can easily verified like:
# virsh list –-all
Id Name State
----------------------------------------------------
- u1604vm1 shut off
1 Starting the installation Use the virsh command to start the system for the installation and entering the console.
# virsh start u1604vm1 –-console
Domain u1604vm1 started
Connected to domain u1604vm1
Escape character is ^]
[ 0.005472] Initializing cgroup subsys cpuset
[ 0.005474] Initializing cgroup subsys cpu
[ 0.005474] Initializing cgroup subsys cpuacct
[ 0.005476] Linux version 4.4.0-7-generic (buildd@z13-009) (gcc version 5.3.1 20160216 (Ubuntu 5.3.1-9ubuntu1) ) #22-Ubuntu SMP Thu Feb 18 21:13:28 UTC 2016 (Ubuntu 4.4.0-7.22-generic 4.4.2)
....
After the boot of the installation kernel the initial installer is launched. You can navigate inside this installer as follows:
<Tab> moves
<Space> selects
<Enter> activates buttons
Select 'virtio' at the 'Configure the network device' screen and press 'Enter':
┌──────────────────┤ [!!] Configure the network device ├──────────────────┐
│ │
│ Please choose the type of your primary network interface that you │
│ will need for installing the Debian system (via NFS or HTTP). Only │
│ the listed devices are supported. │
│ │
│ Network device type: │
│ │
│ ctc: Channel to Channel (CTC) or ESCON connection │
│ qeth: OSA-Express in QDIO mode / HiperSockets │
│ iucv: Inter-User Communication Vehicle - available for VM guests │
│ virtio: KVM VirtIO │
│ │
│ <Go Back> │
│ │
└─────────────────────────────────────────────────────────────────────────┘
On the next screen select 'eth0' as primary network interface and press 'Enter'.
┌─────────────────────┤ [!!] Configure the network ├──────────────────────┐
│ │
│ Your system has multiple network interfaces. Choose the one to use as │
│ the primary network interface during the installation. If possible, │
│ the first connected network interface found has been selected. │
│ │
│ Primary network interface: │
│ │
│ eth0: Ethernet │
│ eth1: Ethernet │
│ │
│ <Go Back> │
│ │
└─────────────────────────────────────────────────────────────────────────┘
Now the manual configuration of the network starts.
Now specify the IP address including the CIDR netmask (/24) and press 'Continue':
┌─────────────────┤ [!!] Configure the network ├──────────────────┐
│ │
│ The IP address is unique to your computer and may be: │
│ │
│ * four numbers separated by periods (IPv4); │
│ * blocks of hexadecimal characters separated by colons (IPv6). │
│ │
│ You can also optionally append a CIDR netmask (such as "/24"). │
│ │
│ If you don't know what to use here, consult your network │
│ administrator. │
│ │
│ IP address: │
│ │
│ 10.245.236.11/24/24____________________________________________ │
│ │
│ <Go Back> <Continue> │
│ │
└─────────────────────────────────────────────────────────────────┘
Accept your gateway by pressing 'Continue'.
┌────────────────────┤ [!!] Configure the network ├─────────────────────┐
│ │
│ The gateway is an IP address (four numbers separated by periods) that │
│ indicates the gateway router, also known as the default router. All │
│ traffic that goes outside your LAN (for instance, to the Internet) is │
│ sent through this router. In rare circumstances, you may have no │
│ router; in that case, you can leave this blank. If you don't know │
│ the proper answer to this question, consult your network │
│ administrator. │
│ │
│ Gateway: │
│ │
│ 10.245.236.1_________________________________________________________ │
│ │
│ <Go Back> <Continue> │
│ │
└───────────────────────────────────────────────────────────────────────┘
In case a name server is available, enter it's IP address here. In case no DNS server is available just leave the field blank and 'Continue':
┌────────────────────┤ [!!] Configure the network ├─────────────────────┐
│ │
│ The name servers are used to look up host names on the network. │
│ Please enter the IP addresses (not host names) of up to 3 name │
│ servers, separated by spaces. Do not use commas. The first name │
│ server in the list will be the first to be queried. If you don't want │
│ to use any name server, just leave this field blank. │
│ │
│ Name server addresses: │
│ │
│ _____________________________________________________________________ │
│ │
│ <Go Back> <Continue> │
│ │
└───────────────────────────────────────────────────────────────────────┘
Now the hostname needs to be specified, it's a good approach to chose the same name as the one listed in the domain XML file: 'u1604-g1', proceed with 'Continue':
┌─────────────────────┤ [!] Configure the network ├─────────────────────┐
│ │
│ Please enter the hostname for this system. │
│ │
│ The hostname is a single word that identifies your system to the │
│ network. If you don't know what your hostname should be, consult your │
│ network administrator. If you are setting up your own home network, │
│ you can make something up here. │
│ │
│ Hostname: │
│ │
│ u1604-g1_____________________________________________________________ │
│ │
│ <Go Back> <Continue> │
│ │
└───────────────────────────────────────────────────────────────────────┘
The next screen asks for the domain. In case there is no domain available or DNS is not used, leave the field blank and 'Continue': ┌─────────────────────┤ [!] Configure the network ├─────────────────────┐
│ │
│ The domain name is the part of your Internet address to the right of │
│ your host name. It is often something that ends in .com, .net, .edu, │
│ or .org. If you are setting up a home network, you can make │
│ something up, but make sure you use the same domain name on all your │
│ computers. │
│ │
│ Domain name: │
│ │
│ _____________________________________________________________________ │
│ │
│ <Go Back> <Continue> │
│ │
└───────────────────────────────────────────────────────────────────────┘
This installation step asks for a temporary 'installation password'. It can be later used via an SSH connection to proceed with the installation remotely. Press 'Continue' to proceed: ┌───────────┤ [!!] Continue installation remotely using SSH ├───────────┐
│ │
│ You need to set a password for remote access to the Debian installer. │
│ A malicious or unqualified user with access to the installer can have │
│ disastrous results, so you should take care to choose a password that │
│ is not easy to guess. It should not be a word found in the │
│ dictionary, or a word that could be easily associated with you, like │
│ your middle name. │
│ │
│ This password is used only by the Debian installer, and will be │
│ discarded once you finish the installation. │
│ │
│ Remote installation password: │
│ │
│ *********____________________________________________________________ │
│ │
│ [ ] Show Password in Clear │
│ │
│ <Continue> │
│ │
└───────────────────────────────────────────────────────────────────────┘
The password need to be specified again. Press 'Continue' afterwards. ┌──────────┤ [!] Continue installation remotely using SSH ├───────────┐
│ │
│ Please enter the same remote installation password again to verify │
│ that you have typed it correctly. │
│ │
│ Re-enter password to verify: │
│ │
│ *********__________________________________________________________ │
│ │
│ [ ] Show Password in Clear │
│ │
│ <Continue> │
│ │
└─────────────────────────────────────────────────────────────────────┘
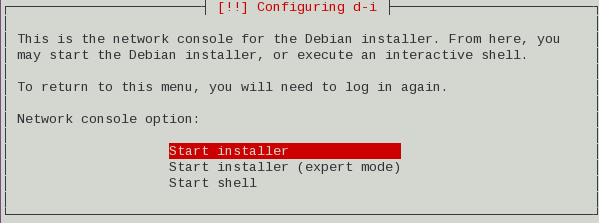
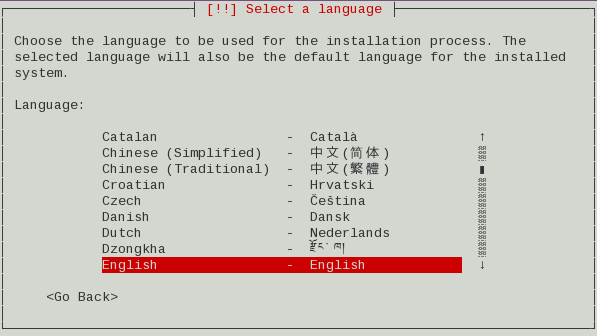
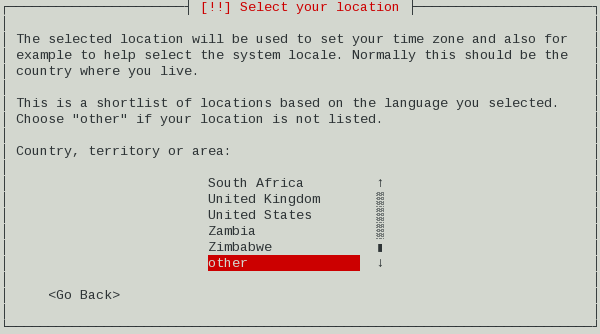
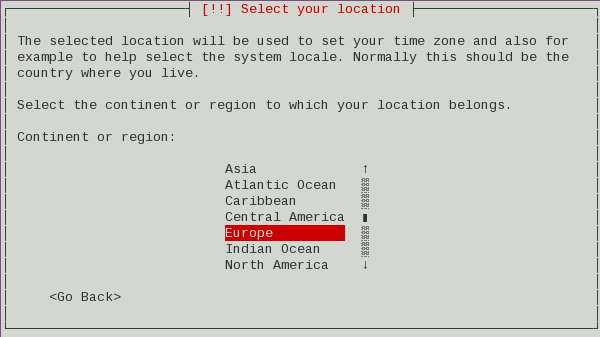
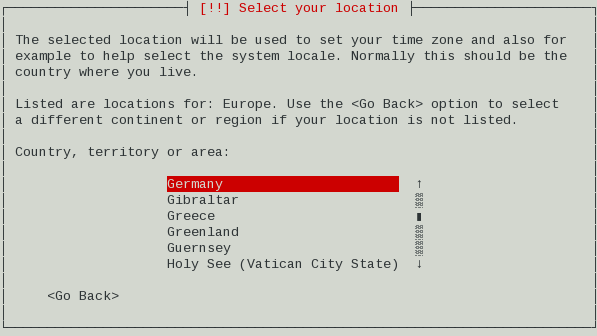
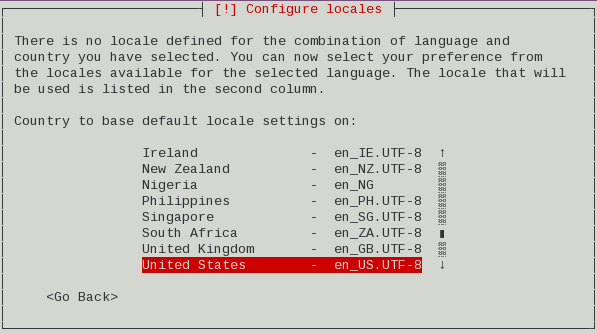
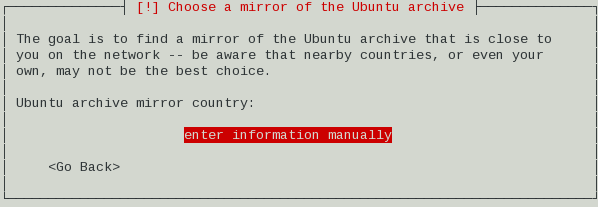
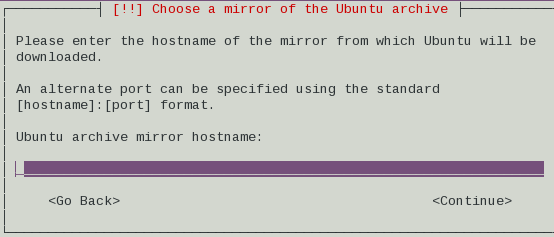
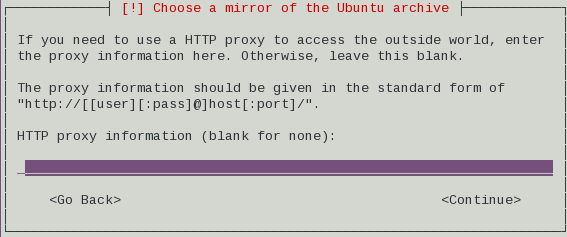
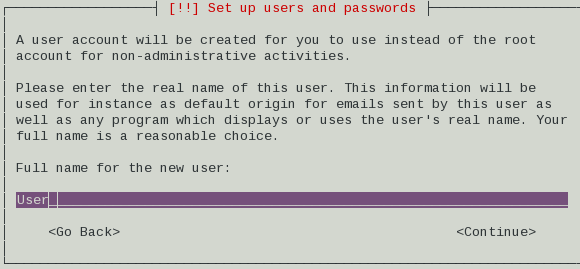
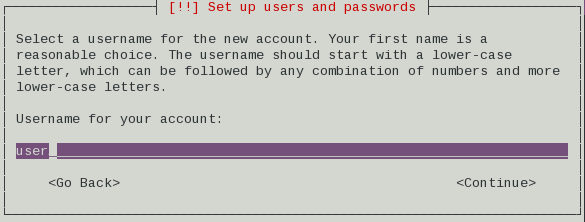
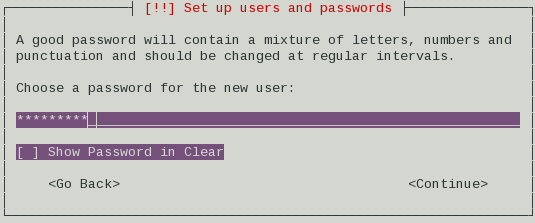
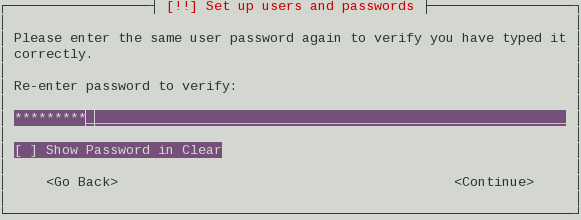
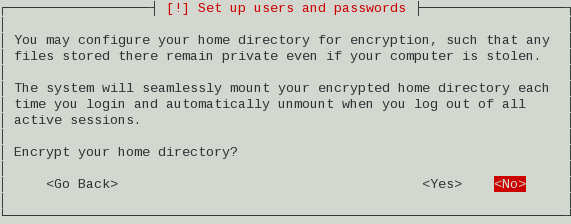
The first part of the Ubuntu installation is now completed. You may continue with the installation via the console by selecting 'Continue', But it is more convenient, hence also recommended to proceed with the installation using a ssh connection. The command for doing that is specified in the following screen : ┌───────────┤ [!!] Continue installation remotely using SSH ├───────────┐ Open a ssh terminal session on your local workstation based on the above command: ssh installer@10.245.236.10 Now the second part of the Ubuntu installation starts, the debian-installer or d-i installer. At the first screen of the d-i installer we select in theis example 'Start Installer'. Press 'Enter'. The next screen allows to specify the language, for example 'English', and press 'Enter'. Now choose your country. The option 'other' will provide more options. Press 'Enter' afterwards. Then selection of the region follows, for example 'Europe'. Press 'Enter'. And then the country selection, for example 'Germany'. Proceed with 'Enter'. Finally configure the 'locale', for example 'en_US.UTF-8' and that's it for the location specification. Press 'Enter'. Mirror and archive specific information is not required. In case a local mirror is available, press 'Enter' to manually specify that mirror of the Ubuntu archive. In case a mirror could be detected just select 'Continue'. In case of a local mirror specify it's address here and press 'Continue'. The next screen asks for the install directory. Specify for example the directory '/ubuntu' and press 'Continue'. The last mirror-related screen allows to specify a http proxy. In case no proxy is needed, just leave the field blank and 'Continue'. The download of installer components starts. Afterwards a regular user name needs to be specified. The systems's user name comes next. The root user is in Ubuntu disabled by default – sudo should be used instead. Specify a user name and proceed with 'Continue'. Now a systems's user name for the account is required. Press 'Continue' afterwards. The specification of the user password comes next. Press 'Continue'. Enter the password again and press 'Continue'. The user setup concludes with the questions about the encryption of the home directory. In this example we just select 'No'.
│ │
│ Start SSH │
│ To continue the installation, please use an SSH client to connect to │
│ the IP address 172.16.47.xxx and log in as the "installer" user. For │
│ example: │
│ │
│ ssh installer@10.245.236.10 │
│ │
│ The fingerprint of this SSH server's host key is: │
│ SHA256:dingKib65Zsw-+giuuqidg8q3fd78qf63dq876fd87qf6d7qf36d │
│ │
│ Please check this carefully against the fingerprint reported by your │
│ SSH client. │
│ │
│ <Continue> │
│ │
└───────────────────────────────────────────────────────────────────────┘
[In case your local operating system is Windows you may use the PuTTY client instead.]
