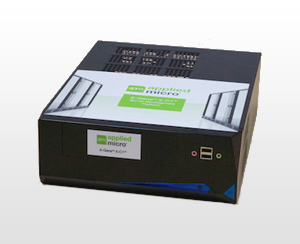
Mustang
Ubuntu 14.04 installation instructions for x-gene Mustang reference board (ARM64)
Before You Begin
You will need the following:
An Applied Micro Mustang reference board (get yours here!)
- A management device for console access
- DHCP available which will provide Internet access (to access the Ubuntu package archive)
A TFTP Server accessible from the system
Note: There is a known issue with Mustang networking after install correlated with link speeds less than 1000Mbit. See LP: #1433290.
Download netboot images
Download netboot images from X-gene netboot images and place them in a directory on your tftp server. Subsequent instructions assume you have placed these files in the directory xgene in your tftp server root. Please modify as required if you chose a different path.
Hardware Requirements
Requires a board with A3 silicon, running firmware based on the APM's 1.13.28 release or newer.
Launch Ubuntu installer
Boot your system to u-boot prompt (“Mustang#”)
- Power up the X-C1 board, while powering up, hit “Enter” or “Return” key to stop the boot process at the u-boot prompt (“Mustang#”
Configure your system to autoboot to Ubuntu
Mustang# setenv script_addr_r 0x4004000000
Mustang# setenv bootcmd 'scsi init; ext4load scsi 0 ${script_addr_r} boot.scr; source ${script_addr_r}'
Mustang# saveenv
(Optional) : Enable other SATA ports , if you’d like to use multiple disks
Mustang# setenv sata 0x3c
Mustang# saveenv
- notice 2 "e"s
Mustang# reset
Configure networking from u-boot
Mustang# setenv ipaddr <mustang-ip>
Mustang# setenv netmask <mustang-netmask>
Mustang# setenv gatewayip <mustang-gateway>
Mustang# setenv serverip <tftp-server-ip>
Load the installer from u-boot
Mustang# tftpboot ${kernel_addr_r} xgene/uImage
Mustang# tftpboot ${ramdisk_addr_r} xgene/uInitrd
Mustang# tftpboot ${fdt_addr_r} xgene/apm-mustang.dtb
Launch the Ubuntu installer from u-boot
Mustang# setenv bootargs 'console=ttyS0,115200n8'
Mustang# bootm ${kernel_addr_r} ${ramdisk_addr_r} ${fdt_addr_r}
Ubuntu Installer GUI Selections
In the installer GUI, make selections as described in this section. When in doubt, refer to the detailed selection instructions below. Most on-screen options are self explanatory . Do take care to pick Guided - use entire disk option from Partition disks menu.
Menu : Select a language
Highlight “English” & hit “return”
Menu: Select your location
Highlight “United States” (or your geographic location as necessary) & hit “return”
Menu: Configure the keyboard
Highlight “English (US)” or your specific configuration & hit “return”
Menu: Configure the network
Select your active interface, typically thats eth0. Highlight “eth0” & hit “return”
Menu: Enter the Hostname
- Type in your hostname, tab and hit “return”
Menu: Choose a mirror of the Ubuntu archive
- “United Kingdom” is most commonly selected. But please feel free to pick a mirror geographically closer to you and hit “return”
Menu: Choose a mirror of the Ubuntu archive
- “ports.ubuntu.com” should be highlighted . If not, select that and hit “return”
Menu: Choose a mirror of the Ubuntu archive
- If you require a proxy enter the info here. Then hit “tab” to highlight “ok” and hit “return”
Menu: set up users and passwords
Sub Menu: Full name for the new user: Enter User’s Full name , tab to ok then press “return”
Sub Menu: Username for your account: Choose a user name
Sub Menu: Choose a password for the new user: Enter & re-enter chosen password on the next screen
Sub Menu : Encrypt your home directory ? : Choose “yes” / “No” as necessary
Menu: Configure the clock
Select your time zone: scroll up or down with the arrow keys to select a timezone; hit “return”
Menu: Partition disks
Choose Guided - use entire disk
NOTE: Ubuntu currently has some hard requirements about how u-boot based servers need to be partitioned (/boot has to be first partition). So it is best to choose this option
Menu: Select disk to partition:
- The disk(s) that are available on the system will appear, typically you want to select “sda” as the disk you want to install to. This entry “SCSI1 (0,0,0) (sda) - (size of disk)” should be highlighted, next press enter
A screen displaying partitions on sda appears. Press "Tab" to highlight "yes" and hit "return".
Menu: Configuring discover
How do you want to manage upgrades on this system? will appear here inside this menu.Depending on what options you are comfortable with, use the arrow key to highlight your option and hit “return”
No automatic updates is typically selected by developers so they can manage the system updates manually.
Menu: Software selection
- Use the arrow keys to highlight your options and then the spacebar to select it. At minimum, following 2 options are recommended:
Basic Ubuntu server
OpenSSH server
Select Tab to highlight “continue” & hit “return” . This will kick off installation if the packages
- Use the arrow keys to highlight your options and then the spacebar to select it. At minimum, following 2 options are recommended:
Menu: Finish the installation
Select Tab to highlight “<Yes>” & hit “return”
Menu: Finish the installation
Select Tab to highlight “<Continue>” & hit “return”
Ubuntu Cloud image based installation instructions for x-gene Mustang reference board (ARM64)
NOTE: While this method is faster than netboot method described above, it is meant for expert Ubuntu developers and for engineering evaluation purposes only. Also, while the instructions use Ubuntu Wily (15.10) as example, they can be used for other Mustang enabled releases (15.04, 14.10 etc) by downloading the corresponding cloud images for those releases.
download the ARM64 cloud images from the following link
setup a default user/password for the cloud image
bzr branch lp:~smoser/+junk/backdoor-image
cd backdoor-image
sudo ./backdoor-image --user ubuntu --password ubuntu --password-auth ../wily-server-cloudimg-arm64-uefi1.img
copy the cloud image to the disk on Mustang
qemu-img convert -O raw wily-server-cloudimg-arm64-uefi1.img wily-server-cloudimg-arm64-uefi1-raw.img
- booting mustang via nfs rootfs or ramdisk rootfs or mmc/usb rootfs
dd if=wily-server-cloudimg-arm64-uefi1-raw.img of=/dev/sda bs=1M
deselect other cloud data sources
The 1st booting may take more than 2 minutes. Once you login to Ubuntu successfully, you need to run 'sudo dpkg-reconfigure clound-init' to remove other data sources and just select the last data source - 'None: Failsafe datasource'.
ARM/Server/Install/Mustang (last edited 2016-02-17 16:57:00 by rkota)
