EditingVideoInBlender
Editing Video In Blender
Get familiar with blender VSE
So you've shot your scenes and now you have lots of video-files that you want to put together into one single video with audio and maybe some background music. GNU/Linux offers a wide variety of software to do this. A very popular one is KDEnlive. Although Blender being primarily known as a 3D software it is equiped with an excellent Video Sequence Editor that is perfect for this task. What I find interesting with blender is that it is an OS-agnostic program, meaning you can open, save and edit your project on any computer with sufficient hardware specifications, hence collaborate with anybody on the source files of the project, regardless what Operative System your collaborators are using! Let's do this!
Preparing the interface
A one-time step that saves a lot of time
Interface basics
Cuts, Transitions, Effects, Compositing
Preparing for your project
Understanding Frame rates
For this tutorial, I am assuming that like me, you have a rather limited budget. It would be nice to have several angles of one shot, but you have only one camera. But wait a minute, do you? Maybe you have a cellphone with a video-camera built in. Maybe one of your actors have a cell-phone camera? Maybe your parents have too? If yes, that would sum it up to at least 3 cameras. The problem with this type of set-up, is that probably all of these cameras record video to different formats, with different codecs and frame rates. The video files might even have a very different look and feel to themselves. But fear not, we can work this around.
Video codecs are a dense jungle that we will look into a little later on, but for now, let's focus on the frame rate. Frame Rate is measured in FPS which is an acronym for "Frames per seconds". This means that 1 second of a video in a video-file at 12 FPS is going to be made up of a sequence of 12 images. Respectivley, 1 second of a video in a video-file at 30 FPS is going to be made up of a sequence of 30 images. A video-file is best rendered when this frame-rate is constant. This means that in blender, you have to set a frame-rate to your project. You can be very free in this, but it is good to know, that most video platform out there on the world wide web prefer to have videos at 30fps. So why not just set it to 30 and rock on you may ask? It would be so simple if all the cameras involved in your shooting did record in 30fps. But what if they didn't? Lets imagine you used your HD-camera recording at 25fps for the main scenes, but that you used your cousins cell-phone recording at 12fps to shoot a few close-ups of the same scene. This means that you have 2 different Frame-rates in your raw video material. Now lets imagine you've set blender to render video at 30fps, when you add video from these cameras to blender, they will appear as if they were speed-up and the audio track will be off-synchronization. To understand this better, try the following:
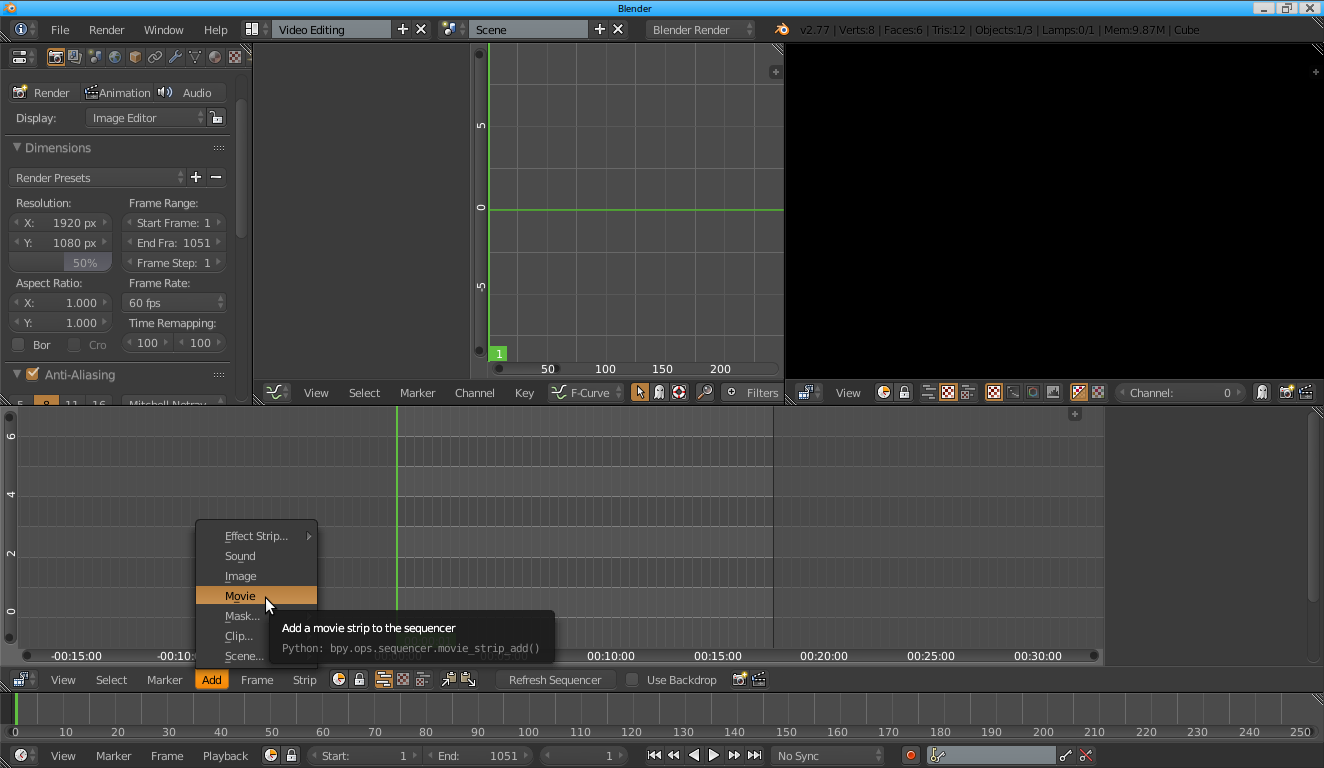
- Import a video-file to the blender VSE time-line (press shift+A with the mouse hovering the sequencer, or use the menu as shown below).
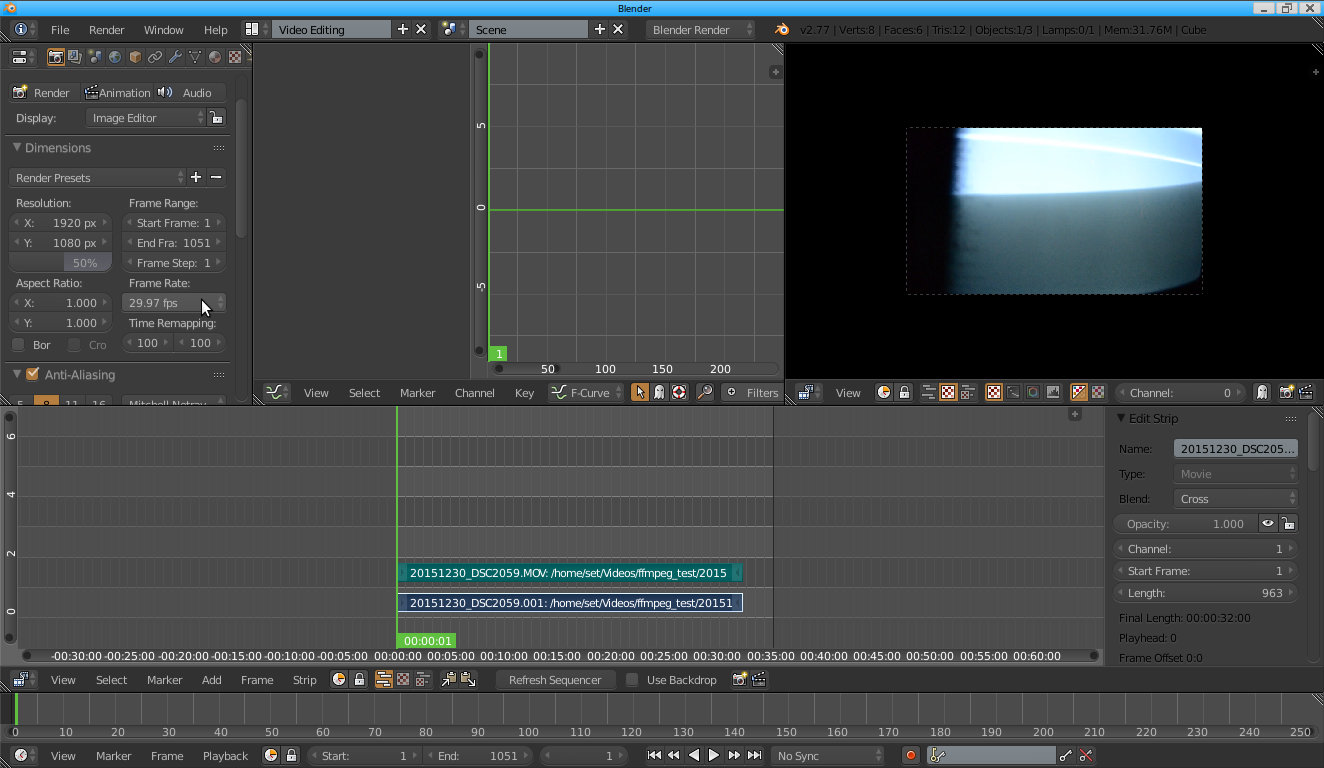
You will notice that 2 strips have been placed in the sequencer; a blue and a green one. The blue is the video-data, and the green is the audio-data. (If this is the first video file you import to a fresh blender project, blender will set itself to the same frame rate as your video file.) Now try this:
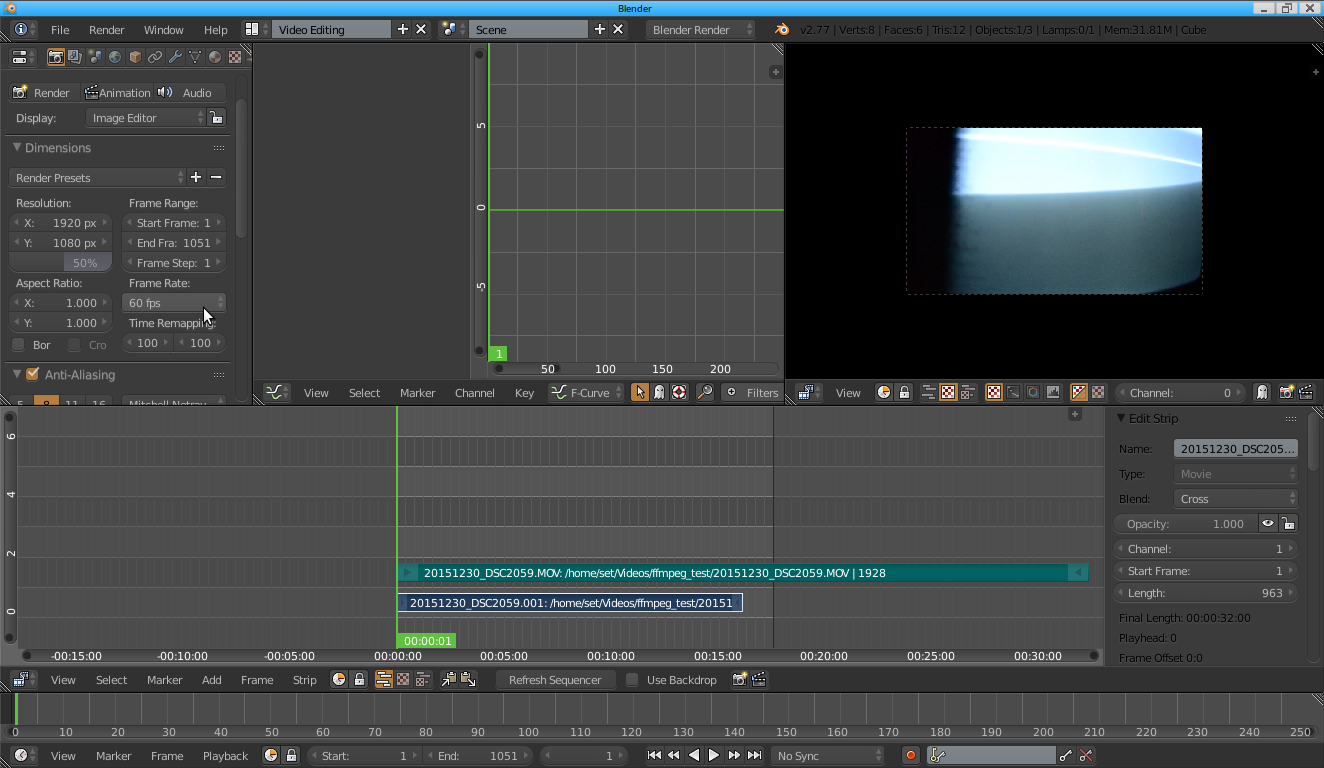
- Increase the fps in blender to 60 FPS.
You will see how the video-strip (blue) appears to become shorter than the audio-strip (green) At higher Frame Rate, blender will read more frames per second. Hence, if a 24fps video file is played at 60fps it appears to be speed up.
Inversely, a 60fps video-file played at 30fps will show at half the speed. (In fact, the best way to have a fluid-looking slow-motion sequence, is to record it with very high FPS)
Preparing video-files with ffmpeg
Once you have gathered all the video-files you want to use in your editing, we need to make sure they will all be in synch with our project that we set to 30 FPS. To convert a video file that is in 24FPS to our project in 30FPS without changing the speed, we have a few options. Ubuntu ships with AVCONV, Ubuntu Studio with FFMPEG and because i do this tutorial for Ubuntu Studio i will use FFMPEG. Furthermore, what is interesting with ffmpeg is that you can use it on other Operative Systems aswell. There is a great add-on for blender called Revolver. It offers you to do the conversion and FPS normalization and some really nifty features, all using the blenders GUI. But i prefer to use FFMPEG by adding this to the end of my .bashrc file:
Some basics that help a lot.
Render your project
Dimensions
Video Formats
UbuntuStudio/Tutorials/EditingVideoInBlender (last edited 2016-05-29 18:31:25 by sakrecoer)


